Migrate From Wordpress to Jekyll With Github Pages
We decided to move away from Wordpress to Jekyll. There are many guides on the process and also a lot of reasons as well. Check out some posts on the process already:
- Migrating from WordPress.com to Jekyll
- How-to: Migrating Blog from WordPress to Jekyll, and Host on Github
- From Wordpress to Jekyll
- How to Migrate from WordPress to Jekyll Running on Github
Here are the steps to the process.
Prepare Github
Most of the steps are covered in GitHub Pages. First go and create your self an account on github.com:
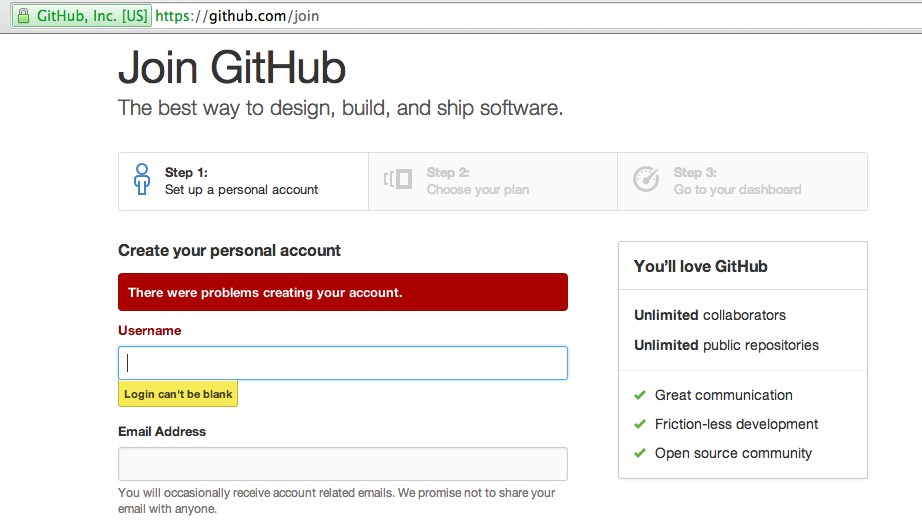
For the plan you can choose free:
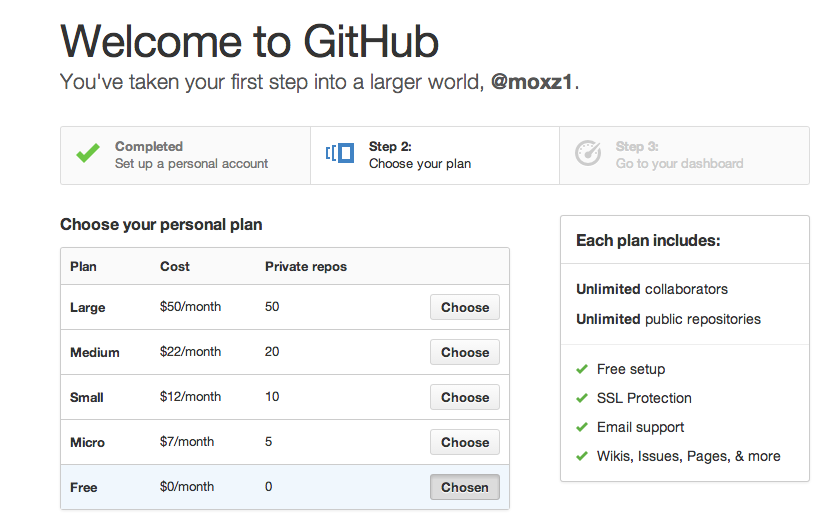
After you done with the creation it will take you to your github account:
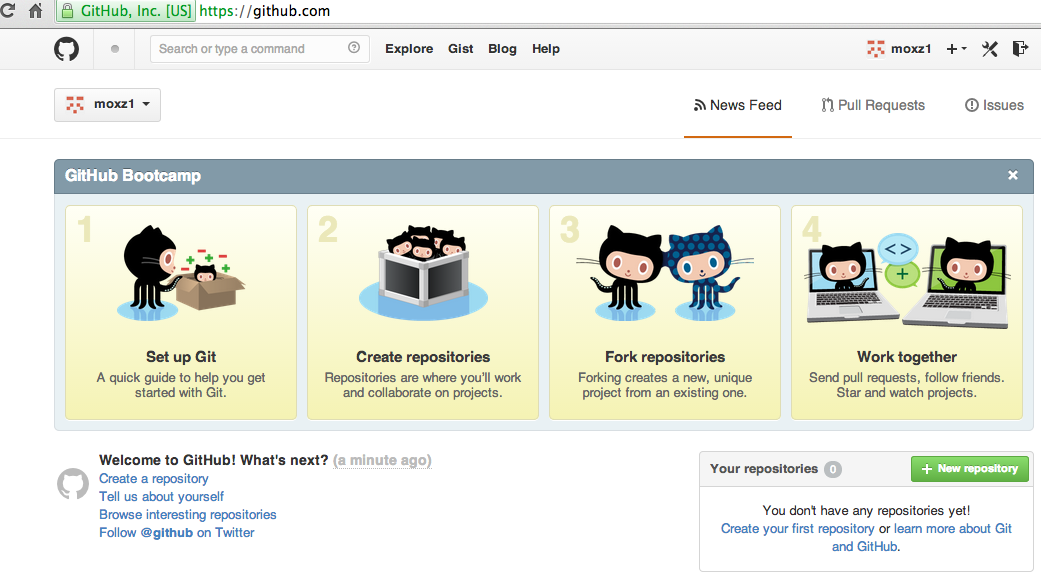
After the account we have to create a repository with a special name. From Using Jekyll with Pages:
Using Jekyll
Every GitHub Page is run through Jekyll when you push content to a specially named branch within your repository. For User Pages, use the master branch in your username.github.io repository. For Project Pages, use the gh-pages branch in your project’s repository. Because a normal HTML site is also a valid Jekyll site, you don’t have to do anything special to keep your standard HTML files unchanged. Jekyll has thorough documentation that covers its features and usage. Simply start committing Jekyll formatted files and you’ll be using Jekyll in no time.
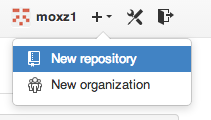
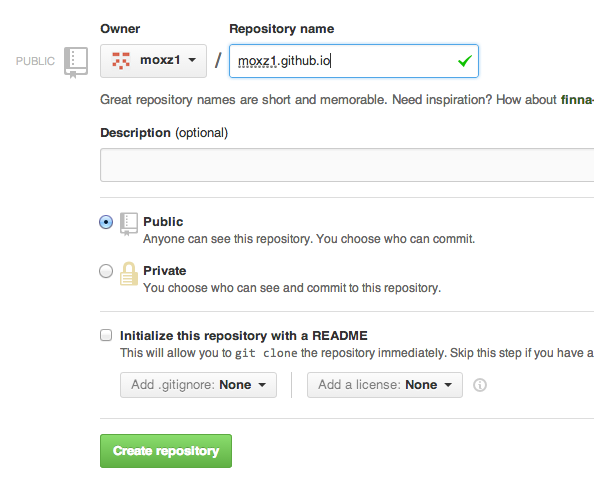
So let’s go ahead and create a repository with name of username.github.io. First select Create New Repository from the top:
Then name it appropriately:
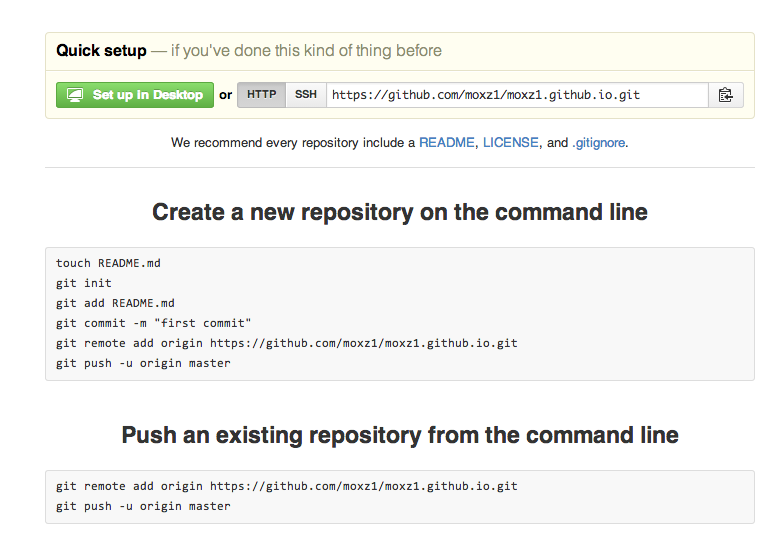
After it’s created, you will see quick instructions on how to initialize the git repository:
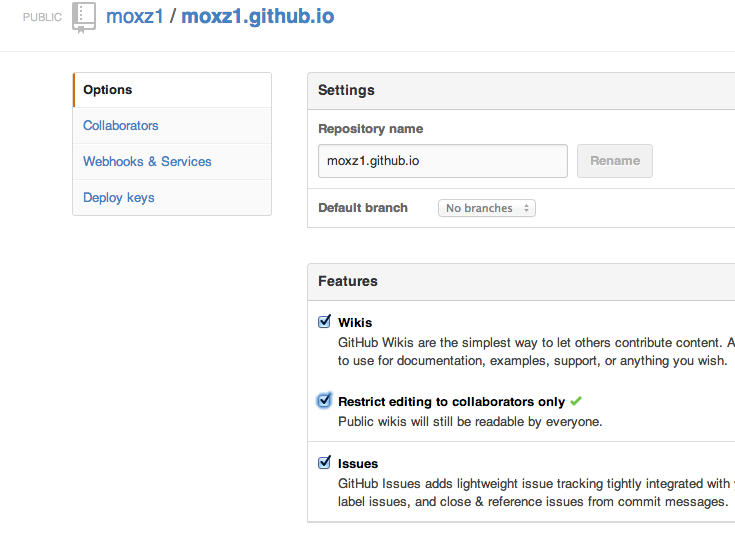
After it’s done, go to settings of the repository and check the box that says Restrict editing to collabolators only:
So let’s clone the repository and add a test home page:
elatov@ccl:~$git clone https://moxz1@github.com/moxz1/moxz1.github.io.git
Initialized empty Git repository in /home/elatov/moxz1.github.io/.git/
Password:
warning: You appear to have cloned an empty repository.
elatov@ccl:~$cd moxz1.github.io/
elatov@ccl:~/moxz1.github.io$echo "Test Page" > index.html
elatov@ccl:~/moxz1.github.io$git add --all
elatov@ccl:~/moxz1.github.io$git commit -m "Initial Commit"
[master (root-commit) 197ba87] Initial Commit
 Committer: elatov <elatov@ccl.local.com>
Your name and email address were configured automatically based
on your username and hostname. Please check that they are accurate.
You can suppress this message by setting them explicitly:

    git config --global user.name "Your Name"
    git config --global user.email you@example.com

If the identity used for this commit is wrong, you can fix it with:

    git commit --amend --author='Your Name <you@example.com>'

 1 files changed, 1 insertions(+), 0 deletions(-)
 create mode 100644 index.html
elatov@ccl:~/moxz1.github.io$git push origin master
Password:
Counting objects: 3, done.
Writing objects: 100% (3/3), 219 bytes, done.
Total 3 (delta 0), reused 0 (delta 0)
To https://moxz1@github.com/moxz1/moxz1.github.io.git
 * [new branch]      master -> master
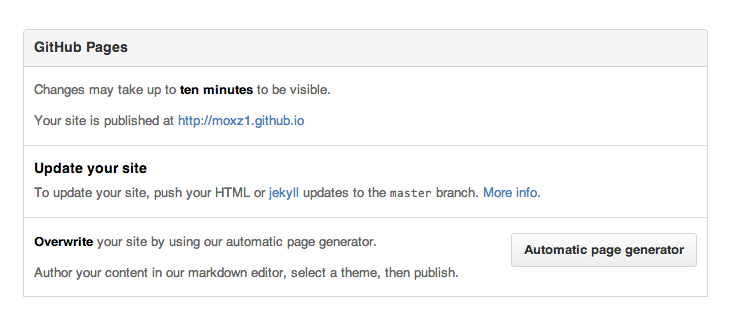
Now if you look back on the settings page of the repository, it will let you know that your changes have been published:
If you want you can update your git user configuration to reflect your username. And you can also use SSH keys instead regular password over https to do commits to the github repository. More information on how to configure the SSH keys are seen in Generating SSH Keys.
After sometime if you visit your user github page you will see the contents of the index.html file that you uploaded:
Running Jekyll Locally
I was using a mac for my testing, so I decided to run jekyll locally. MacOSX comes with a ruby version but I didn’t want to mess with the system version. I already had macports setup on the mac (here is a post for the macports setup). Once you have macports, you can run the following to install the ruby version from macports:
sudo port install ruby19
Then create a symbolic link to ease the ruby usage:
sudo ln -s /opt/local/bin/ruby1.9 /opt/local/bin/ruby
Next install the ruby-gems
sudo port install rb-rubygems
Then fix the path for that as well:
sudo ln -s /opt/local/bin/gem1.9 /opt/local/bin/gem
When you install macports, it includes /opt/local/bin/ in the path prior to other locations. Make sure the gem and ruby versions by default are the macports one:
elatov@kmac:~$type -a gem
gem is /opt/local/bin/gem
gem is /usr/bin/gem
elatov@kmac:~$type -a ruby
ruby is /opt/local/bin/ruby
ruby is /usr/bin/ruby
Now let’s update the system gems:
elatov@kmac:~$sudo gem update --system
Updating rubygems-update
Fetching: rubygems-update-2.2.2.gem (100%)
Successfully installed rubygems-update-2.2.2
Installing RubyGems 2.2.2
RubyGems 2.2.2 installed
Installing ri documentation for rubygems-2.2.2

= 2.2.1 / 2014-01-06
Then install the rdoc gem before the jekyll install:
sudo gem install rdoc
Lastly go ahead and install jekyll
sudo gem install jekyll
Jekyll Structure
From Directory structure:
A basic Jekyll site usually looks something like this:
.
├── _config.yml
├── _drafts
|   ├── begin-with-the-crazy-ideas.textile
|   └── on-simplicity-in-technology.markdown
├── _includes
|   ├── footer.html
|   └── header.html
├── _layouts
|   ├── default.html
|   └── post.html
├── _posts
|   ├── 2007-10-29-why-every-programmer-should-play-nethack.textile
|   └── 2009-04-26-barcamp-boston-4-roundup.textile
├── _data
|   └── members.yml
├── _site
└── index.html
An overview of what each of these does:
FILE / DIRECTORY DESCRIPTION _config.yml Stores configuration data. Many of these options can be specified from the command line executable but it’s easier to specify them here so you don’t have to remember them. _drafts Drafts are unpublished posts. The format of these files is without a date: title.MARKUP. Learn how to work with drafts. _includes These are the partials that can be mixed and matched by your layouts and posts to facilitate reuse. The liquid tag {\% include file.ext %}can be used to include the partial in _includes/file.ext._layouts These are the templates that wrap posts. Layouts are chosen on a post- by-post basis in the YAML front matter, which is described in the next section. The liquid tag {{ content }} is used to inject content into the web page. _posts Your dynamic content, so to speak. The naming convention of these files is important, and must follow the format: YEAR-MONTH-DAY-title.MARKUP. The permalinks can be customized for each post, but the date and markup language are determined solely by the file name. _data Well-formatted site data should be placed here. The jekyll engine will autoload all yaml files (ends with .yml or .yaml) in this directory. If there’s a file members.yml under the directory, then you can access contents of the file through site.data.members. _site This is where the generated site will be placed (by default) once Jekyll is done transforming it. It’s probably a good idea to add this to your .gitignore file. index.html and other HTML, Markdown, Textile files Provided that the file has a YAML Front Matter section, it will be transformed by Jekyll. The same will happen for any .html, .markdown, .md, or .textile file in your site’s root directory or directories not listed above. Other Files/Folders Every other directory and file except for those listed above—such as css and images folders, favicon.ico files, and so forth—will be copied verbatim to the generated site. There are plenty of sites already using Jekyll if you’re curious to see how they’re laid out.
Jekyll Bootstrap
Most people just take a copy of an existing blog and go from there, since you don’t really want to create the above layout by hand. A lot of jekyll powered sites are listed in Jekyll Sites. If you like one just clone it. To get started with a Jekyll site, there is a a project called JekyllBootstrap. It basically eases the process of managing a Jekyll site. To create the first jekyll site, check out the instructions laid out in Jekyll QuickStart. So let’s try it out, first let’s clone their github repo:
elatov@kmac:~$git clone https://github.com/plusjade/jekyll-bootstrap.git
Cloning into 'jekyll-bootstrap'...
remote: Reusing existing pack: 2062, done.
remote: Total 2062 (delta 0), reused 0 (delta 0)
Receiving objects: 100% (2062/2062), 811.25 KiB | 0 bytes/s, done.
Resolving deltas: 100% (790/790), done.
Checking connectivity... done.
Now let’s build and serve that jekyll-bootstrap template locally:
elatov@kmac:~$cd jekyll-bootstrap/
elatov@kmac:~/jekyll-bootstrap$jekyll serve -w
Configuration file: /Users/elatov/jekyll-bootstrap/_config.yml
       Deprecation: The 'pygments' configuration option has been renamed to 'highlighter'. Please update your config file accordingly. The allowed values are 'rouge', 'pygments' or null.
            Source: /Users/elatov/jekyll-bootstrap
       Destination: /Users/elatov/jekyll-bootstrap/_site
      Generating...
                    done.
 Auto-regeneration: enabled
    Server address: http://0.0.0.0:4000/
  Server running... press ctrl-c to stop.
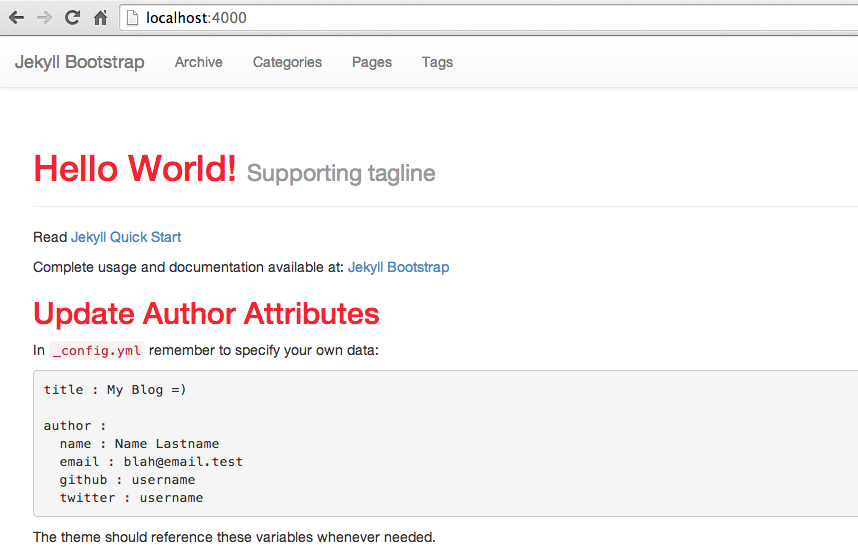
Now if you point your browser to http://localhost:4000 you should see the template:
Jekyll Themes
There are a bunch of themes out there. Here are a couple of pages that have themes:
Like I mentioned before, you can either clone the whole project or you can actually use JekyllBootstrap to install a theme. For example here is an easy way to install the twitter-bootstrap based theme with JekyllBootstrap:
elatov@kmac:~/jekyll-bootstrap$rake theme:install git="https://github.com/jekybootstrap/theme-twitter.git"
Cloning into './_theme_packages/_tmp'...
remote: Reusing existing pack: 26, done.
remote: Total 26 (delta 0), reused 0 (delta 0)
Unpacking objects: 100% (26/26), done.
Checking connectivity... done.
mv ./_theme_packages/_tmp ./_theme_packages/twitter
./_includes/themes/twitter/default.html already exists. Do you want to overwrite? [y/n] y
mkdir -p ./_includes/themes/twitter
cp -r ./_theme_packages/twitter/_includes/themes/twitter/default.html ./_includes/themes/twitter/default.html
./_includes/themes/twitter/page.html already exists. Do you want to overwrite? [y/n] y
mkdir -p ./_includes/themes/twitter
cp -r ./_theme_packages/twitter/_includes/themes/twitter/page.html ./_includes/themes/twitter/page.html
./_includes/themes/twitter/post.html already exists. Do you want to overwrite? [y/n] y
mkdir -p ./_includes/themes/twitter
cp -r ./_theme_packages/twitter/_includes/themes/twitter/post.html ./_includes/themes/twitter/post.html
./_includes/themes/twitter/settings.yml already exists. Do you want to overwrite? [y/n] y
mkdir -p ./_includes/themes/twitter
cp -r ./_theme_packages/twitter/_includes/themes/twitter/settings.yml ./_includes/themes/twitter/settings.yml
mkdir -p ./assets/themes/twitter/css/1.4.0
cp -r ./_theme_packages/twitter/assets/themes/twitter/css/1.4.0/bootstrap.css ./assets/themes/twitter/css/1.4.0/bootstrap.css
./assets/themes/twitter/css/style.css already exists. Do you want to overwrite? [y/n] y
mkdir -p ./assets/themes/twitter/css
cp -r ./_theme_packages/twitter/assets/themes/twitter/css/style.css ./assets/themes/twitter/css/style.css
=> twitter theme has been installed!
=> ---
=> Want to switch themes now? [y/n] y
Generating 'twitter' layout: default.html
Generating 'twitter' layout: page.html
Generating 'twitter' layout: post.html
=> Theme successfully switched!
=> Reload your web-page to check it out =)
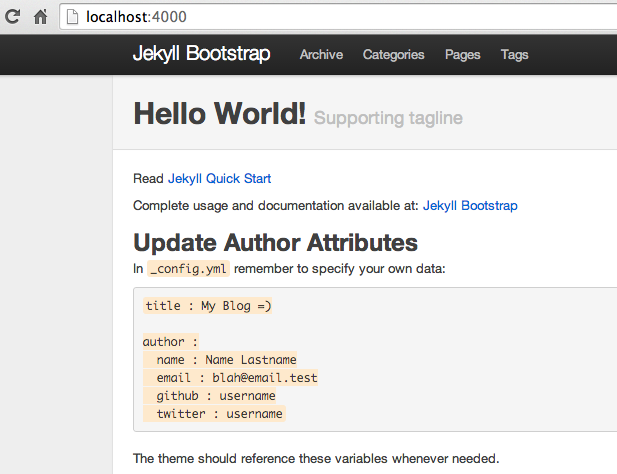
Now if you re-run jekyll you should see the following after you visit http://localhost:4000 :
Customize Jekyll Configurations
Let’s add the information regarding the site. I ended up modifying the following lines in the _config.yml file:
elatov@kmac:~/jekyll-bootstrap$git diff
diff --git a/_config.yml b/_config.yml
index 17bd3e2..7f185e3 100644
--- a/_config.yml
+++ b/_config.yml
@@ -1,21 +1,19 @@
 # This is the default format.
 # For more see: http://jekyllrb.com/docs/permalinks/
-permalink: /:categories/:year/:month/:day/:title
+permalink: /:year/:month/:title

 exclude: [".rvmrc", ".rbenv-version", "README.md", "Rakefile", "changelog.md"]
-pygments: true
+highligher: pygments

 # Themes are encouraged to use these universal variables
 # so be sure to set them if your theme uses them.
 #
-title : Jekyll Bootstrap
-tagline: Site Tagline
+title : My Blog
+tagline: Just a Blog
 author :
-  name : Name Lastname
-  email : blah@email.test
-  github : username
-  twitter : username
-  feedburner : feedname
+  name : Me Moxz
+  email : moxz@me.com
+  github : moxz1

 # The production_url is only used when full-domain names are needed
 # such as sitemap.txt
@@ -25,7 +23,7 @@ author :
 # Else if you are pushing to username.github.io, replace with your username.
 # Finally if you are pushing to a GitHub project page, include the project name at the end.
 #
-production_url : http://username.github.io
+production_url : http://moxz1.github.io
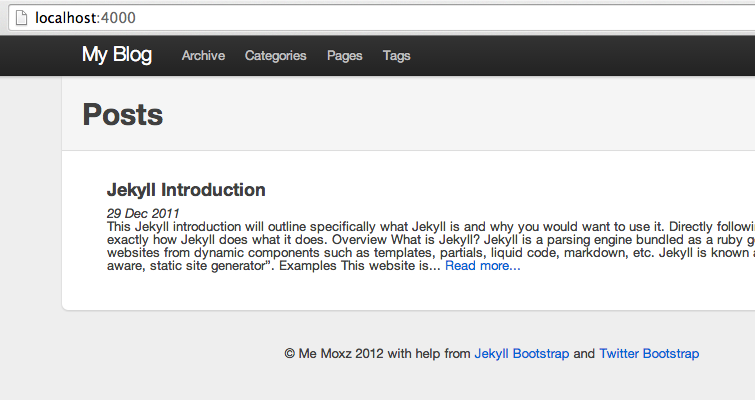
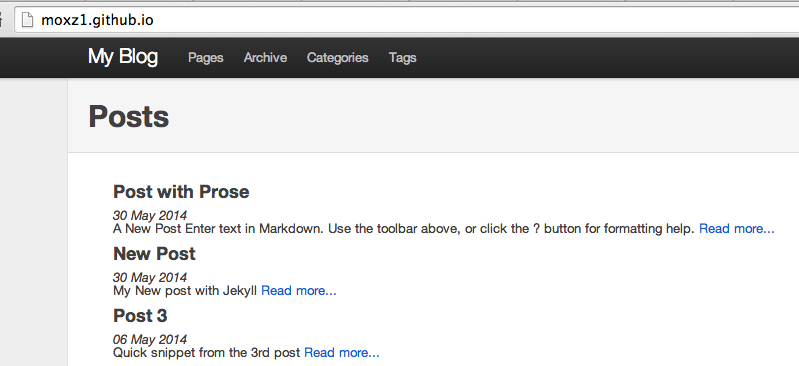
On the main page, I decided to just list posts and nothing else. Here is what I ended up with in the index.md file:
elatov@kmac:~/jekyll-bootstrap$cat index.md
---
layout: page
title: Posts
---
{% include JB/setup %}

<ul class="posts">
{% for post in site.posts  limit:10 %}
    <a href="{{ BASE_PATH }}{{ post.url }}"><h3> {{ post.title }}<br /></h3></a>
	<i>{{ post.date | date_to_string }}<br /></i>
        {{ post.content | strip_html | truncatewords:75}}
            <a href="{{ post.url }}">Read more...</a>
    {% endfor %}
</ul>
After a reload of jekyll, I saw the following on the local site:
If you like how it looks, you can push it to the github pages:
elatov@kmac:~/jekyll-bootstrap$git remote set-url origin https://moxz1@github.com/moxz1/moxz1.github.io.git
elatov@kmac:~/jekyll-bootstrap$git add --all
elatov@kmac:~/jekyll-bootstrap$git commit -m "updates"
[master f692c6f] updates
10 files changed, 482 insertions(+), 197 deletions(-)
create mode 100644 assets/themes/twitter/css/1.4.0/bootstrap.css
rewrite assets/themes/twitter/css/style.css (91%)
rewrite index.md (94%)
elatov@kmac:~/jekyll-bootstrap$git push origin master --force
Counting objects: 38, done.
Delta compression using up to 8 threads.
Compressing objects: 100% (19/19), done.
Writing objects: 100% (21/21), 11.15 KiB | 0 bytes/s, done.
Total 21 (delta 5), reused 8 (delta 0)
To https://moxz1@github.com/moxz1/moxz1.github.io.git
 1f3596c..f692c6f  master -> master
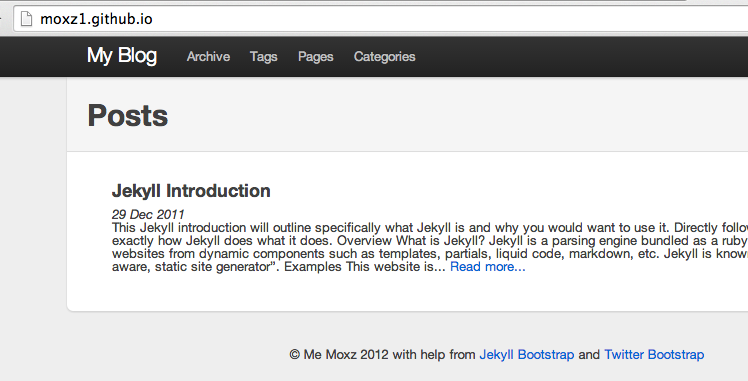
Then after some time, if you visit the github user pages, you will see the same site:
Migrate Wordpress Posts to Jekyll
There are a couple of methods to the approach. Here are a few:
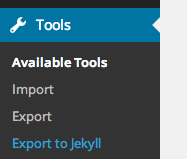
I ended up using the bottom one. After you install the plugin in your wordpress install, you can either go to the Wordpress Managament Page and you will see the Export to Jekyll button there:
Upon clicking that, it will start the export and you should get a zip of the export. Mine kept timing out, so I did it manually on the host it self:
$ cd /var/www/wp-content/plugins/wordpress-to-jekyll-exporter
$ php jekyll-export-cli.php > ~/jekyll-export.zip
I copied the zip from the host and here were the contents of the zip extracted:
elatov@kmac:~/jek$ tree -L 1 jekyll-export
jekyll-export
├── about
├── _config.yml
├── contact
├── _posts
└── wp-content

4 directories, 1 file
wp-contents contained all the uploads from wordpress:
elatov@kmac:~/jek$ls -l jekyll-export/wp-content/
total 0
drwxr-xr-x  10 elatov  staff  340 May 30 09:57 uploads
and _posts, is a directory with all the converted posts:
elatov@kmac:~/jek$ls -l jekyll-export/_posts
total 376
-rw-r--r--  1 elatov  staff  71062 May 30 09:59 2014-04-22-post1.md
-rw-r--r--  1 elatov  staff  26118 May 30 09:59 2014-05-05-post2.md
-rw-r--r--  1 elatov  staff  87552 May 30 09:59 2014-05-06-post3.md
You can just copy those over to your jekyll setup:
elatov@kmac:~$rsync -avzP jek/jekyll-export/_posts/. moxz1.github.io/_posts/.
building file list ...
4 files to consider
./
2014-04-22-post1.md
       71062 100%   18.26MB/s    0:00:00 (xfer#1, to-check=2/4)
2014-05-05-post2.md
       26118 100%    8.30MB/s    0:00:00 (xfer#2, to-check=1/4)
2014-05-06-post3.md
       87552 100%    8.35MB/s    0:00:00 (xfer#3, to-check=0/4)

sent 49675 bytes  received 92 bytes  99534.00 bytes/sec
total size is 184732  speedup is 3.71
Now launching your local jekyll instance:
elatov@kmac:~/moxz1.github.io$jekyll serve -w
Configuration file: /Users/elatov/moxz1.github.io/_config.yml
            Source: /Users/elatov/moxz1.github.io
       Destination: /Users/elatov/moxz1.github.io/_site
      Generating...
                    done.
 Auto-regeneration: enabled
Configuration file: /Users/elatov/moxz1.github.io/_config.yml
    Server address: http://0.0.0.0:4000/
  Server running... press ctrl-c to stop.
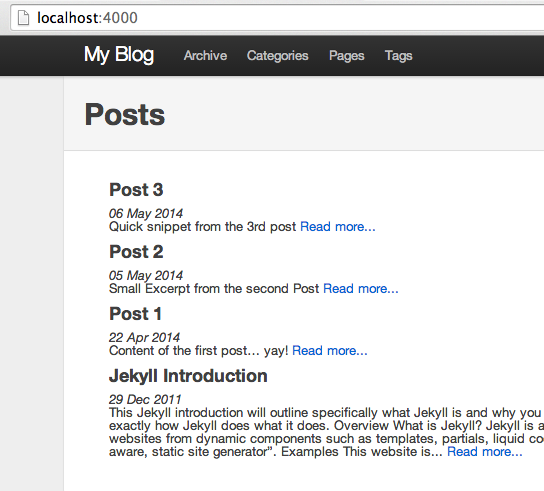
You can visit the local site (http://localhost:4000), and you will see your posts included in the main page:
Clean up Converted Markdown
None of the above converters are perfect, and after the migration you will definitely end up with some left over HTML. Here are a couple of sites that help with clean up:
The first one has an R Script which clean up a bunch of HTML tags and the second one has a ruby script to clean up UTF-8 encoded characters. I ended playing with sed (gsed from macports) for some conversions. Here are a couple of that I ran:
### clean up code snippets
for file in $(grep -E '\[code|\[shell|\[bash|\[powershell|\[xml' * | cut -d : -f 1 | uniq); do echo $file; gsed -ri '/\[code|\[shell|\[bash|\[powershell|\[xml/,/\[\/code|\[\/shell|\[\/bash|\[\/powershell|\[\/xml\]/{s/^/\t/g}' $file; done
for file in $(grep -E '\[code|\[shell|\[bash|\[powershell|\[xml' * | cut -d : -f 1 | uniq); do echo $file; gsed -ri 's/\[[code|bash|powershell|xml|shell].*\]//g' $file; done
for file in $(grep -E '\[\/code\]|\[\/shell\]|\[\/bash\]|\[\/powershell\]|\[\/xml\]' *| cut -d : -f 1 | uniq); do echo $file; gsed -ri 's/\[\/[code|bash|powershell|xml|shell]*\]//g' $file; done

### Replace single quote
for i in $(grep '’' * | awk -F : '{print $1}'  | uniq); do echo $i;gsed -i "s/’/'/g" $i;  done

### replace _\ with _
for i in $(grep '\_' * | awk -F : '{print $1}'  | uniq); do echo $i; done

### replace the > with >
for i in $(grep '>' * | awk -F : '{print $1}'  | uniq); do echo $i; gsed -i 's%\>%>%g' $i; done

### Replace Smiley images with characters
for i in $(grep '<img src="http://site.com/wp-includes/images/smilies/icon_smile.gif"' * | awk -F : '{print $1}'  | uniq); do echo $i; gsed -i 's%<img src="http://virtuallyhyper.com/wp-includes/images/smilies/icon_smile.gif".*/>%:\)%g' $i; done
There were a bunch more but you get the point. The reason why I did it by hand was to make sure everything was converted as I expected. This was tedious, but it was better than re-writing all the posts and at the end I knew the markdown files were clean.
Fixing HTML links and Image links
Most of the href links looked like this in the new files:
<a href="https://communities.vmware.com/thread/423099" onclick="javascript:_gaq.push(['_trackEvent','outbound-article','http://communities.vmware.com/thread/423099']);">ESXi 5.x on new Apple Mac Mini 6,2 Late 2012</a>
To fix those, I wrote a little python script:
elatov@kmac:~$cat conv-html-url-to-md.py
import fileinput
import re

for line in fileinput.input(inplace=1):
    line = re.sub(r'<a href="(.*)" onclick="(.*)">(.*)</a>', r'[\3](\1)', line.rstrip())
    print(line)
Then I just ran the following to clean up all the links:
elatov@kmac:~/moxz1.github.io$ for i in $(ls | grep -v py); do echo $i; python conv-html-url-to-md.py $i; done
The image links were in the following format in the converted files:
<a href="http://site.com/wp-content/uploads/2014/04/installing-unetbootin.png" onclick="javascript:_gaq.push(['_trackEvent','outbound-article','http://virtuallyhyper.com/wp-content/uploads/2014/04/installing-unetbootin.png']);"><img src="http://virtuallyhyper.com/wp-content/uploads/2014/04/installing-unetbootin.png" alt="installing unetbootin ESXi on MacMini 6,2" width="520" height="369" class="alignnone size-full wp-image-10454" title="ESXi on MacMini 6,2" /></a>
Now with another python script we can fix the links for the images:
elatov@kmac:~$cat conv-html-url-to-md.py
import fileinput
import re
for line in fileinput.input(inplace=1):
line = re.sub(r'<a href="(.*)" onclick=(.*) title="(.*)" \/></a>', r'', line.rstrip())
print(line)
Then with another for loop, we can run that through all the posts:
elatov@kmac:~/moxz1.github.io$ for i in $(ls | grep -v py); do echo $i; python conv-html-url-to-md.py $i; done
Moving Images and Uploads
The first thing you will notice in the uploads directory is that there are multiple versions of the same image:
elatov@kmac:~$ls jek/jekyll-export/wp-content/uploads/2012/03/ | tail -9
Ubuntu_11_10_top-150x150.png
Ubuntu_11_10_top-300x55.png
Ubuntu_11_10_top-620x163.png
Ubuntu_11_10_top.png
esxtop_latency-150x150.png
esxtop_latency-300x222.png
esxtop_latency-620x200.png
esxtop_latency-927x180.png
esxtop_latency.png
To clean those up we can use find, here the command to list them:
elatov@kmac:~/jek/jekyll-export/wp-content/uploads/2012/03$find . -name "*-[0-9]*x[0-9]*.png"
./esxtop_latency-150x150.png
./esxtop_latency-300x222.png
./esxtop_latency-620x200.png
./esxtop_latency-927x180.png
./Ubuntu_11_10_top-150x150.png
./Ubuntu_11_10_top-300x55.png
./Ubuntu_11_10_top-620x163.png
Then to clean them up, just run the following:
elatov@kmac:~/jek/jekyll-export/wp-content/uploads/2012/03$find . -name "*-[0-9]*x[0-9]*.png" -delete
elatov@kmac:~/jek/jekyll-export/wp-content/uploads/2012/03$find . -name "*-[0-9]*x[0-9]*.png"
For an easy example I will use github to host my images, but I would recommend using some cloud storage alternative. Here is a pretty good list of options. After you create a new repository(I just called mine uploads and I put the whole uploads directory from the jekyll export), you can access your files with the raw links. This was discussed at:
So for example the above image which was located at:
wp-content/uploads/2012/03/esxtop_latency.png
From the Jekyll Export, will be accessible in the github repository with the following URL:
https://github.com/moxz1/uploads/raw/master/2012/03/esxtop_latency.png
Now we can use the following to point all the image links to the github repository:
elatov@kmac:~$cat conv-html-url-to-md.py
import fileinput
import re

for line in fileinput.input(inplace=1):
    line = re.sub(r'http\:\/\/site.com\/wp-content\/uploads/(.*)', r'https://github.com/moxz1/uploads/raw/master/\1', line.rstrip())
After the image links were updated, I actually ended up running a python-based linkchecker on the jekyll site just to make sure nothing came up broken. To do that I first install pip for python:
elatov@kmac:~$sudo port install py27-pip
Then I made the 2.7 version be the default one:
elatov@kmac:~$sudo port select --set pip pip27
Lastly I searched for the python package:
elatov@kmac:~$pip search pylink
pylinkgrammar             - Python bindings for Link Grammar system
PyLink                    - Universal communication interface using File-Like API
pylinkmobile              - Link Mobile Solutions API wrapper
pylinkchecker             - Simple crawler that detects link errors such as 404 and 500.
PyLinkedIn                - Client for LinkedIn API
pylinktester              - a link tester written in python
Then to install it:
elatov@kmac:~$sudo pip install pylinkchecker
Then I ran the following to check for broken links:
elatov@kmac:~$pylinkcheck.py http://localhost:4000 -O -o pylink.txt
It look about 15 minutes to finish, but then I was able to see if any of my links to images on github were broken:
elatov@kmac:~$grep github pylink.txt
  not found (404): https://github.com/moxz1/uploads/raw/master/2013/02/zenoss-ssh-linux-device.png
  not found (404): https://github.com/moxz1/uploads/raw/master/2013/04/vm_details_change_video_to_glx.png
I had a very small amount and I fixed them really quick. Just as a side note another good linkchecker can be found here, it’s also based on python. That one can be setup to run from cron to check for any broken links on your site.
Writing new Posts
With jekyllbootstrap, we can use the prebuilt Rakefile to create new posts. Most of the instructions are laid out in Jekyll QuickStart. For example here is a quick shortcut to create a new post:
elatov@kmac:~/moxz1.github.io$rake post title="New Post"
Creating new post: ./_posts/2014-05-30-new-post.md
You will see a template generated for the new post:
elatov@kmac:~/moxz1.github.io$cat _posts/2014-05-30-new-post.md
---
layout: post
title: "New Post"
description: ""
category:
tags: []
---
{% include JB/setup %}
The top section is the metadata of the post and you can define tags and categories of the post if you want. Here is a list of available variables from Jekyll Front-matter:
| VARIABLE | DESCRIPTION |
|---|---|
| layout | If set, this specifies the layout file to use. Use the layout file name without the file extension. Layout files must be placed in the _layouts directory. |
| permalink | If you need your processed blog post URLs to be something other than the default /year/month/day/title.html then you can set this variable and it will be used as the final URL. |
| published | Set to false if you don’t want a specific post to show up when the site is generated. |
| category categories | Instead of placing posts inside of folders, you can specify one or more categories that the post belongs to. When the site is generated the post will act as though it had been set with these categories normally. Categories (plural key) can be specified as a YAML list or a space-separated string. |
| tags | Similar to categories, one or multiple tags can be added to a post. Also like categories, tags can be specified as a YAML list or a space- separated string. |
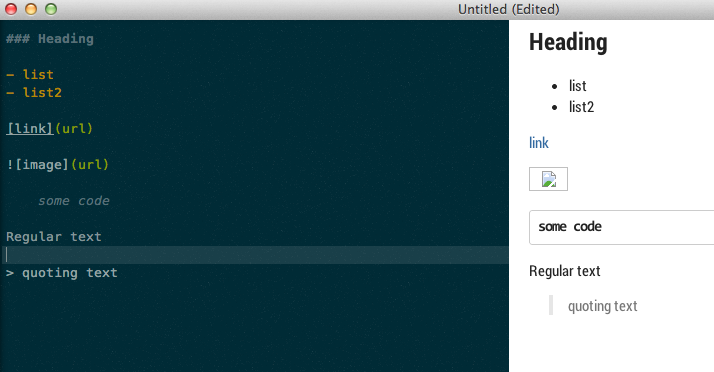
After you define the metadata of the post, you can use your favorite markdown editor to write the content:
- Mou for MacOSX
- Haroopad for Linux
- Sublime Text with plugins
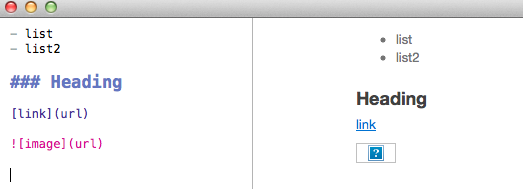
Here is a screenshot of Mou:
Here is Haroopad:
I like Mou and Haroopad for their shortcuts, here are some shortcuts from haroopad:
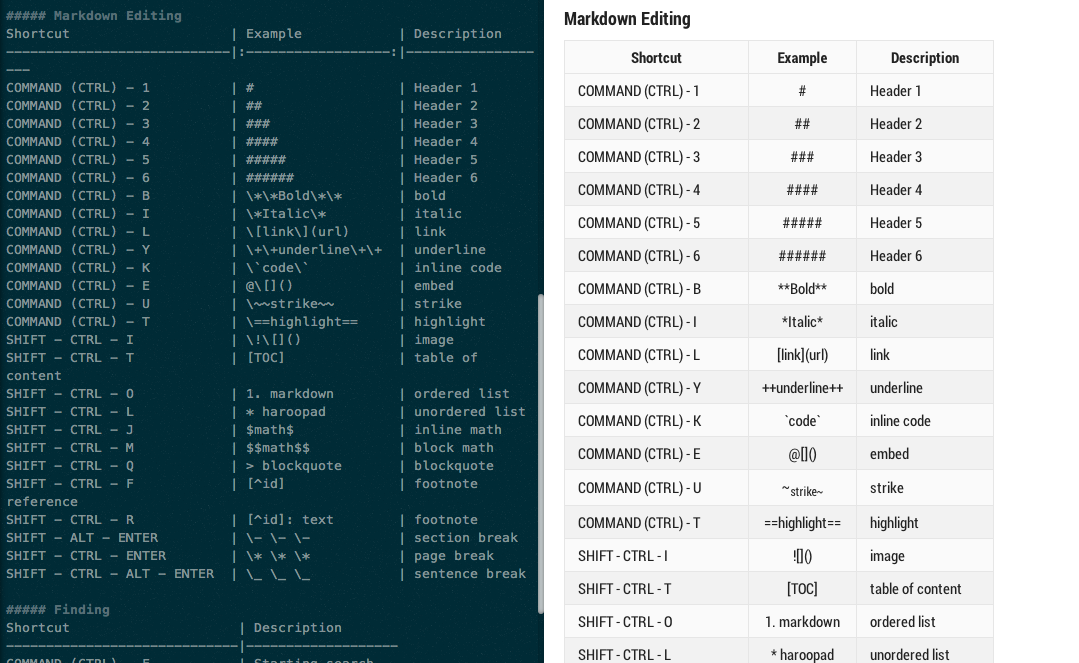
You can see the full list under the help section of haroopad or Mou. Here is Sublime Text 3:
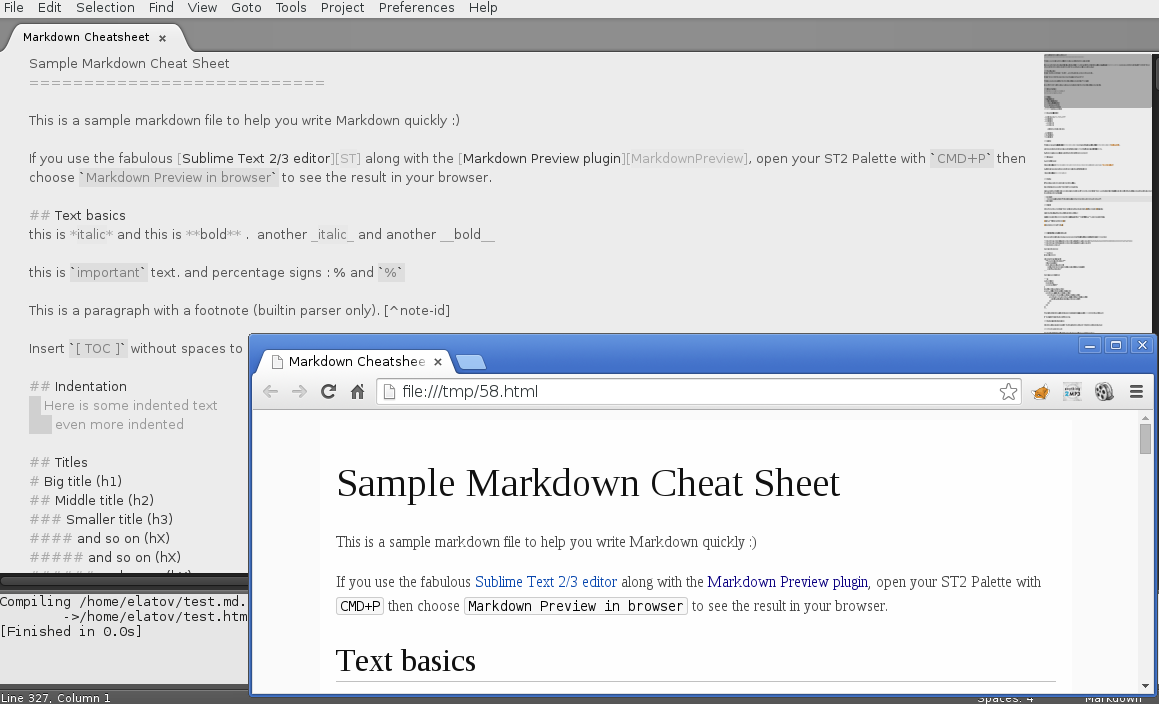
Sublime Text Plugins don’t have the variety of shortcuts by default, but you can definitely customize it to your need. While you are editing the file, upon saving the file to check your changes, you will see jekyll letting you know if a file has changed:
elatov@kmac:~/moxz1.github.io$jekyll serve -w
Configuration file: /Users/elatov/moxz1.github.io/_config.yml
            Source: /Users/elatov/moxz1.github.io
       Destination: /Users/elatov/moxz1.github.io/_site
      Generating...
                    done.
 Auto-regeneration: enabled
Configuration file: /Users/elatov/moxz1.github.io/_config.yml
    Server address: http://0.0.0.0:4000/
  Server running... press ctrl-c to stop.
      Regenerating: 1 files at 2014-05-30 14:43:43 ...done.
      Regenerating: 2 files at 2014-05-30 14:43:48 ...done.
After you are done editing your post and you confirmed the local copy looks good, I would run the following to commit the changes to your github pages:
elatov@kmac:~/moxz1.github.io$jekyll build --safe
Configuration file: /Users/elatov/moxz1.github.io/_config.yml
            Source: /Users/elatov/moxz1.github.io
       Destination: /Users/elatov/moxz1.github.io/_site
      Generating...
                    done.
elatov@kmac:~/moxz1.github.io$git add --all
elatov@kmac:~/moxz1.github.io$git commit -m 'new post'
[master 24ea8b1] new post
 1 file changed, 1 insertion(+), 2 deletions(-)
elatov@kmac:~/moxz1.github.io$git push origin master
Counting objects: 7, done.
Delta compression using up to 8 threads.
Compressing objects: 100% (4/4), done.
Writing objects: 100% (4/4), 368 bytes | 0 bytes/s, done.
Total 4 (delta 3), reused 0 (delta 0)
To https://moxz1@github.com/moxz1/moxz1.github.io.git
   d254dae..24ea8b1  master -> master
After that you should see your new post on your github pages:

I did a test build just in case with the –safe flag, because that is how github runs jekyll. From Jekyll Plugins:
Plugins on GitHub Pages
GitHub Pages is powered by Jekyll, however all Pages sites are generated using the
--safeoption to disable custom plugins for security reasons. Unfortunately, this means your plugins won’t work if you’re deploying to GitHub Pages.
and from Troubleshooting GitHub Pages build failures:
To view Jekyll build errors locally, install Jekyll on your computer and run the
jekyll build --safecommand in the root of your GitHub Pages repository.
This way we can check for any errors before pushing anything to the github pages.
Create New Post with prose.io
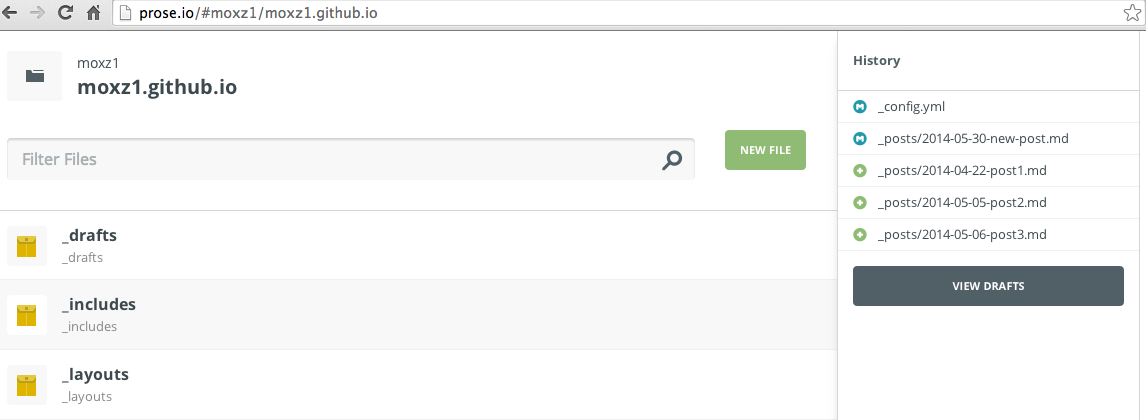
There is also an online tool that allows you to create posts prose.io. After visiting the above page and authorizing prose.io to access your github pages, you will see the following:
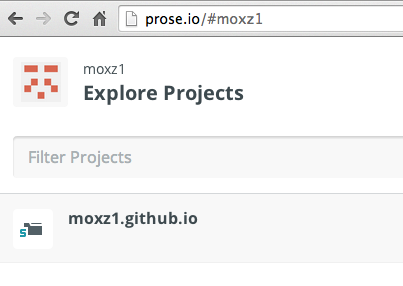
Click on the project will show you the contents:
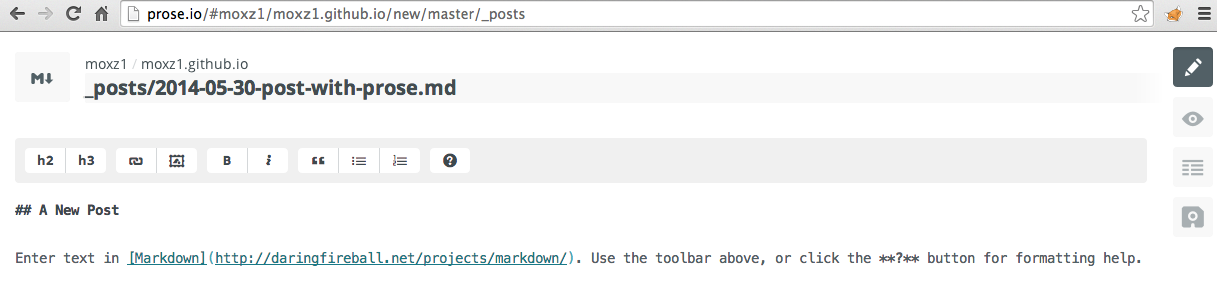
After clicking going inside the _posts directory and clicking New File, you can give the post a title and enter markdown code:
You can also get a preview of the page after the markdown is parsed:

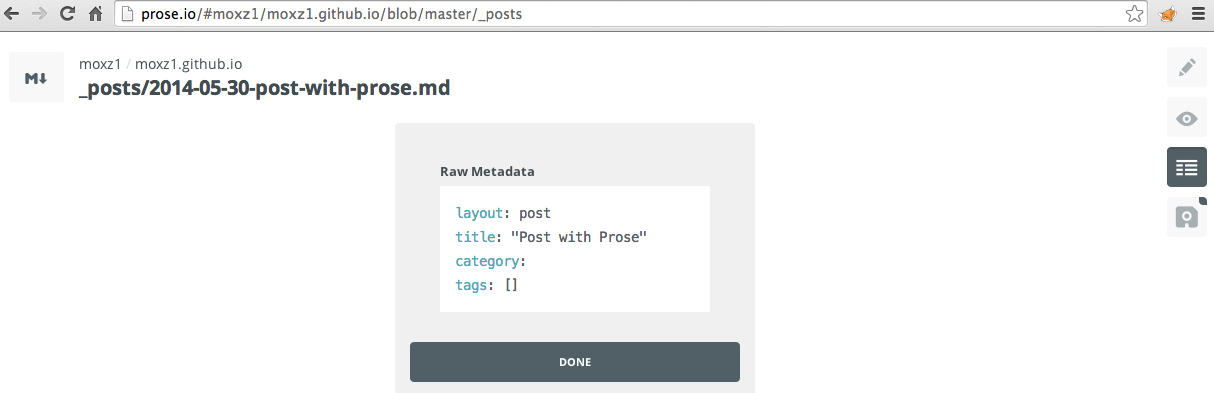
You can also edit the metadata of the post from here (by default, it’s blank):
You can also click on Submit Changes to push the change to github:

To publish the post, click on the “Unpublish” button:
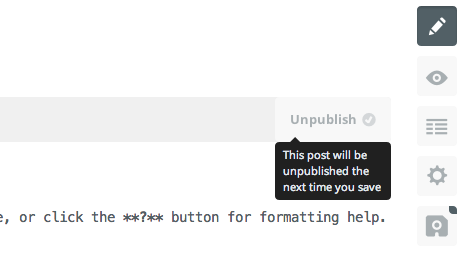
and then click Submit Changes one more time. After that if you go back to your github pages you will see the new post:
Jekyll Summary
I liked the transition to the new setup. Being a persion who loves the command-line, it’s perfect. I think the only downside to this, is the fact that you have to check out the whole site from github before making any changes (and that means that you have to have a local copy on multiple machines). Also running Jekyll locally can be process consuming, depending on how many posts it has go through to generate the site. It will definitely give you more control over your content, and it’s up to you to stay organized. There are definitely a lot pros to the setup as well. You don’t have to manage your own jekyll server, github hosts the pages for you. Also since github is a version control system, you basically have backups of each commit that you make to github. This way of managing a site is definitely not for everyone. Here are some examples of people that had a different experience with jekyll.