OpenSUSE Base Box for Vagrant From SUSE Studio
As I was creating an OpenSUSE base box for vagrant, I realized that it was still kind of big in size. I wanted to create a minimal base OS of the OpenSUSE Linux Distribution. That is when I ran into SUSE Studio. From SUSE’s site:
SUSE Studio is a web-based application for building and testing software applications in a web browser. It supports the creation of physical, virtual or cloud-based applications by leveraging the software appliance form-factor. It enables you to build your own application images or appliances based on SUSE Linux Enterprise Server. SUSE Studio is available as an online or onsite version.
You can basically create your own custom image of the SUSE Linux Distribution and customizing every aspect in the process. So let’s give it a try, go to https://susestudio.com/ and login, after you login you will see the available templates:
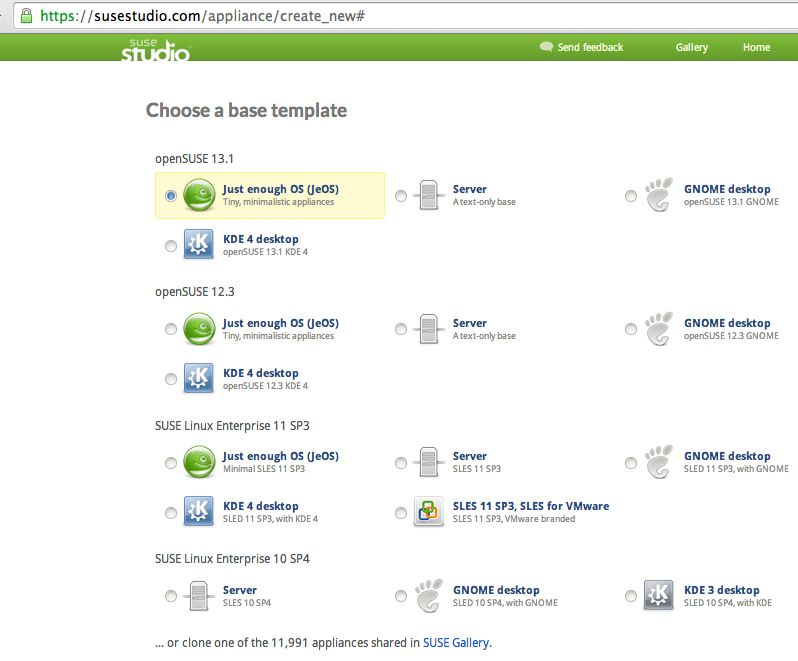
Since we are trying to minimize the size, let’s select “Just Enough OS” then scroll down, select the archicture, give this applicance name:

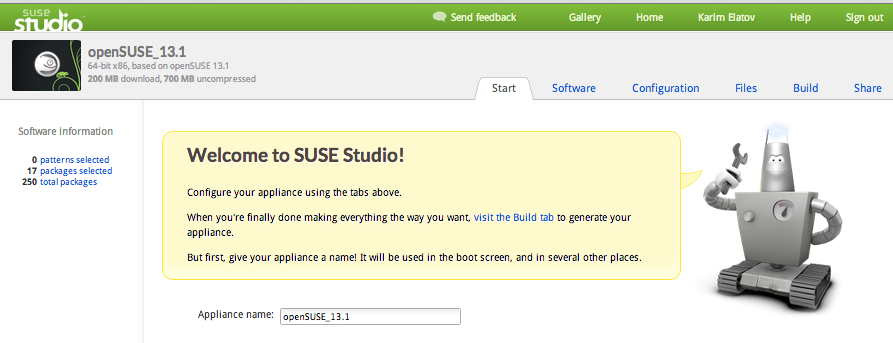
After clicking on “Create Appliance”, it will take you to the configuration:
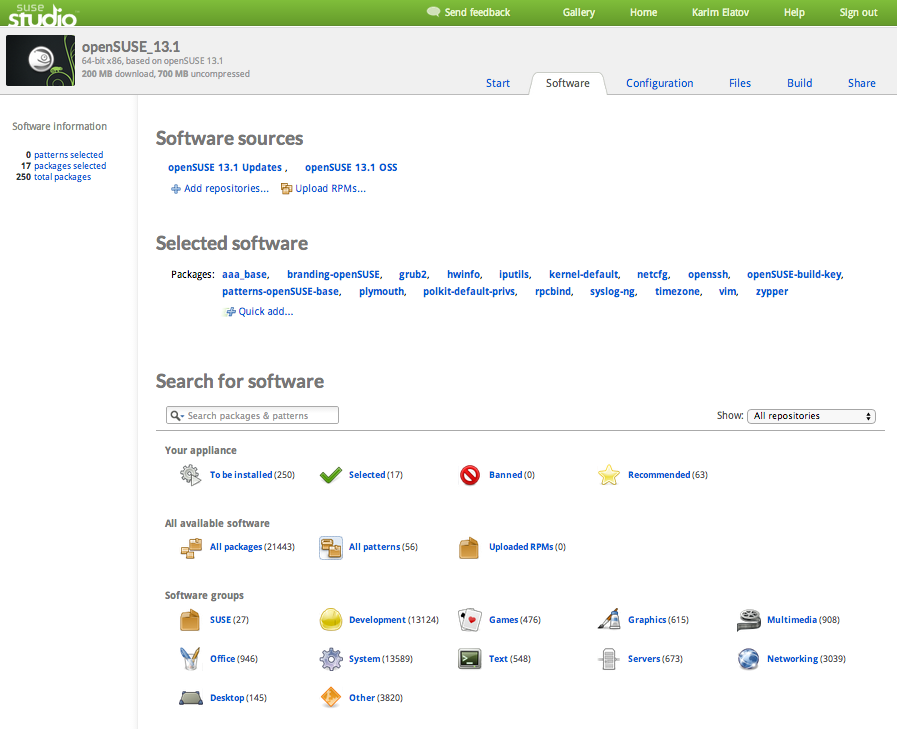
Then click on “Switch to the Software tab to continue”, and it will take you to the software tab where you can customize what RPMs are included in your custom image:
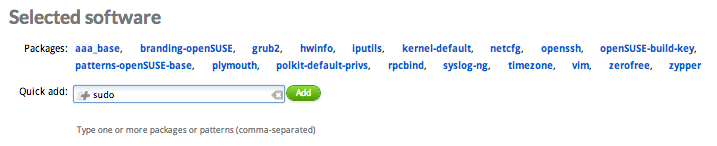
Let’s add the sudo package, since vagrant uses that, (while we are at it let’s add zerofree and curl):
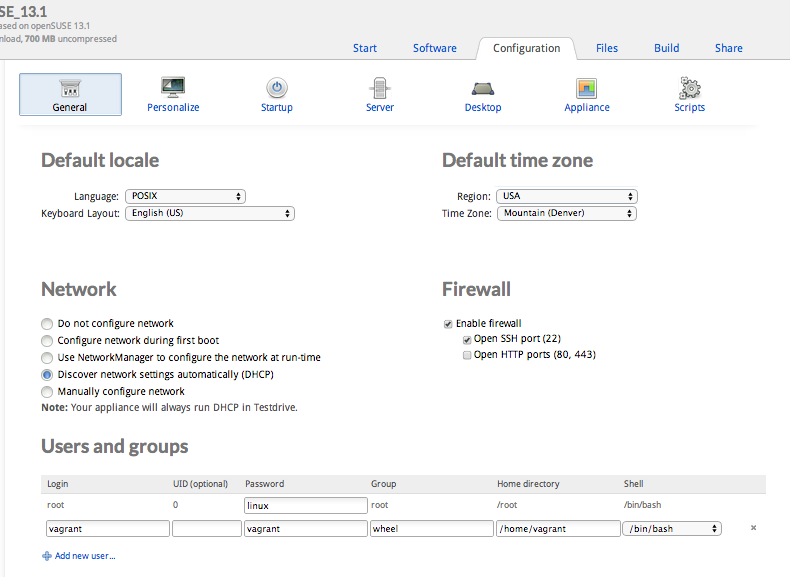
After that go to the Configuration tab, configure the timezone, enable the firewall (after enabling the firewall it will ask you to add the SuSEfirewall2 package), and add the vagrant user:
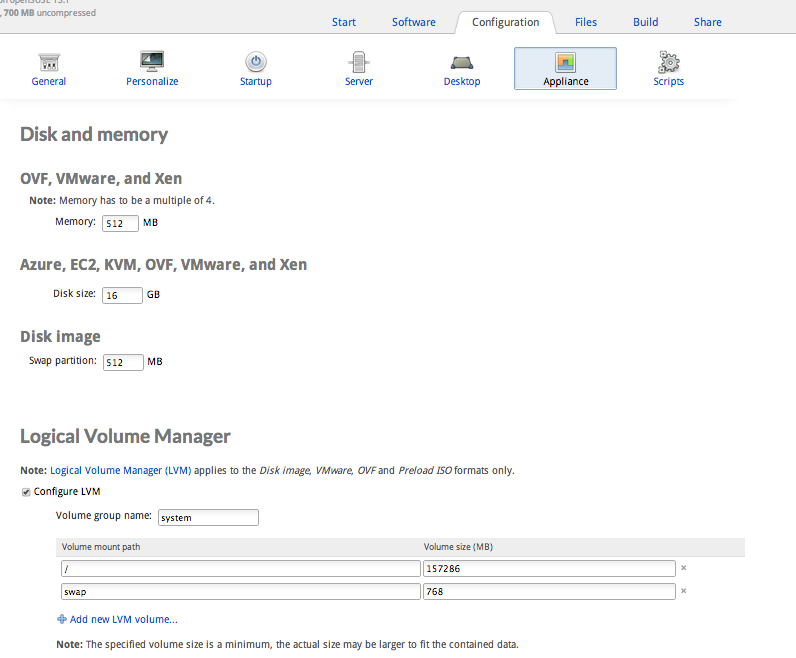
Then go to the Appliance subsection and configure LVM:
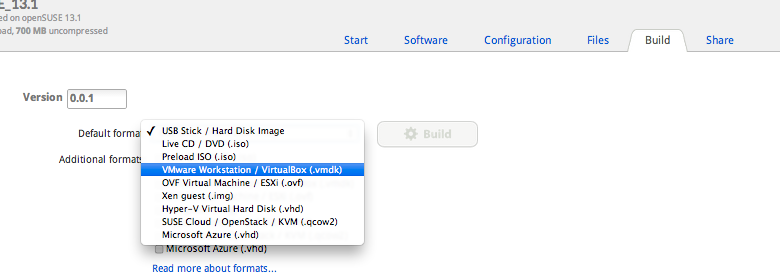
Then go to the Build Tab and select the “VMware Workstation/Virtualbox Format”:
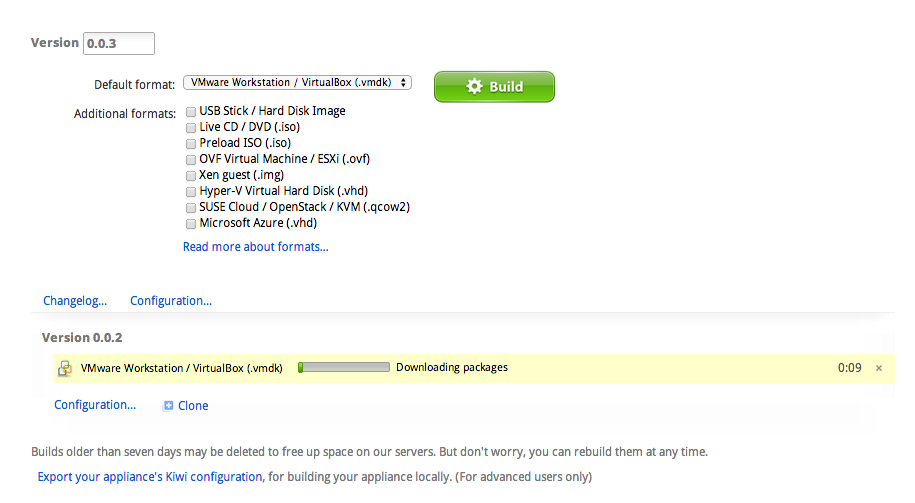
Then click on Build to start the creation of your custom image:
After the build is done, you can download it:

After you have the file, extract it:
elatov@kmac:~/download$tar xvzf openSUSE_13.1.x86_64-0.0.2.vmx.tar.gz
x openSUSE_13.1-0.0.2/
x openSUSE_13.1-0.0.2/openSUSE_13.1.x86_64-0.0.2.vmx
x openSUSE_13.1-0.0.2/openSUSE_13.1.x86_64-0.0.2.vmdk
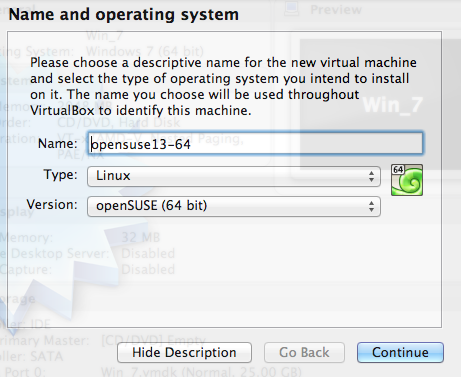
Now let’s add a new VM in VirtualBox and point the virtual disk to the extract vmdk file. So start VirtualBox, click on New VM, and give it a Name:
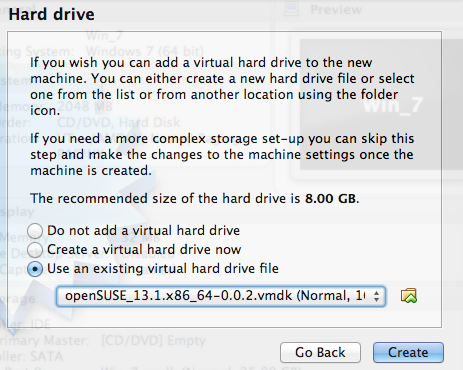
When it gets to the hard-drive page, select “Use an existing virtual hard drive file” and point to the vmdk:
After the VM is created, disable the USB ports, audio device and the floppy device in the boot menu. Start the VM and follow the instructions laid out here to finish the customization of the VM. As a side note, it won’t bring up the first interface by default so login as root to the appliance and run the following to get an IP via DHCP (then you can SSH to the VM using port forwarding like before):
linux-mjbf:~ # dhcpd enp0s3
To enable the interface to automatically use DHCP, copy the template:
linux-mjbf:~ # cp /etc/sysconfig/network/ifcfg.template /etc/sysconfig/network/ifcfg-enp0s3
And then enable DHCP:
linux-mjbf:~ #vi /etc/sysconfig/network-enp0s3
Modify the following lines:
STARTMODE=auto
BOOTPROTO=dhcp4
DHCLIENT_SET_DEFAULT_ROUTE=yes
NOTE Ran into a bug Bug 802970 - Default gateway not set up after first user logs in, that’s why the DHCLIENT_SET option was used.
Also the boot partition is already labeled:
vagrant@linux-mjbf:~> sudo e2label /dev/sda1
BOOT
so you don’t have to re-label it, just use that label in /etc/fstab. While you are in the /etc/fstab file, fix the swap partition. Change this line:
/dev/mapper/systemVG-LVSwap /swap ext3 default 1 2
to this:
/dev/mapper/systemVG-LVSwap swap swap default 0 0
And format that partition as swap:
vagrant@linux-mjbf:~> sudo mkswap /dev/mapper/systemVG-LVSwap
On top of what’s in the previous post, to clean up the Grub Menu, edit the /etc/default/grub file and modify these lines:
GRUB_DISTRIBUTOR=openSUSE_13.1\ \[\ VMX\ \]
GRUB_CMDLINE_LINUX_DEFAULT=" root=/dev/systemVG/LVRoot disk=/dev/disk/by-id/ata-VBOX_HARDDISK_VBf1d999b3-c951ba39 resume=swap quiet splash=silent"
to this:
GRUB_DISTRIBUTOR=openSUSE_13.1
GRUB_CMDLINE_LINUX_DEFAULT=" root=/dev/systemVG/LVRoot resume=swap quiet splash=0"
Then run the following to create a new grub menu and to rebuild the initrd image:
vagrant@linux-mjbf:~> sudo mkinitrd

Kernel image:   /boot/vmlinuz-3.11.10-11-default
Initrd image:   /boot/initrd-3.11.10-11-default
Root device:	/dev/systemVG/LVRoot (mounted on / as ext3)
Kernel Modules:	thermal_sys thermal processor fan usb-common usbcore ehci-hcd ohci-hcd uhci-hcd xhci-hcd dm-mod dm-log dm-region-hash dm-mirror dm-snapshot scsi_dh scsi_dh_alua scsi_dh_hp_sw scsi_dh_emc scsi_dh_rdac usbhid hid-logitech-dj hid-generic hid-holtek-kbd hid-lenovo-tpkbd hid-ortek hid-roccat hid-roccat-common hid-roccat-arvo hid-roccat-isku hid-samsung ehci-pci ohci-pci linear
Features:       acpi dm plymouth block usb lvm2 resume.userspace resume.kernel
To build the virtualbox guest additions, install these packages prior:
sudo zypper in kernel-devel kernel-default-devel gcc make
After creating the box:
elatov@kmac:~/vagrant-boxes$ vagrant package --output vagrant-stu-min-opensuse13-64.box --base opensuse13-64
Here is was the final size:
elatov@kmac:~/vagrant-boxes$ls -lh
total 7427872
-rw-r--r--  1 elatov  staff   688M Jun 11 12:35 vagrant-opensuse13-32bit-small.box
-rw-r--r--  1 elatov  staff   823M Jun 11 10:54 vagrant-opensuse13-32bit.box
-rw-r--r--  1 elatov  staff   532M Jun 12 12:01 vagrant-opensuse13-64-net-install.box
-rw-r--r--  1 elatov  staff   376M Jun 15 16:42 vagrant-stu-min-opensuse13-64.box
It was less than 400MB, I started out with 823MB and ended up with 376MB (I even used the net-install iso… that was the 532MB image).