Using Foreman to Provision and Configure Machines
Installing Foreman with Katello
As I was doing some reading up on foreman, I realized that I will probably want to use katello to host the CentOS repos. Since we want to use Katello along with Foreman, let’s follow the Katello 3.5 Installation guide and install it right away (since you can’t install katello later on as an addon). Also after all the syncing and PXE boot configurations are done, here is a good guide on the provisioning part: Bare metal and Virtual Machine Provisioning through Foreman Server.
Installing the Yum Repos for Katello
Here are the repositories and packages I added before I started the foreman-installer:
$ sudo yum -y localinstall http://fedorapeople.org/groups/katello/releases/yum/3.5/katello/el7/x86_64/katello-repos-latest.rpm
$ sudo yum -y localinstall http://yum.theforeman.org/releases/1.16/el7/x86_64/foreman-release.rpm
$ sudo yum -y localinstall https://yum.puppetlabs.com/puppetlabs-release-pc1-el-7.noarch.rpm
$ sudo yum -y localinstall https://yum.puppetlabs.com/puppetlabs-release-pc1-el-7.noarch.rpm
$ sudo yum -y localinstall http://dl.fedoraproject.org/pub/epel/epel-release-latest-7.noarch.rpm
$ sudo yum -y install foreman-release-scl python-django
$ sudo yum -y update
$ sudo yum -y install katello
After that the katello scenario will be available:
[elatov@fore ~]$ sudo foreman-installer --list-scenarios
Available scenarios
  Foreman (use: --scenario foreman)
        Default installation of Foreman
  Foreman Proxy (use: --scenario foreman-proxy-content)
        Install a stand-alone Foreman Proxy.
  Katello (use: --scenario katello)
        Install Foreman with Katello
So now let’s run the installer, while I was at it, I decided to enable some plugins that I might use later on:
[elatov@fore ~]$ sudo foreman-installer --scenario katello --enable-foreman-compute-libvirt --enable-foreman-compute-openstack --enable-foreman-compute-vmware --enable-foreman-plugin-ansible --enable-foreman-plugin-remote-execution

Installing             Done                                               [100%]
  Success!
  * Katello is running at https://fore.kar.int
      Initial credentials are admin / xdw2xnVKUd8bKGC2
  * To install an additional Foreman proxy on separate machine continue by running:

      foreman-proxy-certs-generate --foreman-proxy-fqdn "$FOREMAN_PROXY" --certs-tar "/root/$FOREMAN_PROXY-certs.tar"

  The full log is at /var/log/foreman-installer/katello.log
Confirm PXE Network Boot is Working
Then I wanted to make sure tftp is enabled on the foreman server (it was by default) and a VM is able to boot from it:
[elatov@fore ~]$ sudo ss -lnup | grep 69
UNCONN     0      0            *:69                       *:*                   users:(("xinetd",pid=1005,fd=5))
[elatov@fore ~]$ grep disa /etc/xinetd.d/tftp
        disable         = no
I just had to configure my DHCP server to point to foreman server for it’s next server for a DHCP boot. So I just set the following on the dnsmasq config:
dhcp-boot=pxelinux.0,fore.kar.int,10.0.0.7
This is covered in: Installing Debian using network booting. Also the tftp configuration running on foreman is covered here:
You can confirm the tftp service was configured appropriately by checking out the contents of the /var/lib/tftpboot/ directory:
[elatov@fore ~]$ ls -l /var/lib/tftpboot/
total 172
drwxr-xr-x 2 foreman-proxy root     6 Jan 13 17:49 boot
-rw-r--r-- 1 root          root 20704 Jan 13 17:47 chain.c32
drwxr-xr-x 2 foreman-proxy root     6 Jan 13 17:49 grub
drwxr-xr-x 2 foreman-proxy root    57 Jan 13 17:49 grub2
-rw-r--r-- 1 root          root 33628 Jan 13 17:47 mboot.c32
-rw-r--r-- 1 root          root 26140 Jan 13 17:47 memdisk
-rw-r--r-- 1 root          root 55012 Jan 13 17:47 menu.c32
drwxr-xr-x 2 foreman-proxy root     6 Jan 13 17:49 poap.cfg
-rw-r--r-- 1 root          root 26764 Jan 13 17:47 pxelinux.0
drwxr-xr-x 2 foreman-proxy root     6 Jan 13 17:49 pxelinux.cfg
drwxr-xr-x 2 foreman-proxy root     6 Jan 13 17:49 ztp.cfg
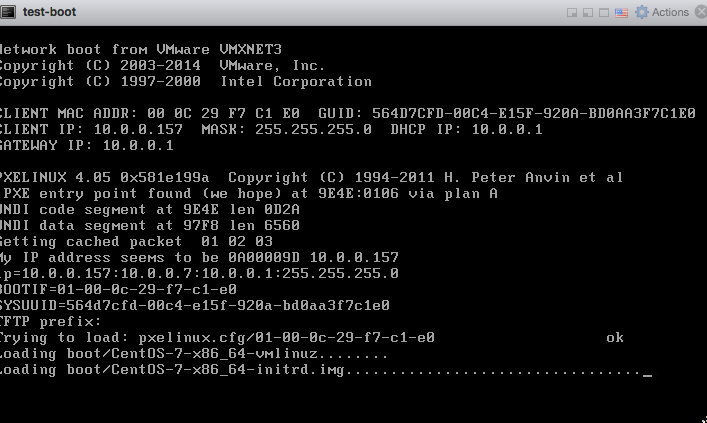
You can see all the necessary files that are needed to PXE Boot a machine. After that, I created a test VM on my ESXi host and added a blank disk to it so it would boot from it’s NIC (this is discussed in Using PXE with Virtual Machines) and I saw it started to boot from foreman:
Syncing CentOS Repos with Katello
Now let’s sync the CentOS repos so when we provision VMs they can install from a local repo rather than downloading packages from the internet. Some nice instructions are available here:
- Katello 3.5 Documentation
- How to Install Katello 3.2 on CentOS 7.x
- Katello – Download Yum Repositories and Register clients for patching
- System management with Foreman/Katello – Part 2: Products, Repositories and Content Views
- Adventures in Katello – Part 1
Configure Hammer CLI
Let’s configure the hammer cli, so we can use that for some of the configuration: echo “ORG="Default Organization"” » ~/.bashrc echo “LOCATION="Default Location"” » ~/.bashrc echo “DOMAIN=kar.int” » ~/.bashrc echo “KATELLOSERVER=$(hostname -f)” » ~/.bashrc source ~/.bashrc mkdir ~/.hammer/ cat > ~/.hammer/cli_config.yml«EOF :foreman: :host: ‘https://$(hostname)/’ :username: ‘admin’ :password: ‘P@ssw0rd’ EOF
Then make sure you can use it: [elatov@fore ~]$ hammer organization list —|———————-|———————-|————-|———————-|———— ID | TITLE | NAME | DESCRIPTION | LABEL | DESCRIPTION —|———————-|———————-|————-|———————-|———— 1 | Default Organization | Default Organization | | Default_Organization | —|———————-|———————-|————-|———————-|————
Use Hammer CLI to Sync CentOS 7 YUM Repos
First let’s get the GPG key for the CentOS 7 Repo:
[elatov@fore ~]$ wget -q https://www.centos.org/keys/RPM-GPG-KEY-CentOS-7 -O /tmp/RPM-GPG-KEY-CentOS-7
[elatov@fore ~]$ hammer gpg create --key /tmp/RPM-GPG-KEY-CentOS-7  --name 'GPG-CentOS-7' --organization "Default Organization"
GPG Key created
Now let’s create a product for CentOS_7:
[elatov@fore ~]$ hammer product create --name=CentOS_7 --organization "Default Organization" --description "CentOS 7 Repos"
Product created
And now let’s create the Repos:
[elatov@fore ~]$ hammer repository create --name='CentOS 7 - Base - x86_64' --organization "Default Organization" --product='CentOS_7' --content-type='yum' --publish-via-http=true --url=http://mirror.centos.org/centos/7/os/x86_64/ --checksum-type=sha256 --gpg-key=GPG-CentOS-7
Repository created

[elatov@fore ~]$ hammer repository create --name='CentOS 7 - Updates - x86_64' --organization "Default Organization" --product='CentOS_7' --content-type='yum' --publish-via-http=true --url=http://mirror.centos.org/centos/7/updates/x86_64/ --checksum-type=sha256 --gpg-key=GPG-CentOS-7
Repository created

[elatov@fore ~]$ hammer repository create --name='CentOS 7 - Extras - x86_64' --organization "Default Organization" --product='CentOS_7' --content-type='yum' --publish-via-http=true --url=http://mirror.centos.org/centos/7/extras/x86_64/ --checksum-type=sha256 --gpg-key=GPG-CentOS-7
Repository created
Now let’s create a weekly sync:
[elatov@fore ~]$ hammer sync-plan create --name 'Weekly Sync' --description 'Weekly Synchronization Plan' --organization "Default Organization" --interval weekly --sync-date $(date +"%Y-%m-%d")" 00:00:00" --enabled yes
Sync plan created
And now let’s add our CentOS product to be part of the sync:
[elatov@fore ~]$ hammer product set-sync-plan --organization "Default Organization" --sync-plan 'Weekly Sync' --name 'CentOS_7'
Synchronization plan assigned.
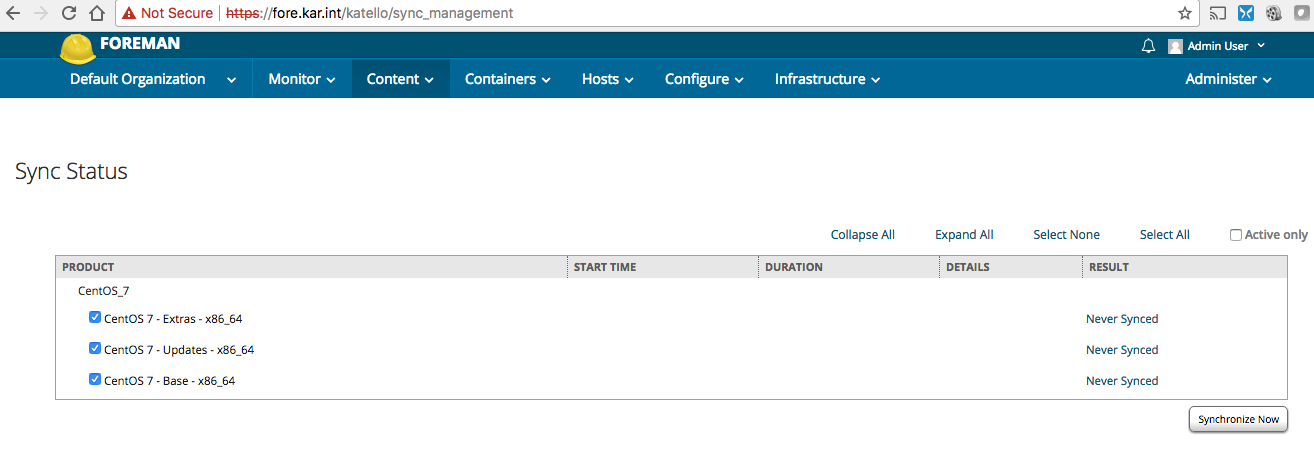
You can also login to the foreman admin console and kick off a sync now. Content -> Sync Status -> Select CentOS_7 Product -> Select All -> Synchronize Now:
Or you can do it one my one using hammer:
$ hammer repository synchronize --organization "Default Organization" --product 'CentOS_7'  --name 'CentOS 7 - Base - x86_64'
$ hammer repository synchronize --organization "Default Organization" --product 'CentOS_7'  --name 'CentOS 7 - Updates - x86_64'
$ hammer repository synchronize --organization "Default Organization" --product 'CentOS_7'  --name 'CentOS 7 - Extras - x86_64'
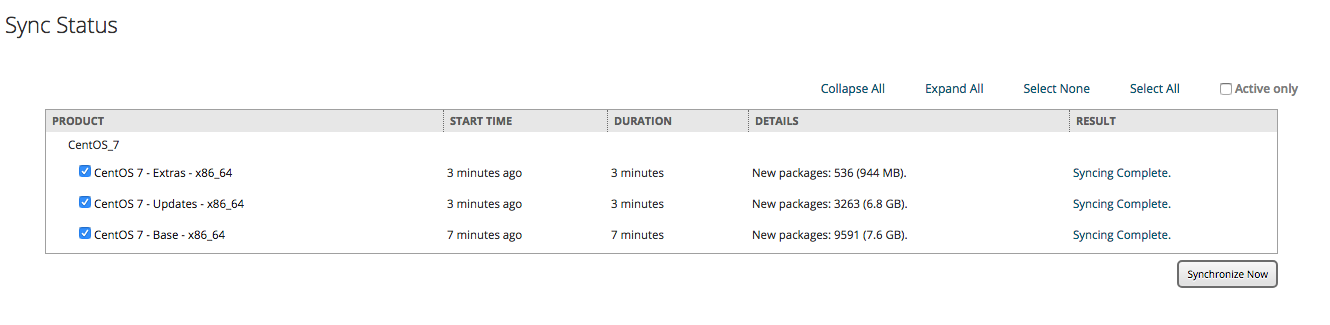
After the sync is done you will see them synced:
You can also confirm using hammer (first list all the repos):
[elatov@fore ~]$ hammer repository list
---|-----------------------------|----------|--------------|--------------------------------------------------
ID | NAME                        | PRODUCT  | CONTENT TYPE | URL
---|-----------------------------|----------|--------------|--------------------------------------------------
1  | CentOS 7 - Base - x86_64    | CentOS_7 | yum          | http://mirror.centos.org/centos/7/os/x86_64/
3  | CentOS 7 - Extras - x86_64  | CentOS_7 | yum          | http://mirror.centos.org/centos/7/extras/x86_64/
2  | CentOS 7 - Updates - x86_64 | CentOS_7 | yum          | http://mirror.centos.org/centos/7/updates/x86_64/
---|-----------------------------|----------|--------------|--------------------------------------------------
Then get the information for the desired Repo:
[elatov@fore ~]$ hammer repository info --id 1
ID:                 1
Name:               CentOS 7 - Base - x86_64
Label:              CentOS_7_-_Base_-_x86_64
Organization:       Default Organization
Red Hat Repository: no
Content Type:       yum
Checksum Type:      sha256
Mirror on Sync:     yes
URL:                http://mirror.centos.org/centos/7/os/x86_64/
Publish Via HTTP:   yes
Published At:       http://fore.kar.int/pulp/repos/Default_Organization/Library/custom/CentOS_7/CentOS_7_-_Base_-_x86_64/
Relative Path:      Default_Organization/Library/custom/CentOS_7/CentOS_7_-_Base_-_x86_64
Download Policy:    on_demand
Product:
    ID:   1
    Name: CentOS_7
GPG Key:
    ID:   1
    Name: GPG-CentOS-7
Sync:
    Status:         Success
    Last Sync Date: 4 minutes
Created:            2018/01/14 18:49:29
Updated:            2018/01/14 19:04:20
Content Counts:
    Packages:       9591
    Package Groups: 84
    Errata:         0
Confirm YUM Repo is Working
As a test on another CentOS machine, I wanted to make sure I can use the YUM repo, so I added the following file:
<> cat /etc/yum.repos.d/fore-Base.repo
[fore-base]
name=CentOS-$releasever - Base
baseurl=http://fore.kar.int/pulp/repos/Default_Organization/Library/custom/CentOS_7/CentOS_7_-_Base_-_x86_64
gpgcheck=1
gpgkey=file:///etc/pki/rpm-gpg/RPM-GPG-KEY-CentOS-7
Then refreshing the repos (I saw it queried the right amount of packages):
<> sudo yum update
Loaded plugins: fastestmirror, remove-with-leaves
fore-base                                                | 2.1 kB     00:00
(1/3): fore-base/updateinfo                                |   92 B   00:00
(2/3): fore-base/group                                     | 738 kB   00:00
(3/3): fore-base/primary                                   | 3.8 MB   00:00
Loading mirror speeds from cached hostfile
 * atomic: www5.atomicorp.com
 * base: pubmirrors.dal.corespace.com
 * epel: fedora-epel.mirror.lstn.net
 * extras: repos.forethought.net
 * updates: repo1.dal.innoscale.net
fore-base                                                             9591/9591
No packages marked for update
and I was also able to see the full list of the packages:
<> sudo yum repository-packages fore-base list
Loaded plugins: fastestmirror, remove-with-leaves
Loading mirror speeds from cached hostfile
 * atomic: www5.atomicorp.com
 * base: pubmirrors.dal.corespace.com
 * epel: fedora-epel.mirror.lstn.net
 * extras: repos.forethought.net
 * updates: dallas.tx.mirror.xygenhosting.com
Available Packages
389-ds-base.x86_64                          1.3.6.1-16.el7             fore-base
389-ds-base-devel.x86_64                    1.3.6.1-16.el7             fore-base
389-ds-base-libs.x86_64                     1.3.6.1-16.el7             fore-base
389-ds-base-snmp.x86_64                     1.3.6.1-16.el7             fore-base
Cython.x86_64                               0.19-5.el7                 fore-base
ElectricFence.i686                          2.2.2-39.el7               fore-base
ElectricFence.x86_64                        2.2.2-39.el7               fore-base
GConf2.i686                                 3.2.6-8.el7                fore-base
GConf2-devel.i686                           3.2.6-8.el7                fore-base
And I was also able to get an RPM directly:
<> wget http://fore.kar.int/pulp/repos/Default_Organization/Library/custom/CentOS_7/CentOS_7_-_Base_-_x86_64/Packages/389-ds-base-1.3.6.1-16.el7.x86_64.rpm
--2018-01-14 16:05:24--  http://fore.kar.int/pulp/repos/Default_Organization/Library/custom/CentOS_7/CentOS_7_-_Base_-_x86_64/Packages/389-ds-base-1.3.6.1-16.el7.x86_64.rpm
Resolving fore.kar.int (fore.kar.int)... 10.0.0.7
Connecting to fore.kar.int (fore.kar.int)|10.0.0.7|:80... connected.
HTTP request sent, awaiting response... 302 FOUND
Location: http://fore.kar.int:80/streamer/var/lib/pulp/content/units/rpm/2b/768197d6ff9daba6e50d580ab0d0423ffe388ad759cafb1d46871c12612b48/389-ds-base-1.3.6.1-16.el7.x86_64.rpm?policy=eyJleHRlbnNpb25zIjogeyJyZW1vdGVfaXAiOiAiMTkyLjE2OC4xLjE%3D
Reusing existing connection to fore.kar.int:80.
HTTP request sent, awaiting response... 200 OK
Length: 1783596 (1.7M) [application/x-rpm]
Saving to: ‘389-ds-base-1.3.6.1-16.el7.x86_64.rpm’

100%[======================================>] 1,783,596   --.-K/s   in 0.05s

2018-01-14 16:05:24 (33.6 MB/s) - ‘389-ds-base-1.3.6.1-16.el7.x86_64.rpm’ saved [1783596/1783596]
and confirm it was a valid RPM:
<> rpm -qip 389-ds-base-1.3.6.1-16.el7.x86_64.rpm
Name        : 389-ds-base
Version     : 1.3.6.1
Release     : 16.el7
Architecture: x86_64
Install Date: (not installed)
Group       : System Environment/Daemons
Size        : 5480006
License     : GPLv3+
Signature   : RSA/SHA256, Thu 10 Aug 2017 08:51:36 AM MDT, Key ID 24c6a8a7f4a80eb5
Source RPM  : 389-ds-base-1.3.6.1-16.el7.src.rpm
Build Date  : Fri 04 Aug 2017 09:07:18 AM MDT
Build Host  : c1bm.rdu2.centos.org
Relocations : (not relocatable)
Packager    : CentOS BuildSystem <http://bugs.centos.org>
Vendor      : CentOS
URL         : https://www.port389.org/
Summary     : 389 Directory Server (base)
Description :
389 Directory Server is an LDAPv3 compliant server.  The base package includes
the LDAP server and command line utilities for server administration.
As a quick test, I created a medium and pointed it to the CentOS repo that I synced with Katello:

I know I could use the Synced Content from Katello but that required passing more parameters to the hammer cli.
Provision a Host with Foreman using PXE Network Boot
For a quick test, I just used this command to create a host:
[elatov@fore ~]$ hammer host create --architecture x86_64 --domain kar.int --operatingsystem "CentOS 7" --partition-table "Kickstart default" --location "Default Location" --organization "Default Organization" --name karim-test --root-password "P@ssw0rd#" --medium centos7-pulp --mac=00:0c:29:ac:e3:6e --subnet vlan-3 --model "VMware Virtual Platform"
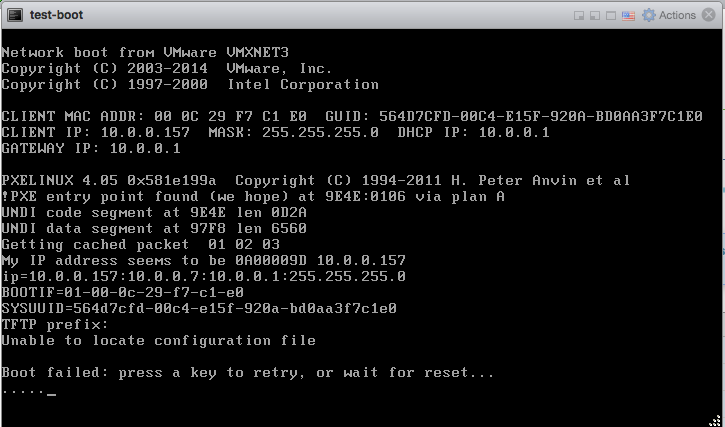
Initially the pxeboot config was not getting created, and I ran into a couple of sites that helped out:
- Satellite 6.1 unable to find configuration file on PXE boot
- Foreman does not update /var/lib/tftpboot/pxelinux.cfg when click on build host.
- PXE booting: Could not find kernel image
My issue was that I didn’t assign the Smart Proxy to my subnet. After fixing the subnet and “Cancelling Build” and rebuilding, I saw the file created:
[elatov@fore ~]# cat /var/lib/tftpboot/pxelinux.cfg/01-00-0c-29-f7-c1-e0
# This file was deployed via 'Kickstart default PXELinux' template
TIMEOUT 10 DEFAULT Kickstart default PXELinux
LABEL Kickstart default PXELinux
  KERNEL boot/CentOS-7-x86_64-vmlinuz
  APPEND initrd=boot/CentOS-7-x86_64-initrd.img ks=http://fore.kar.int:8000/unattended/provision?token=b7cf62a1-5ad9-4179-a723-3a2fed4bd696  network ksdevice=bootif ks.device=bootif BOOTIF=00-00-0c-29-f7-c1-e0 kssendmac ks.sendmac inst.ks.sendmac
  IPAPPEND 2
And I saw the boot files added as well:
[elatov@fore ~]# ls -l /var/lib/tftpboot/boot/
total 53040
-rw-r--r-- 1 foreman-proxy foreman-proxy 48434768 Sep  5 09:36 CentOS-7-x86_64-initrd.img
-rw-r--r-- 1 foreman-proxy foreman-proxy  5877760 Aug 22 17:21 CentOS-7-x86_64-vmlinuz
After starting up the VM, I saw the boot process:
Initially I ran into this error:
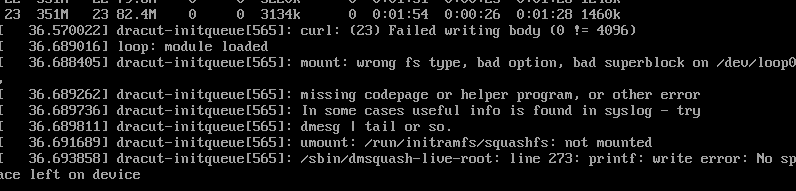
Luckily the issue was discussed in f24 installation fails with 1GB ram. After adding more RAM, I saw the install get further:
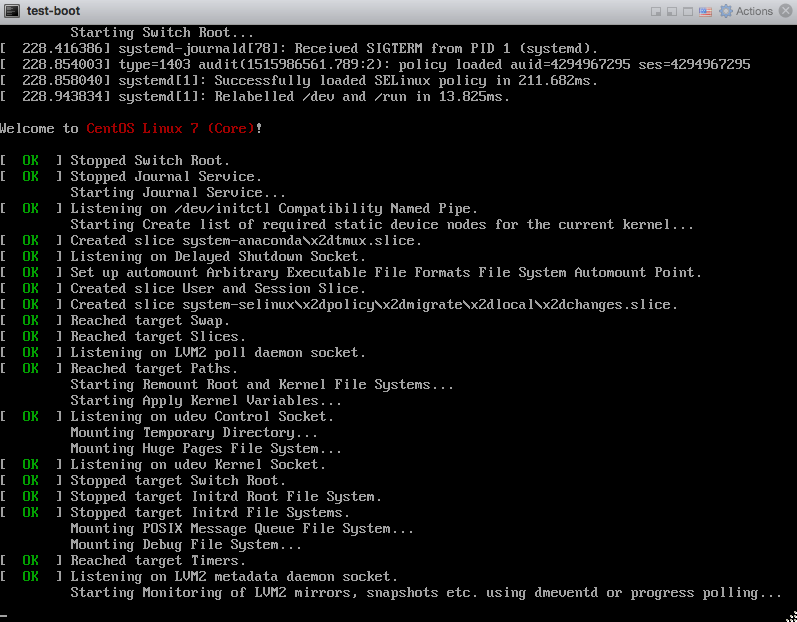
After the install was done, I saw the VM boot up:
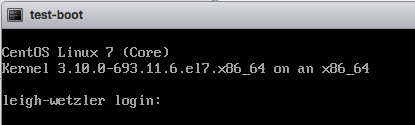
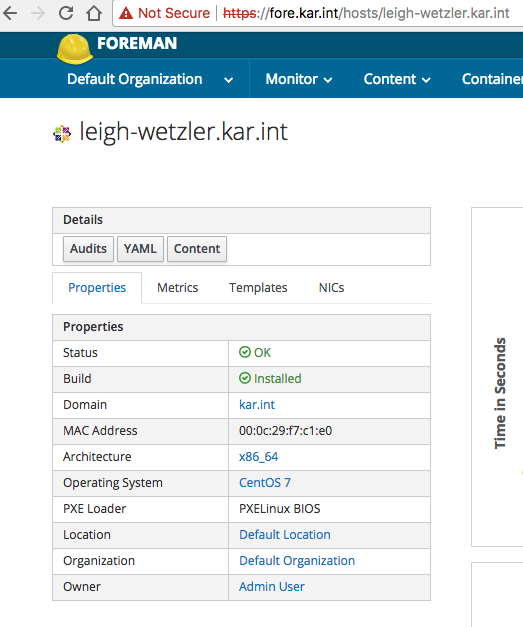
And in the foreman console, I saw the host in an installed state:
You can also SSH to the VM, and check out the kickstart script:
<> ssh root@10.0.0.157
The authenticity of host '10.0.0.157 (10.0.0.157)' can't be established.
ECDSA key fingerprint is SHA256:/V6kXNL3ELLdUDJy5FlvSKY4zgI39MEIVpURxXugXCs.
Are you sure you want to continue connecting (yes/no)? yes
Warning: Permanently added '10.0.0.157' (ECDSA) to the list of known hosts.
root@10.0.0.157's password:
Last login: Mon Jan 15 03:34:34 2018
[root@leigh-wetzler ~]# cat anaconda-ks.cfg
#version=DEVEL
# System authorization information
auth --useshadow --passalgo=SHA256 --kickstart
# Install OS instead of upgrade
install
# Use network installation
url --url="http://fore.kar.int/pulp/repos/Default_Organization/Library/custom/CentOS_7/CentOS_7_-_Base_-_x86_64/"
# Use text mode install
text
# Firewall configuration
firewall --enabled --service=ssh
firstboot --disable
ignoredisk --only-use=sda
# Keyboard layouts
# old format: keyboard us
# new format:
keyboard --vckeymap=us --xlayouts=''
# System language
lang en_US.UTF-8

# Network information
network  --bootproto=dhcp --device=00:0c:29:f7:c1:e0 --hostname=leigh-wetzler.kar.int --activate
# Reboot after installation
reboot
# Root password
rootpw --iscrypted $5$
# SELinux configuration
selinux --enforcing
# System services
services --enabled="chronyd"
# Do not configure the X Window System
skipx
# System timezone
timezone UTC --isUtc
# System bootloader configuration
bootloader --append="nofb quiet splash=quiet crashkernel=auto" --location=mbr --boot-drive=sda
autopart --type=lvm
# Clear the Master Boot Record
zerombr
# Partition clearing information
clearpart --all --initlabel

%post --nochroot
exec < /dev/tty3 > /dev/tty3
#changing to VT 3 so that we can see whats going on....
/usr/bin/chvt 3
(
cp -va /etc/resolv.conf /mnt/sysimage/etc/resolv.conf
/usr/bin/chvt 1
) 2>&1 | tee /mnt/sysimage/root/install.postnochroot.log
%end

%post
logger "Starting anaconda leigh-wetzler.kar.int postinstall"
exec < /dev/tty3 > /dev/tty3
#changing to VT 3 so that we can see whats going on....
/usr/bin/chvt 3
(

#  interface
real=`grep -l 00:0c:29:f7:c1:e0 /sys/class/net/*/{bonding_slave/perm_hwaddr,address} 2>/dev/null | awk -F '/' '// {print $5}' | head -1`
sanitized_real=`echo $real | sed s/:/_/`

cat << EOF > /etc/sysconfig/network-scripts/ifcfg-$sanitized_real
BOOTPROTO="dhcp"
DOMAIN="kar.int"
DEVICE=$real
HWADDR="00:0c:29:f7:c1:e0"
ONBOOT=yes
PEERDNS=yes
PEERROUTES=yes
DEFROUTE=yes
EOF

#update local time
echo "updating system time"
/usr/sbin/ntpdate -sub 0.fedora.pool.ntp.org
/usr/sbin/hwclock --systohc

# update all the base packages from the updates repository
yum -t -y -e 0 update

# SSH keys setup snippet for Remote Execution plugin
#
# Parameters:
#
# remote_execution_ssh_keys: public keys to be put in ~/.ssh/authorized_keys
#
# remote_execution_ssh_user: user for which remote_execution_ssh_keys will be
#                            authorized
#
# remote_execution_create_user: create user if it not already existing
#
# remote_execution_effective_user_method: method to switch from ssh user to
#                                         effective user
#
# This template sets up SSH keys in any host so that as long as your public
# SSH key is in remote_execution_ssh_keys, you can SSH into a host. This only
# works in combination with Remote Execution plugin.

# The Remote Execution plugin queries smart proxies to build the
# remote_execution_ssh_keys array which is then made available to this template
# via the host's parameters. There is currently no way of supplying this
# parameter manually.
# See http://projects.theforeman.org/issues/16107 for details.

sync

# Inform the build system that we are done.
echo "Informing Foreman that we are built"
wget -q -O /dev/null --no-check-certificate http://fore.kar.int:8000/unattended/built?token=b7cf62a1-5ad9-4179-a723-3a2fed4bd696
) 2>&1 | tee /root/install.post.log
exit 0

%end

%packages --ignoremissing
@Core
chrony
dhclient
kexec-tools
ntp
wget
yum

%end

%addon com_redhat_kdump --enable --reserve-mb='auto'

%end
Pretty sweet.
Using Remote Execution with Foreman
As you see above, when I ran the foreman-installer, I ended up enabling the Remote Execution plugin during the install. After that’s installed there are some nice guides on how to use it:
- How to enable Remote Execution (Run Job) option in Foreman / Katello Dashboard
- Foreman Remote Execution 0.3 Manual
Let’s try it out.
SSH Key Issues
Initially I didn’t see the SSH keys created so I followed the instructions in the above sites to create them:
$ mkdir ~foreman-proxy/.ssh
$ chown foreman-proxy ~foreman-proxy/.ssh
$ sudo -u foreman-proxy ssh-keygen -f ~foreman-proxy/.ssh/id_rsa_foreman_proxy -N ''
$ sudo systemctl restart  httpd
$ sudo systemctl  restart foreman-tasks
$ sudo systemctl  restart foreman-proxy
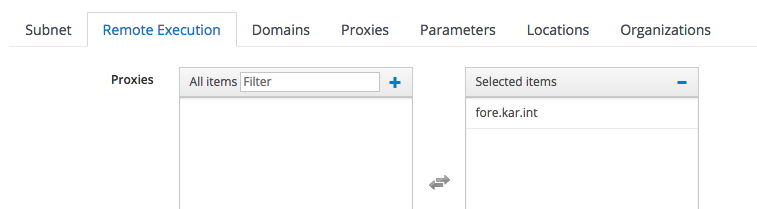
Then I noticed that the SSH key wasn’t not getting pushed to the provisioned VM. I had to make sure the subnet had a Smart Proxy assigned for the remote-execution feature:
I also had to use a different port to confirm I could curl the SSH key:
<> curl https://fore.kar.int:8443/ssh/pubkey -k
<> curl https://fore.kar.int:9090/ssh/pubkey -k
ssh-rsa AAAAB3NzaC1yc2EAAAADAQABAAABAQDSfBrS+K32ri5dA+X7/RxNWKoZB9zBwCo5evAGufIm30Og+rW0ruTjbXynoyZ7QfDz
At first I thought I misconfigured the SSH key some how. This was discussed in: Remote Execution public key and the latest/nightly documentation has a note about that (Foreman Remote Execution 0.3 Manual(Nightly)):
Note: For Katello installations, the default Smart Proxy port will be 9090 rather than 8443 in the above curl example.
Also while I was troubleshooting the issue I ran into How to update remoteExecution SSH key properly? and where?, which had instructions on how to refresh the smart proxy to refresh the new SSH key if you updated it:
It’s stored in the database in Foreman. If you go to the Smart Proxy’s page and click “Refresh” under the actions it will refresh the key.
smart_proxy_dynflow_core Issues
Then I ran into an issue where the smart_proxy_dynflow_core service wasn’t started. This is discussed in: Remote Execution failure and in Failed to initialize: Dynflow::ExecutionPlan::Steps::Error - All X applicable proxies are down:
sudo systemctl enable smart_proxy_dynflow_core
sudo systemctl start smart_proxy_dynflow_core
Next I ran into an issue where the smart_proxy_dynflow_core service was misconfigured, this was discussed in:
- Remote Execution sending error after upgrade katello 3.4.3
- Timeout when running job
- smart_proxy_dynflow_core.service on capsule keeps failing when running
yum -y install --advisory ...ReX on 6k hosts
I ended up configuring the following file:
[elatov@fore ~]$ grep -vE '^$|^#' /etc/smart_proxy_dynflow_core/settings.yml
---
:database: /var/lib/foreman-proxy/dynflow/dynflow.sqlite
:foreman_url: 'https://fore.kar.int'
:foreman_ssl_ca: /etc/foreman-proxy/foreman_ssl_ca.pem
:foreman_ssl_cert: /etc/foreman-proxy/foreman_ssl_cert.pem
:foreman_ssl_key: /etc/foreman-proxy/foreman_ssl_key.pem
:console_auth: false
:listen: 127.0.0.1
:port: 8008
Then I was successfully able to run a command remotely on a provisioned host:

Took a while but I got there, I feel like the installer should’ve probably take care of that.
Trying out Ansible with Foreman
Before playing around with the intergration between Foreman and ansible, I decided to make sure I can run a playbook manually.
Running a Simple Ansible Playbook
First let’s install ansible:
$ sudo yum install ansible
Then configure it:
[elatov@fore ~]$ grep -vE '^#|^$' /etc/ansible/ansible.cfg
[defaults]
inventory      = /etc/ansible/hosts
roles_path    = /etc/ansible/roles
deprecation_warnings = False
[inventory]
[privilege_escalation]
[paramiko_connection]
[ssh_connection]
[persistent_connection]
[accelerate]
[selinux]
[colors]
[diff]
I added the following section to the hosts files:
[elatov@fore ~]$ grep -vE '^#|^$' /etc/ansible/hosts
[vms]
10.0.0.150
And then as a test I installed the chronyd role from galaxy:
[elatov@fore ~]$ sudo ansible-galaxy install influxdata.chrony -p /etc/ansible/roles/
- downloading role 'chrony', owned by influxdata
- downloading role from https://github.com/influxdata/ansible-chrony/archive/master.tar.gz
- extracting influxdata.chrony to /etc/ansible/roles/influxdata.chrony
- influxdata.chrony (master) was installed successfully
As a quick test make sure you can connect to the host with ansible (I just used the same SSH key as for Remote Execution):
[elatov@fore ~]$ ansible all -m ping -u root
10.0.0.150 | SUCCESS => {
    "changed": false,
    "ping": "pong"
}
Then I created a quick playbook to install the role:
[elatov@fore ~]$ cat deploy.yml
---
- hosts: all
  roles:
    - { role: influxdata.chrony }
And then ran it:
[elatov@fore ~]$ ansible-playbook deploy.yml -u root -v
Using /etc/ansible/ansible.cfg as config file

PLAY [all] *************************************************************************************************************

TASK [Gathering Facts] *************************************************************************************************
ok: [10.0.0.150]

TASK [influxdata.chrony : include os-specific vars] ********************************************************************
ok: [10.0.0.150] => {"ansible_facts": {"chrony_conf_file": "/etc/chrony.conf", "chrony_driftfile": "/var/lib/chrony/drif
t", "chrony_keyfile": "/etc/chrony/chrony.keys", "chrony_service_name": "chronyd"}, "ansible_included_var_files": ["/etc
/ansible/roles/influxdata.chrony/vars/redhat.yml"], "changed": false}

TASK [influxdata.chrony : Install Chrony] ******************************************************************************
ok: [10.0.0.150] => {"changed": false, "msg": "", "rc": 0, "results": ["chrony-3.1-2.el7.centos.x86_64 providing chrony
is already installed"]}
..
..
PLAY RECAP *************************************************************************************************************
10.0.0.150                 : ok=6    changed=2    unreachable=0    failed=0
And that was it. I logged into the host and confirmed chronyd is running:
[elatov@fore ~]$ ssh root@10.0.0.150
Last login: Thu Jan 18 19:06:12 2018 from fore.kar.int
[root@karim-test ~]# systemctl status chronyd
● chronyd.service - NTP client/server
   Loaded: loaded (/usr/lib/systemd/system/chronyd.service; enabled; vendor preset: enabled)
   Active: active (running) since Thu 2018-01-18 19:06:12 UTC; 6min ago
     Docs: man:chronyd(8)
           man:chrony.conf(5)
  Process: 20362 ExecStartPost=/usr/libexec/chrony-helper update-daemon (code=exited, status=0/SUCCESS)
  Process: 20358 ExecStart=/usr/sbin/chronyd $OPTIONS (code=exited, status=0/SUCCESS)
 Main PID: 20361 (chronyd)
   CGroup: /system.slice/chronyd.service
           └20361 /usr/sbin/chronyd

Jan 18 19:06:12 karim-test.kar.int systemd[1]: Starting NTP client/server...
Jan 18 19:06:12 karim-test.kar.int chronyd[20361]: chronyd version 3.1 starting (+CMDMON +NTP +REFCLOCK +RTC +PRI...BUG)
Jan 18 19:06:12 karim-test.kar.int chronyd[20361]: commandkey directive is no longer supported
Jan 18 19:06:12 karim-test.kar.int chronyd[20361]: Could not open keyfile /etc/chrony/chrony.keys
Jan 18 19:06:12 karim-test.kar.int chronyd[20361]: Frequency -0.582 +/- 0.031 ppm read from /var/lib/chrony/drift
Jan 18 19:06:12 karim-test.kar.int systemd[1]: Started NTP client/server.
Pretty easy.
Running Ansible With Foreman
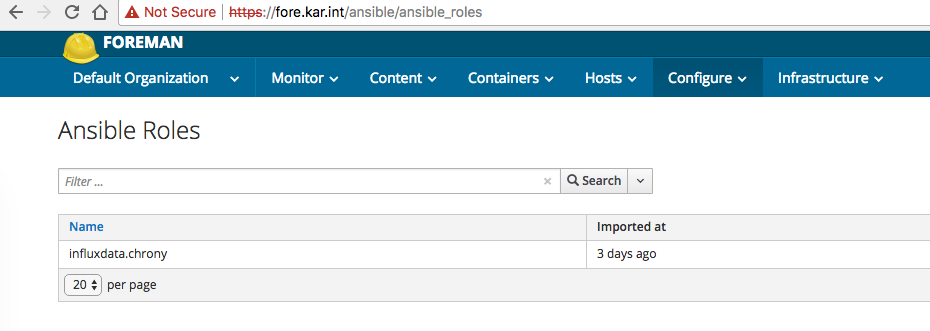
I already had the chronyd role installed so I imported it under Configure -> Ansible Roles:
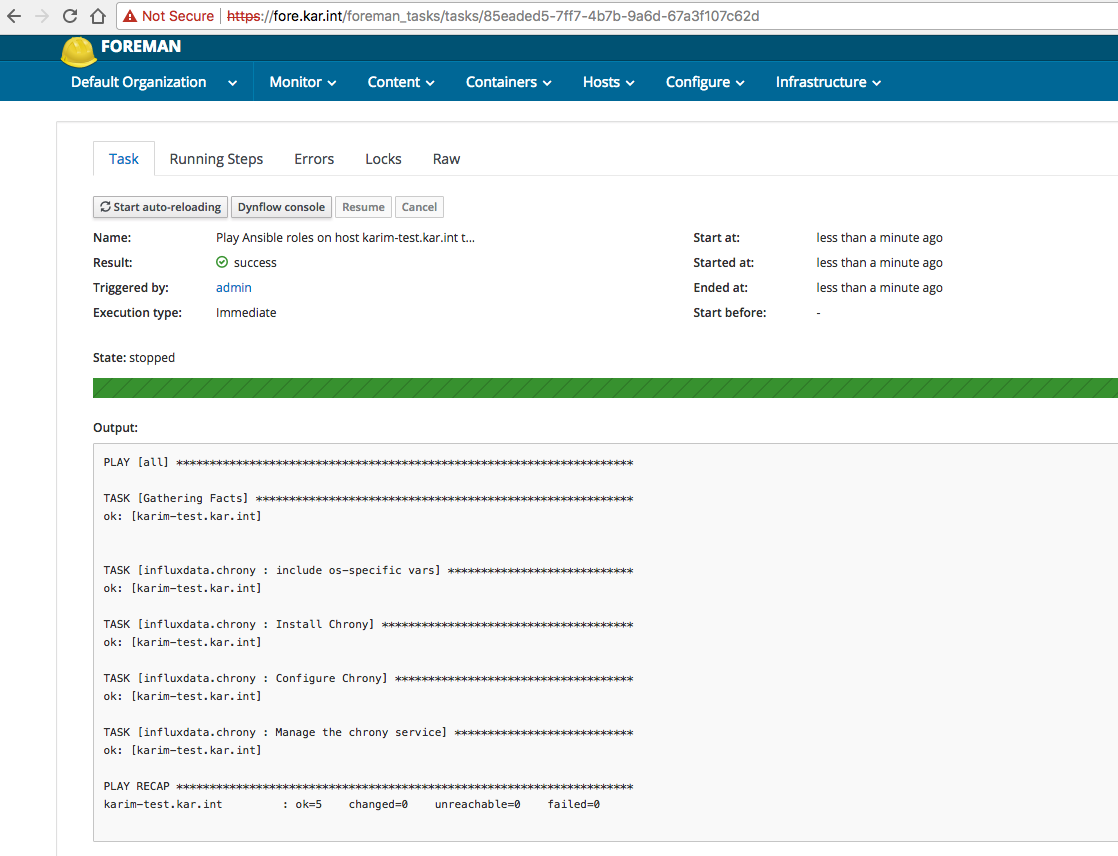
Then I just assigned that role to the host and selected to run the playbook on the selected host:

Issues With Running Ansible Playbooks
Initially ran into this issue: ActionController::UrlGenerationError in HostsController#play_roles when playing role on a host . After fixing the ruby script (/opt/theforeman/tfm/root/usr/share/gems/gems/foreman_ansible-1.4.5/app/controllers/foreman_ansible/concerns/hosts_controller_extensions.rb) and restarting:
$ sudo systemctl restart httpd
I was able to run an ansible playbook. Then I ran into a permission error:
and I found this page: Running playbook role in Foreman 1.15.6 / ansible pluging 1.4.5 / ansible 2.4.1 return an error. And so I confirmed it was a home directory permission issue:
[elatov@fore ~]$ sudo su - foreman -s /bin/bash
Last login: Thu Jan 18 22:17:57 EST 2018 on pts/1
-bash-4.2$ pwd
/usr/share/foreman
-bash-4.2$ mkdir .ansible
mkdir: cannot create directory ‘.ansible’: Permission denied
and then to fix it:
[elatov@fore ~]$ sudo mkdir ~foreman/.ansible
[elatov@fore ~]$ sudo chown foreman ~foreman/.ansible
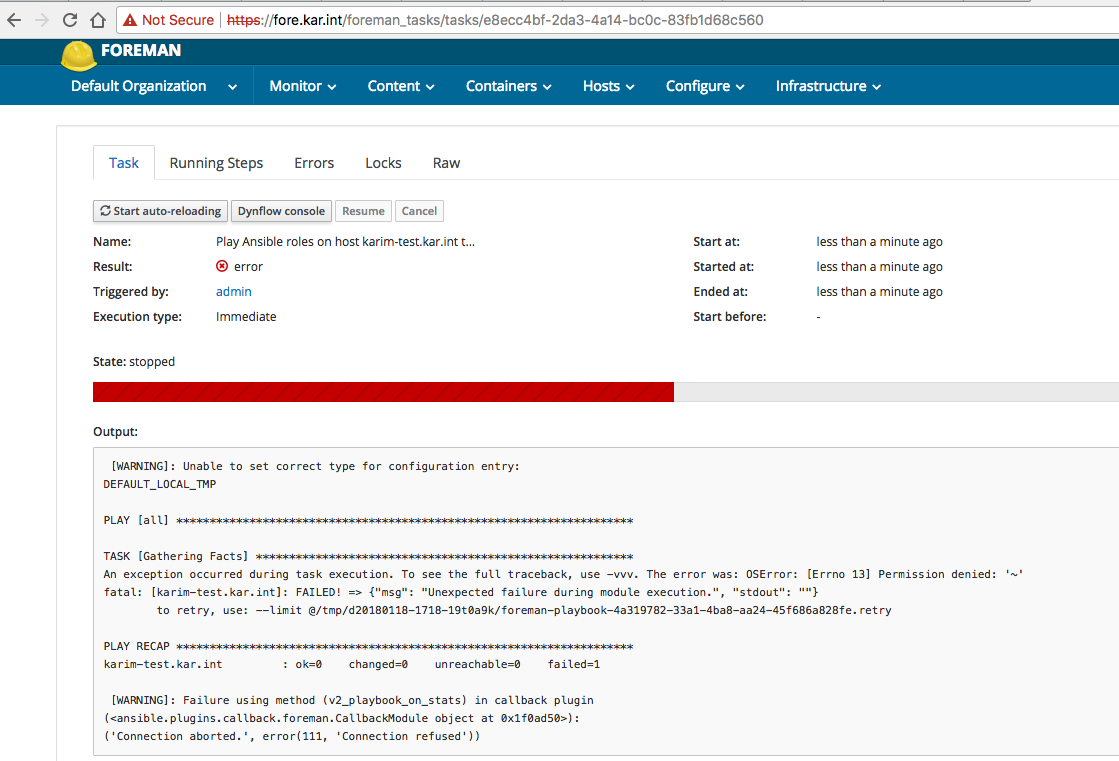
Then after that the playbook succeeded but the playback failed:
I needed to set the correct URL. I saw the issue discussed on different pages:
All the pages suggested to set the FOREMAN_URL, FOREMAN_SSL_CERT, FOREMAN_SSL_KEY, and FOREMAN_SSL_VERIFY environment variables for the foreman user but none really talked about how to accomplish that. I followed the instructions laid out in an IRC channel I randomly rant into, and added them to the /etc/environment file:
[elatov@fore ~]$ cat /etc/environment
FOREMAN_URL=https://fore.kar.int
FOREMAN_SSL_VERIFY=False
But even after a reboot it still didn’t work. I also set it at the httpd level:
[elatov@fore ~]$ tail -3 /etc/sysconfig/httpd
LANG=C
FOREMAN_URL=https://fore.kar.int
FOREMAN_SSL_VERIFY=False
And I saw it set for the foreman user’s process that started the ruby app:
[elatov@fore ~]$ ps -ef | grep foreman | grep -i Pass
foreman   4701     1  1 00:00 ?        00:00:09 Passenger RackApp: /usr/share/foreman
Here is the enviroment information about the process:
[elatov@fore ~]$ sudo cat /proc/4701/environ | grep -ao '^[^P]*'
FOREMAN_URL=https://fore.kar.intMAN
But none of those worked, finally I just modified the script directly:
[elatov@fore ~]$ grep FOREMAN_URL\' /usr/lib/python2.7/site-packages/ansible/plugins/callback/foreman.py
    FOREMAN_URL = os.getenv('FOREMAN_URL', "https://fore.kar.int")
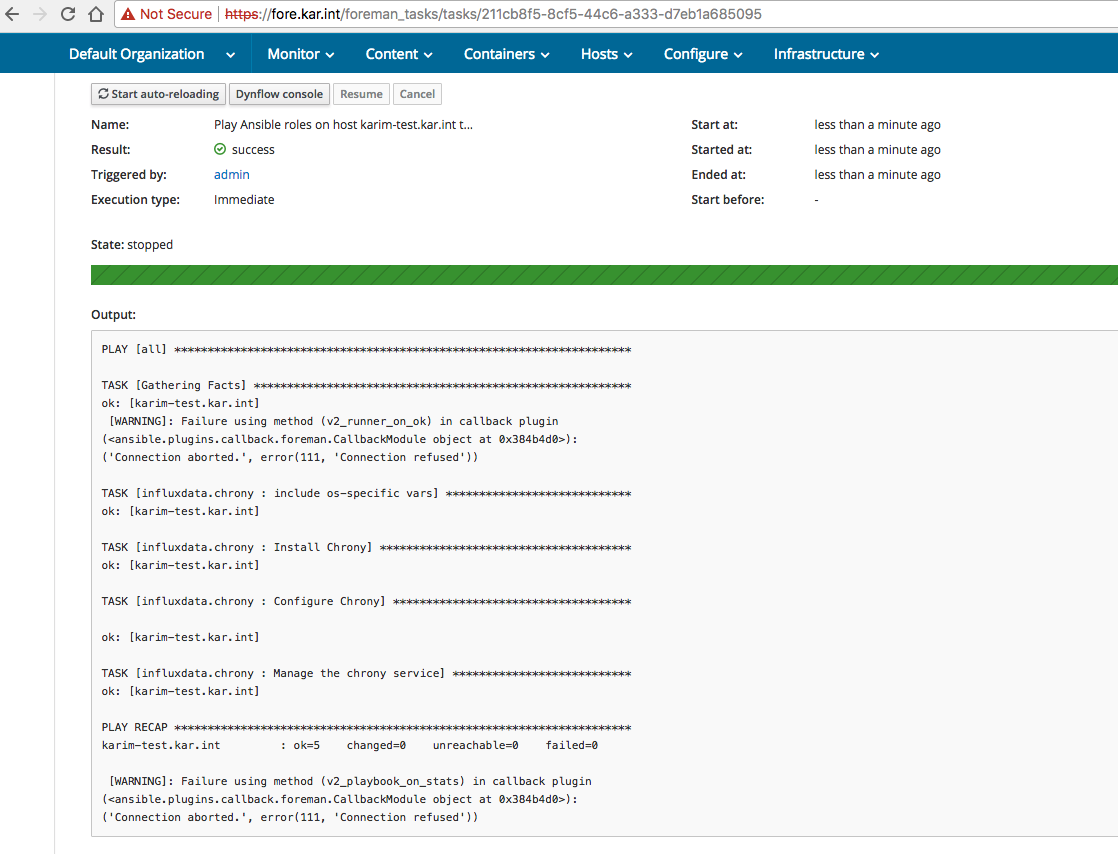
And after that the ansible role apply looked pretty good: