ESXi Patch for HeartBleed
I decided to apply the heartbleed patch on my ESXi host, there were some concerns and confusion with the latest NFS issue and 5.5GA versus 5.5U1. There is a lot of good information in VMware KB 2076665. But I actually liked the summary from this VMware blogs page:
Stated simply, if you are…
- Using NFS storage
- Concerned about patching to Update 1 due to change control
- Not already running ESXi 5.5 Update 1 (build-1623387)
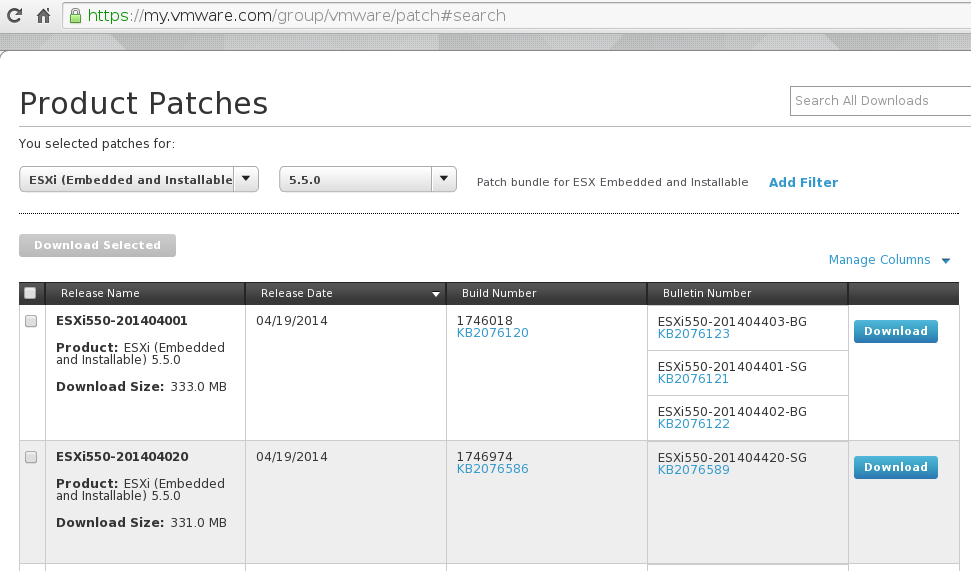
… then you should patch your install for the Heartbleed issue and at the same time stay at ESX 5.5 by applying Patch Release ESXi550-201404020, and not ESXi550-201404001.
I was using NFS with 5.5U1 but for only ISOs not actually running VMs and I didn’t see any NFS disconnects. Here is my current ESXi version:
~ # vmware -lv
VMware ESXi 5.5.0 build-1623387
VMware ESXi 5.5.0 Update 1
And here is the profile applied to the host
~ # esxcli software  profile get
(Updated) ESXi-5.5.0-1623387-standard
   Name: (Updated) ESXi-5.5.0-1623387-standard
   Vendor: macm.local.com
   Creation Time: 2014-04-06T01:38:34
   Modification Time: 2014-04-06T01:38:34
   Stateless Ready: True
   Description:
So I located and downloaded patch ESXi550-201404001:
Before applying the patch, I made sure no VMs are running on the Host:
~ # esxcli vm process list
~ #
Then go ahead and put the host into maintenance mode:
~ # esxcli system maintenanceMode set -e true
~ # esxcli system maintenanceMode get
Enabled
Now let’s go ahead and apply the patch:
~ # esxcli software vib update -d /vmfs/volumes/ISOS/vmware/ESXI/5_5/ESXi550-201404001.zip
Installation Result
   Message: The update completed successfully, but the system needs to be rebooted for the changes to be effective.
   Reboot Required: true
   VIBs Installed: VMware_bootbank_esx-base_5.5.0-1.16.1746018, VMware_bootbank_lsi-mr3_0.255.03.01-2vmw.550.1.16.1746018, VMware_locker_tools-light_5.5.0-1.16.1746018
   VIBs Removed: VMware_bootbank_esx-base_5.5.0-1.15.1623387, VMware_bootbank_lsi-mr3_0.255.03.01-1vmw.550.1.15.1623387, VMware_locker_tools-light_5.5.0-1.15.1623387
   VIBs Skipped: VMware_bootbank_ata-pata-amd_0.3.10-3vmw.550.0.0.1331820, VMware_bootbank_ata-pata-atiixp_0.4.6-4vmw.550.0.0.1331820,
If you have a quick internet connection you can install the patch directly with the following commands:
~ # esxcli network firewall ruleset set -e true -r httpClient
~ # esxcli software profile update -d https://hostupdate.vmware.com/software/VUM/PRODUCTION/main/vmw-depot-index.xml -p ESXi-5.5.0-20140404001-standard
Lastly let’s reboot the host:
~ # esxcli system shutdown reboot -r 'heartbleed'
~ #
Since I was running on a mac mini, I wanted to make sure Interrupt Remapping is still disabled:
~ # esxcli system settings kernel list -o iovDisableIR
Name          Type  Description                              Configured  Runtime  Default
------------  ----  ---------------------------------------  ----------  -------  -------
iovDisableIR  Bool  Disable Interrrupt Routing in the IOMMU  true        TRUE     FALSE
and I still had two NICs:
~ # esxcli network nic list
Name    PCI Device     Driver  Link  Speed  Duplex  MAC Address         MTU  Description
------  -------------  ------  ----  -----  ------  -----------------  ----  -------------------------------------------------------------
vmnic0  0000:001:00.0  tg3     Up     1000  Full    68:5b:35:c9:96:10  1500  Broadcom Corporation NetXtreme BCM57766 Gigabit Ethernet
vmnic1  0000:009:00.0  tg3     Up     1000  Full    68:5b:35:91:47:85  1500  Broadcom Corporation NetXtreme BCM57762 Gigabit Ethernet PCIe
Everything looked good. Now before we take the host out of maintenance mode, let’s go ahead and get new SSL certs in place. The instructions for that are laid out in the same KB. First let’s backup the existing certs:
~ # mkdir /vmfs/volumes/backups/certs
~ # ls -l /etc/vmware/ssl/
total 8
-rw-r--r--    1 root     root          1436 Jun  1 17:46 rui.crt
-r--------    1 root     root          1704 Jun  1 17:46 rui.key
-rw-r--r-T    1 root     root             0 Apr 15 09:31 vsanvp_castore.pem
~ # mv /etc/vmware/ssl/rui.* /vmfs/volumes/backups/certs/.
Next let’s generate new ones:
~ # /sbin/generate-certificates
WARNING: can't open config file: /usr/ssl/openssl.cnf
~ # ls -l /etc/vmware/ssl/
total 8
-rw-r--r--    1 root     root          1403 Jun  1 17:55 rui.crt
-r--------    1 root     root          1704 Jun  1 17:55 rui.key
-rw-r--r-T    1 root     root             0 Apr 15 09:31 vsanvp_castore.pem
That WARNING in the first command is okay and can be safely ignored. Lastly apply the sticky bit to the new certs:
~ # chmod +t /etc/vmware/ssl/rui.*
~ # ls -l /etc/vmware/ssl/
total 8
-rw-r--r-T    1 root     root          1403 Jun  1 17:55 rui.crt
-r-------T    1 root     root          1704 Jun  1 17:55 rui.key
-rw-r--r-T    1 root     root             0 Apr 15 09:31 vsanvp_castore.pem
At this point you can either restart the management services or just reboot the host. I was already in maintenance mode so I just rebooted the host:
~ # esxcli system shutdown reboot -r 'new certs'
~ #
Then the last thing we have to do is reset the root password. So after the host is back up, relogin with SSH and run the following to set the new password for root:
~ # passwd root
Changing password for root

You can now choose the new password or passphrase.

A valid password should be a mix of upper and lower case letters,
digits, and other characters.  You can use a 7 character long
password with characters from at least 3 of these 4 classes, or
a 6 character long password containing characters from all the
classes.  An upper case letter that begins the password and a
digit that ends it do not count towards the number of character
classes used.

A passphrase should be of at least 3 words, 8 to 40 characters
long, and contain enough different characters.

Alternatively, if noone else can see your terminal now, you can
pick this as your password: "oynpx+rne*fznyy".

Enter new password:
After that you should be all set. Take the host out of maintenance mode and power on your VMs:
~ # esxcli system maintenanceMode set -e false
~ # esxcli system maintenanceMode get
Disabled

~ # vim-cmd vmsvc/getallvms
Vmid    Name                 File                      Guest OS          Version   Annotation
1      VM1      [datastore1] VM1/VM1.vmx           rhel6_64Guest           vmx-08
2      VM2      [datastore1] VM2/VM2.vmx           windows7Server64Guest   vmx-08

~ # vim-cmd vmsvc/power.on 2
Powering on VM:
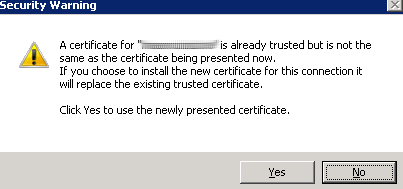
If you connect back to the ESXi host with the vSphere Client it will give you a warning about the SSL certificate for the ESXi host: