Install ChromeOS Kernel 3.8 on Samsung Chromebook
I was running Arch Linux on the ARM based Samsung Chromebook Snow Model (here are the steps I took to install Arch Linux on the Chromebook) and I realized that the kernel was never updating. I was on version 3.4 and it was actually working out just fine. I just wanted to see what it would take to install a later kernel.
ChromeOS Kernel 3.8
I ran into 3 sites that went over the process pretty well:
- Samsung arm Chromebook kernel (XE303C12 Snow)
- Samsung Chromebook XE303C12/Installing Linux
- Building and installing a custom kernel for Samsung Arm Chromebook Fedora 18
You will notice there are two approaches to installing the kernel:
- To sign the kernel and to dd the kernel into the Kernel partion
- Using Nv-Uboot just copy the file to /boot
Since I followed the instructions to install Arch Linux I already had Nv-Uboot installed so I took the second approach.
Mainline Kernel on Samsung Chromebook
At the time of writing this post the lastest kernel is 3.17 but the mainline kernel doesn’t support some of the hardware yet (like audio). I also found a couple of sites which talked about compiling the mainline kernel for the Samsung Chromebook:
- Booted mainline kernel on Chromebook
- booting-3.11kernel
- Using an Upstream Kernel on Chrome OS
- ARM Chromebook/Mainline Linux kernel
The latest link provides instructions on how to compile the latest kernel (3.13) and has support for most devices but still lacks support for audio and the camera. The instructions to install the mainline kernel are very similar, you just have to make sure you install nv-uboot that has simple frame buffer support. Both nv-uboot versions are available at [https://wiki.debian.org/InstallingDebianOn/Samsung/ARMChromebook). Since I wasn’t going to run the mainline kernel, I didn’t have to worry about the nv-uboot version. Just for reference here are the commands to install the different versions of nv-uboot:
# without FB support
wget -O - http://commondatastorage.googleapis.com/chromeos-localmirror/distfiles/nv_uboot-snow.kpart.bz2 | bunzip2 > nv_uboot.kpart
dd if=nv_uboot.kpart of=/dev/mmcblk1p1

# with FB support
wget -O - http://commondatastorage.googleapis.com/chromeos-localmirror/distfiles/nv_uboot-snow-simplefb.kpart.bz2 | bunzip2 > nv_uboot.kpart
dd if=nv_uboot.kpart of=/dev/mmcblk1p1
After nv-uboot with FB enabled is installed you can use the steps from above sites to install the mainline kernel, but of course sounds won’t work. I actually gave this a try just to see what happens and during boot you will see the Linux Tux:
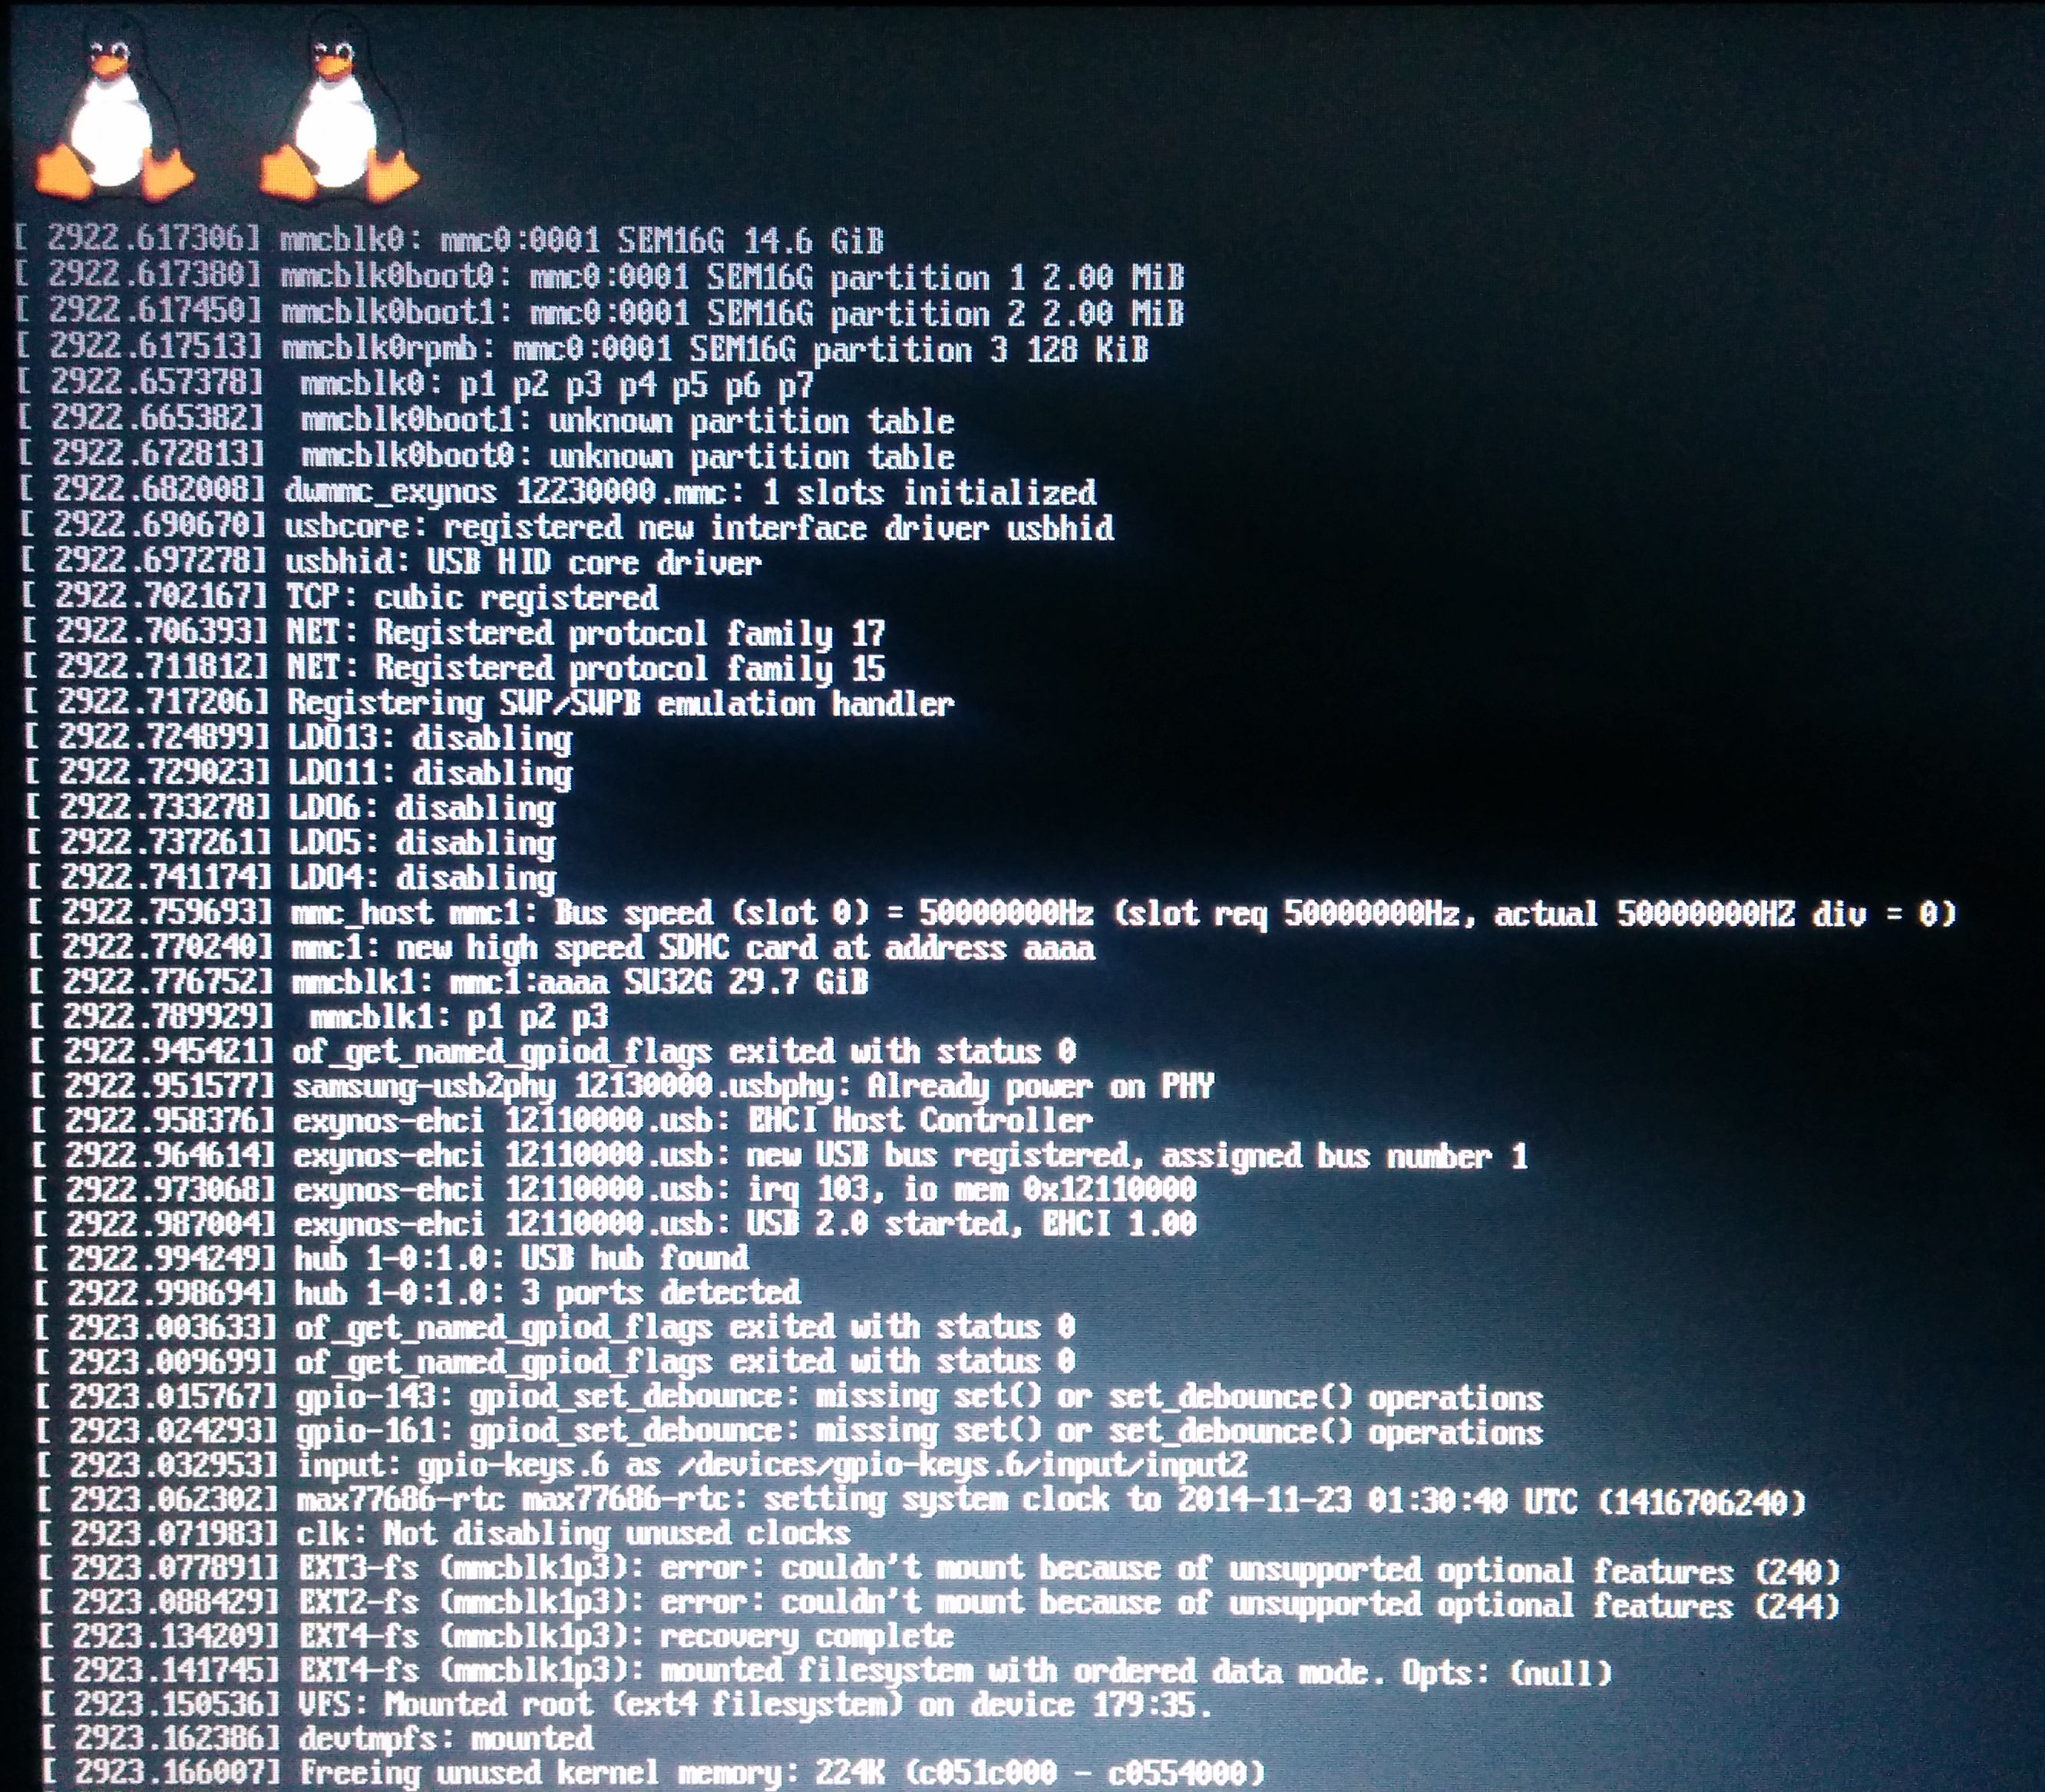
But it was pretty slow to boot and some of the components didn’t work well.
Compiling the ChromeOS Kernel
Again since the ChromeOS kernel provides better hardware support I decided to go down this path. First let’s get the source code:
elatov@crbook:~$git clone https://chromium.googlesource.com/chromiumos/third_party/kernel.git -b chromeos-3.8 --depth 1 chromeos
After that’s done let’s generate the config for the kernel compile:
elatov@crbook:~$cd chromeos
elatov@crbook:~/chromeos$./chromeos/scripts/prepareconfig chromeos-exynos5
Now let’s sure all the configurations match the current kernel options:
elatov@crbook:~/chromeos$time make oldconfig
Lastly let’s go ahead and do the compile:
elatov@crbook:~/chromeos$time make -j 3 uImage
...
...
 SHIPPED arch/arm/boot/compressed/lib1funcs.S
  SHIPPED arch/arm/boot/compressed/ashldi3.S
  AS      arch/arm/boot/compressed/lib1funcs.o
  AS      arch/arm/boot/compressed/ashldi3.o
  AS      arch/arm/boot/compressed/piggy.gzip.o
  LD      arch/arm/boot/compressed/vmlinux
  OBJCOPY arch/arm/boot/zImage
  Kernel: arch/arm/boot/zImage is ready
  UIMAGE  arch/arm/boot/uImage
Image Name:   Linux-3.8.11
Created:      Sat Nov 15 22:14:30 2014
Image Type:   ARM Linux Kernel Image (uncompressed)
Data Size:    3854232 Bytes = 3763.90 kB = 3.68 MB
Load Address: 40008000
Entry Point:  40008000
  Image arch/arm/boot/uImage is ready

real   15m45.719s
user   25m43.955s
sys    2m35.610s
You will notice it toook about 40 minutes to build the kernel image file. Now let’s build the modules:
elatov@crbook:~/chromeos$time make -j 3 modules
..
..
  LD [M]  sound/core/seq/snd-seq.ko
  LD [M]  sound/core/snd-hrtimer.ko
  LD [M]  sound/core/snd-hwdep.ko
  LD [M]  sound/core/snd-rawmidi.ko
  LD [M]  sound/usb/snd-usb-audio.ko
  LD [M]  sound/usb/snd-usbmidi-lib.ko

real    6m37.689s
user    10m44.965s
sys     1m11.755s
And now let’s install the modules:
elatov@crbook:~/chromeos$time sudo make modules_install
  INSTALL sound/core/snd-hwdep.ko
  INSTALL sound/core/snd-rawmidi.ko
  INSTALL sound/usb/snd-usb-audio.ko
  INSTALL sound/usb/snd-usbmidi-lib.ko
  DEPMOD  3.8.11

real    0m9.016s
user    0m1.180s
sys     0m1.360s
After that you will see the modules under /lib/modules:
elatov@crbook:~$ls /lib/modules/3.8.11/kernel/
crypto  drivers  fs  kernel  lib  net  sound
Now let’s build the DTBs (Device Tree Blob) files:
elatov@crbook:~/chromeos$time make dtbs
  DTC     arch/arm/boot/dts/exynos4210-origen.dtb
  DTC     arch/arm/boot/dts/exynos4210-smdkv310.dtb
  DTC     arch/arm/boot/dts/exynos4210-trats.dtb
  DTC     arch/arm/boot/dts/exynos5250-skate.dtb
  DTC     arch/arm/boot/dts/exynos4412-smdk4412.dtb
  DTC     arch/arm/boot/dts/exynos5250-smdk5250.dtb
  DTC     arch/arm/boot/dts/exynos5250-snow-rev4.dtb
  DTC     arch/arm/boot/dts/exynos5250-snow-rev5.dtb
  DTC     arch/arm/boot/dts/exynos5250-spring.dtb
  DTC     arch/arm/boot/dts/exynos5420-peach-kirby.dtb
  DTC     arch/arm/boot/dts/exynos5420-peach-pit-rev3_5.dtb
  DTC     arch/arm/boot/dts/exynos5420-peach-pit-rev4.dtb
  DTC     arch/arm/boot/dts/exynos5420-peach-pit.dtb
  DTC     arch/arm/boot/dts/exynos5420-smdk5420.dtb
  DTC     arch/arm/boot/dts/exynos5420-smdk5420-evt0.dtb
  DTC     arch/arm/boot/dts/exynos5422-peach-pi.dtb
  DTC     arch/arm/boot/dts/exynos5440-ssdk5440.dtb

real    0m2.590s
user    0m1.015s
sys     0m0.615s
Just for reference if you are planning to restart the compile, or if you made some modifications to the code it’s always a good to clean the previous build files, this is accompished by running the following:
elatov@crbook:~/chromeos$make mrproper
Booting with Nv-Uboot
With Nv-Uboot we actually have two options for booting. The first is to create an FIT (Flattened Image Tree) Kernel. The format is described in detail in Flattened Image Trees: A powerful kernel image format from Texas Instruments. Currently my Arch Linux is actually using this format:
elatov@crbook:$mkimage -l /boot/vmlinux.uimg
FIT description: Chrome OS kernel image with one or more FDT blobs
Created:         Sun May 25 18:59:10 2014
 Image 0 (kernel@1)
  Description:  kernel
  Created:      Sun May 25 18:59:10 2014
  Type:         Kernel Image (no loading done)
  Compression:  uncompressed
  Data Size:    3964888 Bytes = 3871.96 kB = 3.78 MB
 Image 1 (fdt@1)
  Description:  exynos5250-snow-rev4.dtb
  Created:      Sun May 25 18:59:10 2014
  Type:         Flat Device Tree
  Compression:  uncompressed
  Data Size:    27423 Bytes = 26.78 kB = 0.03 MB
  Architecture: ARM
  Hash algo:    sha1
  Hash value:   a46690c0a9fb4e77b1dc9c6876fc93be4c707891
 Image 2 (fdt@2)
  Description:  exynos5250-spring.dtb
  Created:      Sun May 25 18:59:10 2014
  Type:         Flat Device Tree
  Compression:  uncompressed
  Data Size:    30015 Bytes = 29.31 kB = 0.03 MB
  Architecture: ARM
  Hash algo:    sha1
  Hash value:   11b0a8d484b43bee73f105544e49c2051af728b9
 Image 3 (fdt@3)
  Description:  exynos5250-snow-rev5.dtb
  Created:      Sun May 25 18:59:10 2014
  Type:         Flat Device Tree
  Compression:  uncompressed
  Data Size:    27377 Bytes = 26.74 kB = 0.03 MB
  Architecture: ARM
  Hash algo:    sha1
  Hash value:   538ca50a67068141466c2b3be91e0fc124bde3ee
 Default Configuration: 'conf@1'
 Configuration 0 (conf@1)
  Description:  unavailable
  Kernel:       kernel@1
  FDT:          fdt@1
 Configuration 1 (conf@2)
  Description:  unavailable
  Kernel:       kernel@1
  FDT:          fdt@2
 Configuration 2 (conf@3)
  Description:  unavailable
  Kernel:       kernel@1
  FDT:          fdt@3
This format includes both the Kernel Image and the DTB file and they have to match. To create the FIT image we first have to create a descriptor file and then we can use the mkimage utliity to build the image. Here is how my descriptor file looked like:
elatov@crbook:~/chromeos$cat arch/arm/boot/kernel.its
/dts-v1/;

/ {
	description = "Chrome OS kernel image with one or more FDT blobs";
	#address-cells = <1>;
	images {
		kernel@1{
			description = "kernel";
			data = /incbin/("zImage");
			type = "kernel_noload";
			arch = "arm";
			os = "linux";
			compression = "none";
			load = <0>;
			entry = <0>;
		};
		fdt@1{
			description = "exynos5250-snow-rev4.dtb";
			data = /incbin/("dts/exynos5250-snow-rev4.dtb");
			type = "flat_dt";
			arch = "arm";
			compression = "none";
			hash@1{
				algo = "sha1";
			};
		};
	};
	configurations {
		default = "conf@1";
		conf@1{
			kernel = "kernel@1";
			fdt = "fdt@1";
		};
	};
};
Notice that we use the zImage file and not the uImage file.
When I tried to run mkimage to build the image, I initially recieved the following error:
elatov@crbook:~/chromeos$mkimage -f arch/arm/boot/kernel.its vmlinux.uimg
sh: dtc: command not found
mkimage: Can't read vmlinux.uimg.tmp: Invalid argument
To fix that I installed dtc
elatov@crbook:~$sudo pacman -S dtc
Then to build the FIT image I re-ran the command and it worked out:
elatov@crbook:~/chromeos/arch/arm/boot$mkimage -f kernel.its vmlinux.uimg
FIT description: Chrome OS kernel image with one or more FDT blobs
Created:         Sun Nov 16 13:17:49 2014
 Image 0 (kernel@1)
  Description:  kernel
  Created:      Sun Nov 16 13:17:49 2014
  Type:         Kernel Image (no loading done)
  Compression:  uncompressed
  Data Size:    4065400 Bytes = 3970.12 kB = 3.88 MB
 Image 1 (fdt@1)
  Description:  exynos5250-snow-rev4.dtb
  Created:      Sun Nov 16 13:17:49 2014
  Type:         Flat Device Tree
  Compression:  uncompressed
  Data Size:    46035 Bytes = 44.96 kB = 0.04 MB
  Architecture: ARM
  Hash algo:    sha1
  Hash value:   42e8d34755e85ec939465a75041de9ae4cdad1d0
 Default Configuration: 'conf@1'
 Configuration 0 (conf@1)
  Description:  unavailable
  Kernel:       kernel@1
  FDT:          fdt@1
Then finally I can just backup the original FIT Kernel Image and copy the new one into place:
elatov@crbook:~/chromeos$sudo cp /boot/vmlinux.uimg /boot/vmlinux.uimg.orig
elatov@crbook:~/chromeos$sudo cp arch/arm/boot/vmlinux.uimg /boot/vmlinux.uimg
Then after rebooting the new 3.8 kernel booted up.
Building NFS and AutoFS Kernel Modules
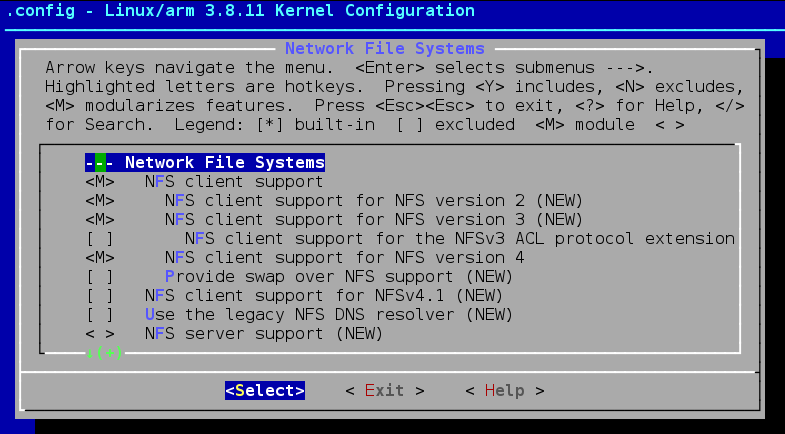
In my previous version of Arch Linux I was actually using NFS and AutoFS, but those modules are not automatically enabled for the Samsung Chromebook. So let’s build those, go back to the source code and run make menuconfig and under File Systems Enable AutoFS and Network File Systems:

Then go into Network File Systems and enable the desired versions:
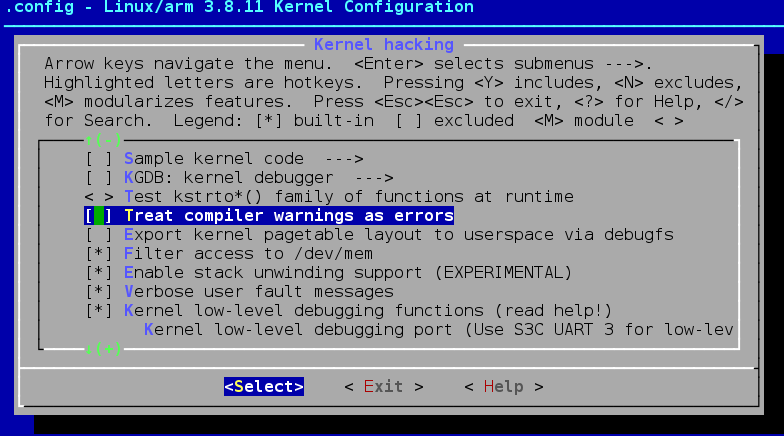
Then rebuild just the modules, by running make -j 3 modules, at first I receieved the following warning/error:
net/sunrpc/svc.c: In function ‘svc_printk’:
net/sunrpc/svc.c:1041:8: error: unused variable ‘buf’ [-Werror=unused-variable]
  char  buf[RPC_MAX_ADDRBUFLEN];
		^
cc1: all warnings being treated as errors
make[2]: *** [net/sunrpc/svc.o] Error 1
make[1]: *** [net/sunrpc] Error 2
make[1]: *** Waiting for unfinished jobs....
So I went back into make menuconfig and under Kernel Hacking, I disabled the option to treat warning as errors:
Then cleaning the source:
elatov@crbook:~/chromeos$cp .config .config-good
elatov@crbook:~/chromeos$make mrproper
   CLEAN   .
  CLEAN   arch/arm/kernel
  CLEAN   kernel
  CLEAN   arch/arm/boot/compressed
  CLEAN   arch/arm/boot
  CLEAN   .tmp_versions
  CLEAN   scripts/basic
  CLEAN   scripts/dtc
  CLEAN   scripts/kconfig
  CLEAN   scripts/mod
  CLEAN   scripts
  CLEAN   include/config include/generated arch/arm/include/generated
  CLEAN   .config .config.old include/generated/uapi/linux/version.h
and rebuilding the modules:
elatov@crbook:~/chromeos$cp .config-good .config
elatov@crbook:~/chromeos$time make -j 3 modules
  LD [M]  drivers/staging/iio/light/isl29018.ko
  LD [M]  fs/nfs/blocklayout/blocklayoutdriver.ko
  LD [M]  kernel/configs.ko
  LD [M]  fs/nfs/nfs_layout_nfsv41_files.ko
  LD [M]  net/bluetooth/bluetooth.ko
  LD [M]  net/wireless/cfg80211.ko

real    2m0.212s
user    2m57.095s
sys 0m21.905s
Then reinstalling the modules:
elatov@crbook:~/chromeos$time sudo make -j 3 modules_install
  INSTALL drivers/bluetooth/btmrvl.ko
  INSTALL drivers/bluetooth/btmrvl_sdio.ko
  INSTALL drivers/input/joydev.ko
  INSTALL drivers/media/v4l2-core/videobuf2-vmalloc.ko
  INSTALL drivers/media/usb/uvc/uvcvideo.ko
  INSTALL drivers/net/wireless/mwifiex/mwifiex.ko
  INSTALL drivers/net/wireless/mwifiex/mwifiex_sdio.ko
  INSTALL drivers/power/sbs-battery.ko
  INSTALL drivers/rtc/rtc-s3c.ko
  INSTALL drivers/staging/iio/light/isl29018.ko
  INSTALL fs/nfs/blocklayout/blocklayoutdriver.ko
  INSTALL fs/nfs/nfs_layout_nfsv41_files.ko
  INSTALL kernel/configs.ko
  INSTALL net/bluetooth/bluetooth.ko
  INSTALL net/wireless/cfg80211.ko
  DEPMOD  3.8.11

real    0m4.162s
user    0m0.605s
sys 0m0.610s
For good measure (even though I didn’t have to), I rebooted and then I saw the new modules loaded:
elatov@crbook:~$uname -a
Linux crbook.dnsd.me 3.8.11 #1 SMP Sat Nov 22 13:52:12 MST 2014 armv7l GNU/Linux
elatov@crbook:~$lsmod
Module                  Size  Used by
mwifiex_sdio           22648  0
mwifiex               162905  1 mwifiex_sdio
btmrvl_sdio            17424  0
btmrvl                 18081  1 btmrvl_sdio
bluetooth             271358  3 btmrvl,btmrvl_sdio
cfg80211              416240  1 mwifiex
isl29018               18268  0
sbs_battery            13002  0
joydev                 17227  0
rtc_s3c                13393  0
nfs                   128563  0
lockd                  74948  1 nfs
sunrpc                196525  2 nfs,lockd
autofs4                28213  2
and I was able to mount NFS shares.
Fixing Xorg
When I rebooted, X would fail to launch, to fix the issue I ended up grabbing chromium version of the armsoc driver. Luckily Arch Linux provided a couple of different versions:
elatov@crbook:~$pacman -Ss armsoc
alarm/xf86-video-armsoc-chromium 1:r233.4712450-1 [installed]

alarm/xf86-video-armsoc-git 1:219.f16b5c8-2

alarm/xf86-video-armsoc-odroid 237.3bdf799-1
and then I switched the Xorg config to use armsoc instead of fbdev:
elatov@crbook:~$grep armsoc /etc/X11/xorg.conf.d/30-monitor.conf  -B 1
#	Driver		"fbdev"
	Driver		"armsoc"
Then after another reboot X started up with out issues. I also noticed the backlight sysfs node changed to another location:
elatov@crbook:~$cat /sys/class/backlight/backlight.12/brightness
1000
Changing NV-Uboot Boot process
In the above example I built an FIT boot image and booted from that. Another approach to booting is to specify the Kernel Image along with the DTB (Device Tree Blob) in NV-Uboot and it will boot up. Honestly I am not sure which one is better, but I like to have the ability to specify a kernel and to try different DTB files just for testing. With specifying the Kernel File and the DTB file, I will like it gives me more control.
Before we start making changes, let’s go ahead and check all the configuration for nv-uboot. Here is how my printenv looked like (this is inside u-boot):
SMDK5250 # printenv
baudrate=115200
bootargs=console=ttySAC3,115200
bootcmd=run non_verified_boot
bootdelay=0
bootdev_bootargs=
common_bootargs=cros_legacy console=ttySAC3,115200 earlyprintk
cros_bootfile=/boot/vmlinux.uimg
dev_extras=daisy
ext2_boot=run regen_ext2_bootargs; if ext2load ${devtype} ${devnum}:${rootpart} ${loadaddr} ${cros_bootfile}; then if test ${kernaddr} != ""; then echo "Using bundled kernel"; bootm ${kernaddr};fi; bootm ${loadaddr};fi
fdtaddr=bda3dc3c
initrd_high=0xffffffff
initrdroot_boot=run tftp_setup; run regen_initrdroot_bootargs; bootp; if tftpboot ${rootaddr} ${tftpserverip}:${tftprootpath} && tftpboot ${loadaddr} ${tftpserverip}:${tftpkernelpath}; then bootm ${loadaddr} ${rootaddr}; else echo 'ERROR: Could not load root/kernel from TFTP'; exit; fi
loadaddr=0x42000000
mmc0_boot=setenv devnum 0; run mmc_boot
mmc0_tftpboot=setenv devnum 0; run mmc_setup; run tftp_ext2_boot
mmc1_boot=setenv devnum 1; run mmc_boot
mmc_boot=run mmc_setup; run run_disk_boot_script;run ext2_boot
mmc_setup=mmc dev ${devnum}; mmc rescan ${devnum}; setenv devtype mmc; setenv devname mmcblk${devnum}p
net_boot=if test ${ethact} != ""; then if test ${tftpserverip} != "0.0.0.0"; then run initrdroot_boot; if test ${nfsserverip} != "0.0.0.0"; then run nfsroot_boot; fi; fi; fi
nfsroot_boot=run tftp_setup; run regen_nfsroot_bootargs; bootp; if tftpboot ${loadaddr} ${tftpserverip}:${tftpkernelpath}; then bootm ${loadaddr}; else echo 'ERROR: Could not load kernel from TFTP'; exit; fi
nfsserverip=0.0.0.0
non_verified_boot=usb start; run net_boot; run usb_boot; run mmc1_boot; run mmc0_boot
regen_all=setenv bootargs ${common_bootargs} ${dev_extras} ${extra_bootargs} ${bootdev_bootargs}
regen_ext2_bootargs=setenv bootdev_bootargs root=/dev/${devname}${rootpart} rootwait ro; run regen_all
regen_initrdroot_bootargs=setenv bootdev_bootargs rw root=/dev/ram0 ramdisk_size=512000 cros_netboot; run regen_all
regen_nfsroot_bootargs=setenv bootdev_bootargs dev=/dev/nfs4 rw nfsroot=${nfsserverip}:${rootpath} ip=dhcp noinitrd; run regen_all
rootaddr=0x44000000
rootpart=3
run_disk_boot_script=if fatload ${devtype} ${devnum}:${script_part} ${loadaddr} ${script_img}; then source ${loadaddr}; fi
script_img=/u-boot/boot.scr.uimg
script_part=c
sd_to_spi=echo Flashing U-Boot from SD card to SPI flash; if mmc dev 1 && mmc rescan && mmc read 40008000 1 1000 && sf probe 1:0 && sf update 40008000 0 80000; then echo Flash completed; else echo Flash failed; fi
stderr=serial,lcd
stdin=serial,mkbp-keyb
stdout=serial,lcd
tftp_ext2_boot=run tftp_setup; run regen_ext2_bootargs; bootp; if tftpboot ${loadaddr} ${tftpserverip}:${tftpkernelpath}; then bootm ${loadaddr}; else echo 'ERROR: Could not load kernel from TFTP'; exit; fi
tftpserverip=0.0.0.0
tftp_setup=setenv tftpkernelpath /tftpboot/vmlinux.uimg; setenv tftprootpath /tftpboot/initrd.uimg; setenv rootpath /export/nfsroot; setenv autoload n
usb_boot=setenv devtype usb; setenv devnum 0; setenv devname sda; run run_disk_boot_script;run ext2_boot
We can see that no dtb file is utilized. There are good instructions on how to setup a nice env.txt file in your /boot partition in ARM Chromebook/U-Boot Environment. After it’s in place, you can modify that file and just type in run import_sd_env and it will import your changes (this way you don’t have to type the commands one at a time on the u-boot prompt.) Here is how my file looked like, I made some minor modifications from the above page:
elatov@crbook:~$cat /boot/env.txt
boot_part=2
root_part=3
script_part=c

loadaddr=0x42000000
dtaddr=0x43000000
scriptaddr=0x44000000
initrdaddr=0x45000000

env_path=/env.txt
kernel_path=/vmlinux.uimg
dtb_path=/exynos5250-snow.dtb

common_bootargs=cros_legacy console=ttySAC3,115200 console=tty1 earlyprintk clk_ignore_unused
dev_extras=daisy

bootdelay=3
bootcmd=run usb_boot; run mmc1_boot; run mmc0_boot

load_env_txt=ext2load ${dev_type} ${dev_num}:${boot_part} ${loadaddr} ${env_path}; run import_env_txt

import_env_txt=env import -t ${loadaddr}

import_env=setenv dev_num 0; run mmc_setup; run load_env_txt
import_sd_env=setenv dev_num 1; run mmc_setup; run load_env_txt
import_usb_env=run usb_setup; run load_env_txt

regen_all=setenv bootargs ${common_bootargs} ${dev_extras} ${extra_bootargs} ${dev_bootargs}
regen_bootargs=setenv dev_bootargs root=/dev/${dev_name}${root_part} rootwait rw; run regen_all

load_kernel=ext2load ${dev_type} ${dev_num}:${boot_part} ${loadaddr} ${kernel_path}
load_dtb=ext2load ${dev_type} ${dev_num}:${boot_part} ${dtaddr} ${dtb_path}

boot_kernel=run regen_bootargs; run load_kernel; run load_dtb; if run load_initrd; then bootm ${loadaddr} ${initrdaddr} ${dtaddr}; else bootm ${loadaddr} - ${dtaddr}; fi

load_script=fatload ${dev_type} ${dev_num}:${script_part} ${scriptaddr} ${script_path} || ext2load ${dev_type} ${dev_num}:${boot_part} ${scriptaddr} ${script_path}

boot_script=if run load_script; then source ${scriptaddr} fi;

boot=run boot_script; run boot_kernel

mmc_setup=mmc dev ${dev_num}; mmc rescan; setenv dev_type mmc; setenv dev_name mmcblk${dev_num}p
mmc_boot=run mmc_setup; run boot
mmc0_boot=setenv dev_num 0; run mmc_boot
mmc1_boot=setenv dev_num 1; run mmc_boot

usb_setup=usb start; setenv dev_type usb; setenv dev_num 0; setenv dev_name sda;
usb_boot=run usb_setup; run boot
After that’s in place, we can do the following to import the config for the initial setup. Reboot and type any key to disrupt the u-boot process and you will get to the u-boot prompt:
SMDK5250 #
Here is what I ran to import the env.txt file:
Model: Google Snow
In:  mkbp-keyb
Out: lcd
Err: lcd
Net: No Ethernet found
Hit any key to stop autoboot: 0
SMDK5250 # mmc dev 1
ERROR: v7_dcache_inval_range - stop address is not alliged - 0xbda3d548
mmc_init err 0, time 43906
mmc1 is current device
SMDK5250 # ext2load mmc 1:2 0x42000000 /env.txt
Loading file "/env.txt" from mmc device 1:2 (Kernel)
1832 bytes read
SMDK5250 # env import -t 0x42000000
## Info: input data size = 1833 = 0x729
SMDK5250 #
Then you can run saveenv and those changes will be pushed to Flash.
SMDK5250 # saveenv
Saving Environment to SPI Flash
SF: Detected W25Q32 with page size 4KIB, total MiB
Erasing SPI flash... Writing to SPI flash ... done
Now after that’s in place, you can make changes to the env.txt file under /boot and then do the following to import them, if you are planning to test with different u-boot settings, this will definitely help out:
Model: Google Snow
In:  mkbp-keyb
Out: lcd
Err: lcd
Net: No Ethernet found
Hit any key to stop autoboot: 0
MDK5250 # printenv common_bootargs
common_bootargs=cros_legacy console=ttySAC3,115200 console=tty1 debug earlyprintk clk_ignore_unused
MDK5250 # run import_sd_env
ERROR: v7_dcache_inval_range - stop address is not alliged - 0xbda3d288
mmc_init err 0, time 41864
mmc1 is current device
ERROR: v7_dcache_inval_range - stop address is not alliged - 0xbda3d348
mmc_init err 0, time 41901
Loading file "/env.txt" from mmc device 1:2 (Kernel)
1808 bytes read
## Info: input data size = 16008 = 0x3E88
MDK5250 # printenv common_bootargs
common_bootargs=cros_legacy console=ttySAC3,115200 console=tty1 earlyprintk clk_ignore_unused
SMDK5250 # saveenv
Saving Environment to SPI Flash
SF: Detected W25Q32 with page size 4KIB, total MiB
Erasing SPI flash... Writing to SPI flash ... done
We can see that the debug option is gone now.
Booting with uImage and DTB File
After the above setup is in place for** u-boot** we now don’t have to create the FIT image kernel files. We just build the kernel with the following commands:
$ git clone https://chromium.googlesource.com/chromiumos/third_party/kernel.git -b chromeos-3.8 --depth 1 chromeos
$ cd chromeos
$ ./chromeos/scripts/prepareconfig chromeos-exynos5
$ make oldconfig
$ make -j 3 uImage
$ make -j 3 modules
$ sudo make modules_install
$ make dtbs
$ sudo cp arch/arm/boot/uImage /boot/vmlinux.uimg
$ sudo cp arch/arm/boot/dts/exynos5250-snow-rev4.dtb /boot/exynos5250-snow.dtb
Now if you reboot and if all is well, you will boot into the new kernel. If you are setting up the u-boot for the first time, I would build the kernel and put the files into place and then import the new env.txt into u-boot after the kernel files are already in place.
Cross Compiling the ARM Kernel
I actually had a Dell laptop which was a little bit more powerful (and it was running Fedora 20) than the chromebook, so I used that for compiliing the kernel for my chromebook. First I installed the correct compiler:
$ sudo yum install gcc-arm-linux-gnu
Then I grabbed the source again:
$ git clone https://chromium.googlesource.com/chromiumos/third_party/kernel.git -b chromeos-3.8 --depth 1 chromeos
$ cd chromeos
Then after that I just added the ARCH and CROSS_COMPILE variables, like so:
./chromeos/scripts/prepareconfig chromeos-exynos5
CROSS_COMPILE=arm-linux-gnu- ARCH=arm make oldconfig
Before we can create the uImage file, we actually need the mkimage utility and that’s part of the uboot-tools package, so I installed that:
$ sudo yum install uboot-tools
And then I finally built the kernel:
time CROSS_COMPILE=arm-linux-gnu- ARCH=arm make -j 2 uImage
  Image arch/arm/boot/uImage is ready
real    5m50.150s
user    10m2.490s
sys 1m8.456s
We can see it took about 15 minutes (vs the 40 minutes on the chromebook), if you plan on testing different options, this will definitely save some time. Then to build the rest:
$ time CROSS_COMPILE=arm-linux-gnu- ARCH=arm make -j 2 modules
real    2m27.547s
user    4m12.984s
sys 0m30.599s
$ CROSS_COMPILE=arm-linux-gnu- ARCH=arm make -j 2 dtbs
You can even build the FIT Kernel image if you want:
$ mkimage -f arch/arm/boot/kernel.its vmlinux.uimg
For the modules you can specify a different location and then copy them over:
$ mkdir /tmp/other
$ CROSS_COMPILE=arm-linux-gnu- ARCH=arm INSTALL_MOD_PATH=/tmp/other make modules_install
and then you will see all the modules under the new location:
$ls /tmp/other/lib/modules/3.8.11/
build              modules.builtin      modules.devname  modules.symbols.bin
kernel             modules.builtin.bin  modules.order    source
modules.alias      modules.dep          modules.softdep
modules.alias.bin  modules.dep.bin      modules.symbols
just copy that into /lib/modules/3.8.11 on the destination machine.