Running Gentoo as a Guest in VirtualBox
So I decided to do a test install of gentoo just to remind myself how fun it is :)
Installing Gentoo
The process is definitely more involved then a regular Linux Distro install, but you get to learn a lot of things in the process. There are 3 good guides that helped me out:
Getting the Right Media
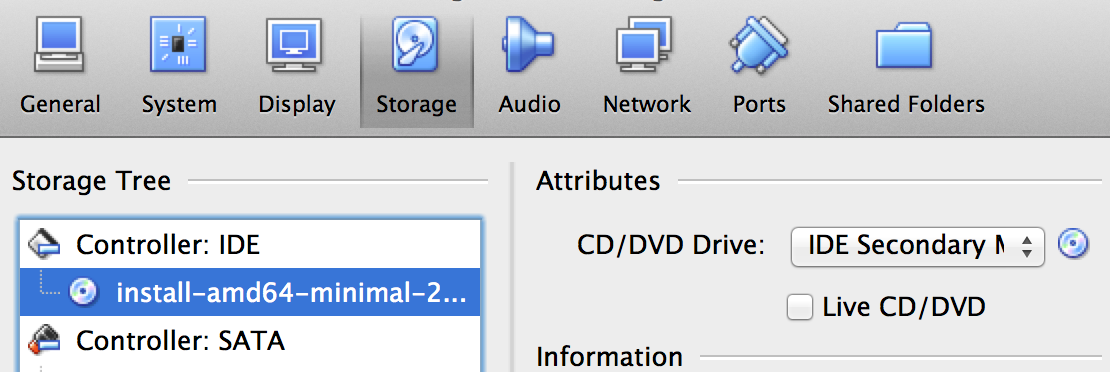
I was using a 64bit version so I grabbed the ISO. After that I created a VM called gentoo in Virtualbox and Virtualbox autodetected the OS to be gentoo and took care of the rest. I gave the VM 1GB of ram and 20GB of disk space (VirtualBox set the Disk controller to be SATA and that worked out okay). I then attached the downloaded ISO to the IDE Controller:
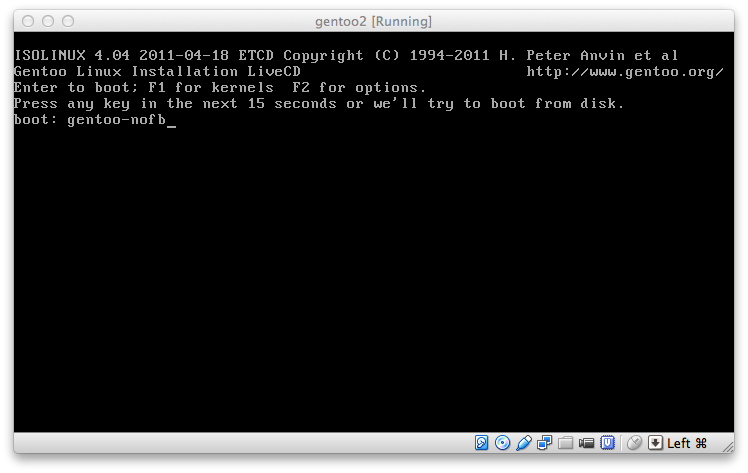
Then powering on the vm and typing in gentoo-nofb booted from the livecd:
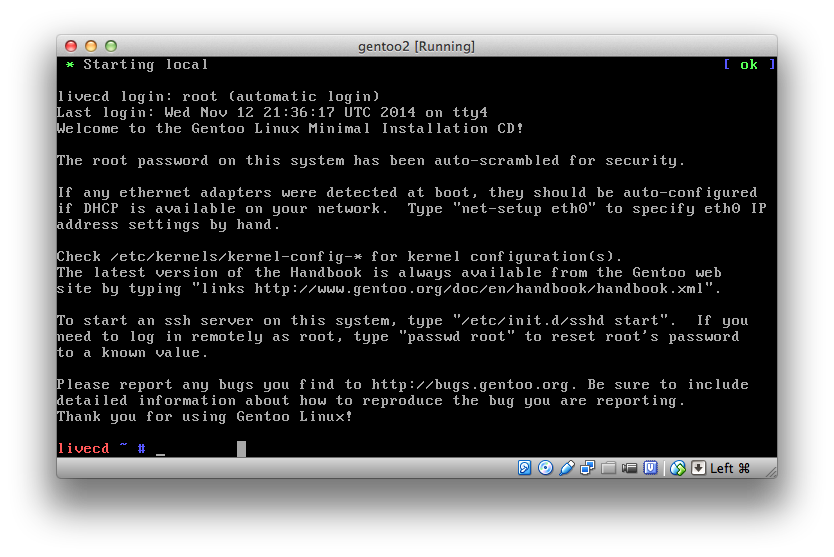
After the VM is booted I saw the following:
Enable SSH from the livecd
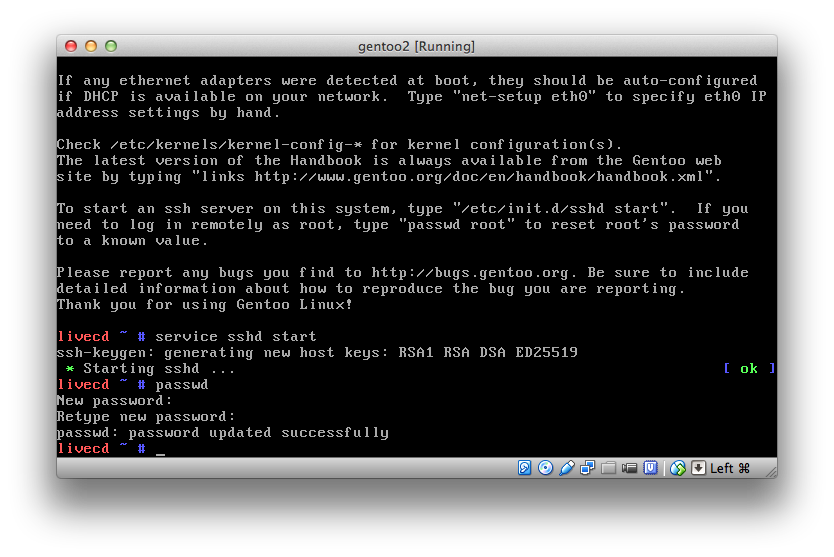
From here we can enable ssh just to make the install easier. So let’s enable ssh and set the password from the livecd:
Now from virtualbox let’s enable port forwarding so we can ssh from the host machine:
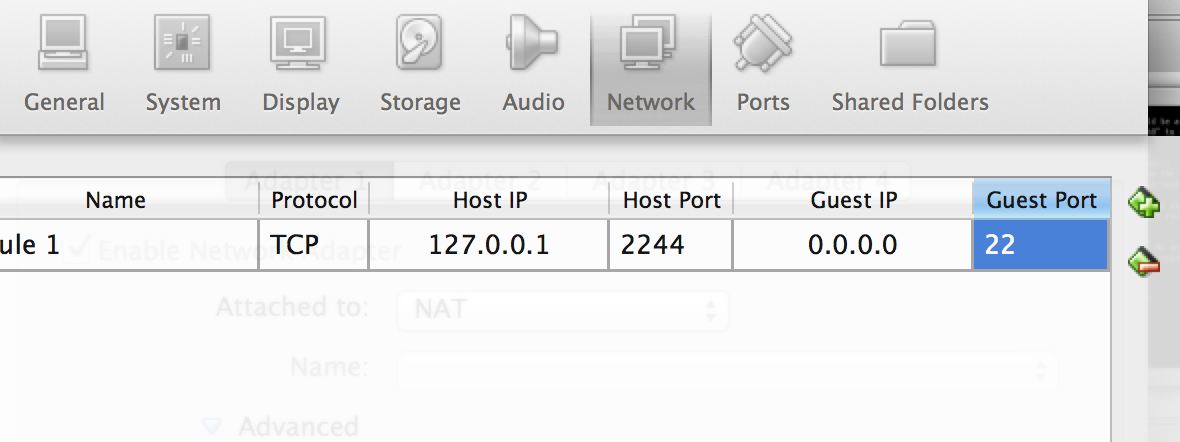
And then ssh from the host machine:
elatov@fed:~$ssh -p 2244 -l root localhost
The authenticity of host '[localhost]:2244 ([127.0.0.1]:2244)' can't be established.
ED25519 key fingerprint is dd:eb:77:76:99:88:ab:64:f4:26:2a:cb:2b:04:c6:11.
Are you sure you want to continue connecting (yes/no)? yes
Warning: Permanently added '[localhost]:2244' (ED25519) to the list of known hosts.
Password:
Welcome to the Gentoo Linux Minimal Installation CD!

The root password on this system has been auto-scrambled for security.

If any ethernet adapters were detected at boot, they should be auto-configured
if DHCP is available on your network.  Type "net-setup eth0" to specify eth0 IP
address settings by hand.

Check /etc/kernels/kernel-config-* for kernel configuration(s).
The latest version of the Handbook is always available from the Gentoo web
site by typing "links http://www.gentoo.org/doc/en/handbook/handbook.xml".

To start an ssh server on this system, type "/etc/init.d/sshd start".  If you
need to log in remotely as root, type "passwd root" to reset root's password
to a known value.

Please report any bugs you find to http://bugs.gentoo.org. Be sure to include
detailed information about how to reproduce the bug you are reporting.
Thank you for using Gentoo Linux!

livecd ~ #
Partition the Disk
Initially nothing is on the disk:
livecd ~ # fdisk -l /dev/sda

Disk /dev/sda: 20 GiB, 21474836480 bytes, 41943040 sectors
Units: sectors of 1 * 512 = 512 bytes
Sector size (logical/physical): 512 bytes / 512 bytes
I/O size (minimum/optimal): 512 bytes / 512 bytes
So let’s create a 200MB boot partition and the rest will be used for an LVM:
livecd ~ # fdisk /dev/sda

Welcome to fdisk (util-linux 2.24.1).
Changes will remain in memory only, until you decide to write them.
Be careful before using the write command.

Device does not contain a recognized partition table.

Created a new DOS disklabel with disk identifier 0xf2370f07.

Command (m for help): n

Partition type:
   p   primary (0 primary, 0 extended, 4 free)
   e   extended
Select (default p): p
Partition number (1-4, default 1):
First sector (2048-41943039, default 2048):
Last sector, +sectors or +size{K,M,G,T,P} (2048-41943039, default 41943039): +200M

Created a new partition 1 of type 'Linux' and of size 200 MiB.

Command (m for help): n

Partition type:
   p   primary (1 primary, 0 extended, 3 free)
   e   extended
Select (default p): p
Partition number (2-4, default 2):
First sector (411648-41943039, default 411648):
Last sector, +sectors or +size{K,M,G,T,P} (411648-41943039, default 41943039):

Created a new partition 2 of type 'Linux' and of size 19.8 GiB.

Command (m for help): t
Partition number (1,2, default 2): 2
Hex code (type L to list all codes): 8e

Changed type of partition 'Linux' to 'Linux LVM'.

Command (m for help): p
Disk /dev/sda: 20 GiB, 21474836480 bytes, 41943040 sectors
Units: sectors of 1 * 512 = 512 bytes
Sector size (logical/physical): 512 bytes / 512 bytes
I/O size (minimum/optimal): 512 bytes / 512 bytes
Disklabel type: dos
Disk identifier: 0xf2370f07

Device    Boot     Start       End   Blocks  Id System
/dev/sda1           2048    411647   204800  83 Linux
/dev/sda2         411648  41943039 20765696  8e Linux LVM

Command (m for help): w

The partition table has been altered.
Calling ioctl() to re-read partition table.
Syncing disks.

livecd ~ # fdisk -l /dev/sda

Disk /dev/sda: 20 GiB, 21474836480 bytes, 41943040 sectors
Units: sectors of 1 * 512 = 512 bytes
Sector size (logical/physical): 512 bytes / 512 bytes
I/O size (minimum/optimal): 512 bytes / 512 bytes
Disklabel type: dos
Disk identifier: 0xf2370f07

Device    Boot     Start       End   Blocks  Id System
/dev/sda1           2048    411647   204800  83 Linux
/dev/sda2         411648  41943039 20765696  8e Linux LVM
Now let’s create the logical volumes:
livecd ~ # vgscan
  WARNING: lvmetad is running but disabled. Restart lvmetad before enabling it!
  Reading all physical volumes.  This may take a while...
  No volume groups found
livecd ~ # pvcreate /dev/sda2
  WARNING: lvmetad is running but disabled. Restart lvmetad before enabling it!
  Physical volume "/dev/sda2" successfully created
livecd ~ # vgcreate vg /dev/sda2
  WARNING: lvmetad is running but disabled. Restart lvmetad before enabling it!
  Volume group "vg" successfully created
livecd ~ # lvcreate -L2G -n swap vg
  WARNING: lvmetad is running but disabled. Restart lvmetad before enabling it!
  Logical volume "swap" created
livecd ~ # lvcreate -l100%FREE -n root vg
  WARNING: lvmetad is running but disabled. Restart lvmetad before enabling it!
  Logical volume "root" created
livecd ~ # lvs
  WARNING: lvmetad is running but disabled. Restart lvmetad before enabling it!
  LV   VG   Attr       LSize  Pool Origin Data%  Meta%  Move Log
  root vg   -wi-a----- 17.80g
  swap vg   -wi-a-----  2.00g
Now let’s put appropriate filesystems on the logical volumes:
livecd ~ # mkfs.ext2 /dev/sda1
mke2fs 1.42.10 (18-May-2014)
Creating filesystem with 204800 1k blocks and 51200 inodes
Filesystem UUID: 7b6c019a-1509-4ee1-8858-24db713dbf48
Superblock backups stored on blocks:
	8193, 24577, 40961, 57345, 73729

Allocating group tables: done
Writing inode tables: done
Writing superblocks and filesystem accounting information: done

livecd ~ # mkfs.ext3 /dev/mapper/vg-root
mke2fs 1.42.10 (18-May-2014)
Creating filesystem with 4666368 4k blocks and 1166880 inodes
Filesystem UUID: 6a20c3ad-c00c-4cea-ac6a-c48d171e12b8
Superblock backups stored on blocks:
	32768, 98304, 163840, 229376, 294912, 819200, 884736, 1605632, 2654208,
	4096000

Allocating group tables: done
Writing inode tables: done
Creating journal (32768 blocks): done
Writing superblocks and filesystem accounting information: mdone

livecd ~ # mkswap /dev/mapper/vg-swap
Setting up swapspace version 1, size = 2097148 KiB
no label, UUID=40710598-2858-432b-9265-7a1b81412c26
The boot partition is ext2, cause we don’t need to journal it. Now let’s mount the file systems:
livecd ~ # swapon -p 1 /dev/mapper/vg-swap
livecd ~ # mount /dev/mapper/vg-root /mnt/gentoo/
livecd ~ # mkdir /mnt/gentoo/boot
livecd ~ # mount /dev/sda1 /mnt/gentoo/boot
Getting the Stage 3 files
From the gentoo mirrors I just grabbed the amd64 version:
livecd ~ # cd /mnt/gentoo
livecd gentoo # wget http://mirror.usu.edu/mirrors/gentoo/releases/amd64/current-iso/stage3-amd64-20141106.tar.bz2
--2014-11-12 21:56:08--  http://mirror.usu.edu/mirrors/gentoo/releases/amd64/current-iso/stage3-amd64-20141106.tar.bz2
Resolving mirror.usu.edu... 129.123.104.64
Connecting to mirror.usu.edu|129.123.104.64|:80... connected.
HTTP request sent, awaiting response... 200 OK
Length: 208643338 (199M) [application/x-bzip2]
Saving to: 'stage3-amd64-20141106.tar.bz2'

stage3-amd64-201411 100%[=====================>] 198.98M  4.70MB/s   in 47s

2014-11-12 21:56:56 (4.20 MB/s) - 'stage3-amd64-20141106.tar.bz2' saved [208643338/208643338]
livecd gentoo # time tar xjf stage3-amd64-20141106.tar.bz2

real	0m37.671s
user	0m18.770s
sys	0m17.120s
That should extract most of the directory structure:
livecd gentoo # ls
bin   etc   lib32       media  proc  sbin                           tmp
boot  home  lib64       mnt    root  stage3-amd64-20141106.tar.bz2  usr
dev   lib   lost+found  opt    run   sys                            var
Chrooting into the Stage 3 Environment
Now that we have all the files let’s change root into our install:
livecd gentoo # mount -t proc proc /mnt/gentoo/proc
livecd gentoo # mount --rbind /dev /mnt/gentoo/dev
livecd gentoo # mount --rbind /sys /mnt/gentoo/sys
livecd gentoo # cp -L /etc/resolv.conf /mnt/gentoo/etc/
livecd gentoo # chroot /mnt/gentoo /bin/bash
livecd / # source /etc/profile
The networking was all good so we can get the portage snapshot:
livecd / # ifconfig
enp0s3: flags=4163<UP,BROADCAST,RUNNING,MULTICAST>  mtu 1500
        inet 10.0.2.15  netmask 255.255.255.0  broadcast 10.0.2.255
        inet6 fe80::a00:27ff:fedc:6ca  prefixlen 64  scopeid 0x20<link>
        inet6 fe80::ae20:524f:177e:be86  prefixlen 64  scopeid 0x20<link>
        ether 08:00:27:dc:06:ca  txqueuelen 1000  (Ethernet)
        RX packets 540821  bytes 413337100 (394.1 MiB)
        RX errors 0  dropped 0  overruns 0  frame 0
        TX packets 249923  bytes 26854299 (25.6 MiB)
        TX errors 0  dropped 0 overruns 0  carrier 0  collisions 0

lo: flags=73<UP,LOOPBACK,RUNNING>  mtu 65536
        inet 127.0.0.1  netmask 255.0.0.0
        inet6 ::1  prefixlen 128  scopeid 0x10<host>
        loop  txqueuelen 0  (Local Loopback)
        RX packets 2  bytes 140 (140.0 B)
        RX errors 0  dropped 0  overruns 0  frame 0
        TX packets 2  bytes 140 (140.0 B)
        TX errors 0  dropped 0 overruns 0  carrier 0  collisions 0
livecd / # mkdir /usr/portage
livecd / # emerge-webrsync
!!! Repository 'x-portage' is missing masters attribute in '/usr/portage/metadata/layout.conf'
!!! Set 'masters = gentoo' in this file for future compatibility
Fetching most recent snapshot ...
Trying to retrieve 20141111 snapshot from http://distfiles.gentoo.org ...
Fetching file portage-20141111.tar.xz.md5sum ...
Fetching file portage-20141111.tar.xz.gpgsig ...
Fetching file portage-20141111.tar.xz ...
Checking digest ...
Getting snapshot timestamp ...
Syncing local tree ...

Number of files: 182833
Number of files transferred: 156585
Total file size: 335.80M bytes
Total transferred file size: 335.80M bytes
Literal data: 335.80M bytes
Matched data: 0 bytes
File list size: 4.66M
File list generation time: 0.001 seconds
File list transfer time: 0.000 seconds
Total bytes sent: 154.15M
Total bytes received: 3.08M

sent 154.15M bytes  received 3.08M bytes  1.65M bytes/sec
total size is 335.80M  speedup is 2.14
Cleaning up ...

Performing Global Updates
(Could take a couple of minutes if you have a lot of binary packages.)


 * IMPORTANT: 8 news items need reading for repository 'gentoo'.
 * Use eselect news to read news items.

livecd / #
Now let’s set the timezone:
livecd / # cp /usr/share/zoneinfo/America/Denver /etc/localtime
livecd / # echo "America/Denver" > /etc/timezone
livecd / # date
Wed Nov 12 15:07:10 MST 2014
You can change your OS profile at this stage, but I just left mine as is:
livecd / # eselect profile list
Available profile symlink targets:
  [1]   default/linux/amd64/13.0 *
  [2]   default/linux/amd64/13.0/selinux
  [3]   default/linux/amd64/13.0/desktop
  [4]   default/linux/amd64/13.0/desktop/gnome
  [5]   default/linux/amd64/13.0/desktop/gnome/systemd
  [6]   default/linux/amd64/13.0/desktop/kde
  [7]   default/linux/amd64/13.0/desktop/kde/systemd
  [8]   default/linux/amd64/13.0/developer
  [9]   default/linux/amd64/13.0/no-emul-linux-x86
  [10]  default/linux/amd64/13.0/no-emul-linux-x86/desktop
  [11]  default/linux/amd64/13.0/no-multilib
  [12]  default/linux/amd64/13.0/x32
  [13]  hardened/linux/amd64
  [14]  hardened/linux/amd64/selinux
  [15]  hardened/linux/amd64/no-multilib
  [16]  hardened/linux/amd64/no-multilib/selinux
  [17]  hardened/linux/amd64/x32
  [18]  hardened/linux/musl/amd64
  [19]  default/linux/uclibc/amd64
  [20]  hardened/linux/uclibc/amd64
Now let’s set our hostname:
livecd etc # echo "127.0.0.1 gen.local gen localhost" > hosts
livecd etc # sed -i -e 's/hostname.*/hostname="gen"/' conf.d/hostname
livecd etc # hostname gen
livecd etc # hostname -f
gen.local
Kernel Configuration
First let’s go ahead and get the kernel source:
livecd etc # time emerge gentoo-sources

real	2m1.159s
user	0m39.270s
sys	0m28.550s
livecd etc # cd /usr/src/linux
Since we are using LVM for our root partition we have to make sure LVM is enabled:
Device Drivers -->
	Multi-device support (RAID and LVM)  --->
	<*>   RAID support
	[*]     Autodetect RAID arrays during kernel boot (NEW)
	< >     Linear (append) mode (NEW)
	< >     RAID-0 (striping) mode (NEW)
	< >     RAID-1 (mirroring) mode (NEW)
	< >     RAID-10 (mirrored striping) mode (NEW)
	< >     RAID-4/RAID-5/RAID-6 mode (NEW)
	< >     Multipath I/O support (NEW)
	< >     Faulty test module for MD (NEW)
	< >   Block device as cache (NEW)
	<*>   Device mapper support
Also from the virtualbox page, we need the following:
General setup  --->
    Timers subsystem  --->
        [*] Tickless System (Dynamic Ticks)
        [ ] High Resolution Timer Support
Processor type and features  --->
    [X] Symmetric multi-processing support (keep this enabled for multiple cores, too!)
    [X] SMT (Hyperthreading) scheduler support (This too, for i7's)
    [ ] Machine Check / overheating reporting
Power management and ACPI options  --->
    [ ] Suspend to RAM and standby
    [ ] Hibernation (aka 'suspend to disk')
    [*] ACPI (Advanced Configuration and Power Interface) Support  --->
Device Drivers  --->
    < > ATA/ATAPI/MFM/RLL support
    <*> Serial ATA and Parallel ATA drivers
        <*> AHCI SATA Support
        [*] ATA SFF support
        <*> Intel ESB, ICH, PIIX3, PIIX4 PATA/SATA support
    [*] Network device support  --->
        Ethernet driver support  --->
            [*] AMD devices
                <M>   AMD PCnet32 PCI support
            [*] Intel devices
                <M>   Intel(R) Pro/1000 Gigabit Ethernet support
    Input device support --->
        [*] Mice --->
           <*> PS/2 mouse
    Graphics support --->
        <*> Direct Rendering Manager (XFree86 4.1.0 and higher DRI support)  --->
            < > all options can be empty
    <M> Sound card support --->
        <M> Advanced Linux Sound Architecture --->
            [*] PCI sound Devices --->
                <M> Intel/SiS/nVidia/AMD/ALi AC97 Controller
And for the compile options we need to add the following:
INPUT_DEVICES="evdev"
Into /etc/portage/make.conf file. I can’t live without vim, so I installed that as well (and used it to modify the make.conf file):
livecd linux # time emerge vim
real	2m1.949s
user	1m20.620s
sys	0m10.780s
Now to actually configure the kernel:
livecd linux # make menuconfig
All of the above options were already enabled except the audio card:
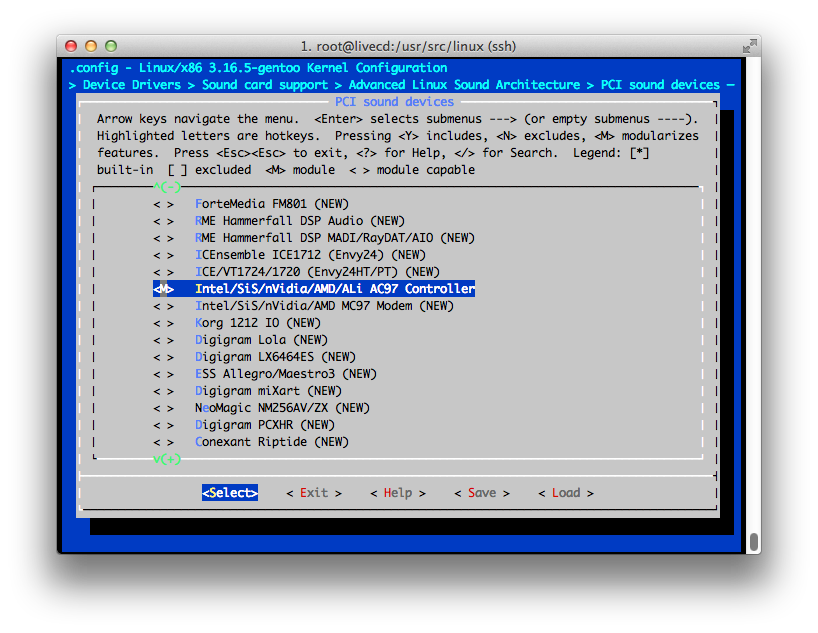
As a side note, if you don’t want to mess with the config, you can always just use the same config that the livecd is using. This can be accomplished with the following:
livecd linux # make localyesconfig
After we configured our options for the kernel, let’s actually build it:
livecd linux # time make -j2
..
..
  OBJCOPY arch/x86/boot/setup.bin
  BUILD   arch/x86/boot/bzImage
Setup is 15552 bytes (padded to 15872 bytes).
System is 5529 kB
CRC 666bb5f2
Kernel: arch/x86/boot/bzImage is ready  (#1)

real	11m8.265s
user	9m43.780s
sys	0m26.810s
About 20 minutes to build the kernel… that’s not to bad. Now let’s get all of our kernel modules:
livecd linux # time make modules_install
  INSTALL arch/x86/kernel/iosf_mbi.ko
  INSTALL drivers/char/kcopy/kcopy.ko
  INSTALL drivers/thermal/x86_pkg_temp_thermal.ko
  INSTALL net/ipv4/netfilter/ipt_MASQUERADE.ko
  INSTALL net/ipv4/netfilter/iptable_nat.ko
  INSTALL net/ipv4/netfilter/nf_nat_ipv4.ko
  INSTALL net/netfilter/nf_nat.ko
  INSTALL net/netfilter/nf_nat_ftp.ko
  INSTALL net/netfilter/nf_nat_irc.ko
  INSTALL net/netfilter/nf_nat_sip.ko
  INSTALL net/netfilter/xt_LOG.ko
  INSTALL net/netfilter/xt_mark.ko
  INSTALL net/netfilter/xt_nat.ko
  INSTALL sound/ac97_bus.ko
  INSTALL sound/pci/ac97/snd-ac97-codec.ko
  INSTALL sound/pci/snd-intel8x0.ko
  DEPMOD  3.16.5-gentoo

real	0m0.654s
user	0m0.000s
sys	0m0.010s
Lastly let’s install the files into /boot:
livecd linux # make install
sh ./arch/x86/boot/install.sh 3.16.5-gentoo arch/x86/boot/bzImage \
	System.map "/boot"
livecd linux # ls /boot
System.map-3.16.5-gentoo  config-3.16.5-gentoo  lost+found  vmlinuz-3.16.5-gentoo
Building initramfs
First let’s install the utility that can build the initramfs image:
livecd linux # time emerge genkernel
real	0m59.152s
user	0m19.950s
sys	0m11.470s
Here is how the build looked like:
livecd linux # genkernel --install --lvm  initramfs
* Gentoo Linux Genkernel; Version 3.4.49.2
* Running with options: --install --lvm initramfs

* Using genkernel.conf from /etc/genkernel.conf
* Sourcing arch-specific config.sh from /usr/share/genkernel/arch/x86_64/config.sh ..
* Sourcing arch-specific modules_load from /usr/share/genkernel/arch/x86_64/modules_load ..

* Linux Kernel 3.16.5-gentoo for x86_64...
* .. with config file /usr/share/genkernel/arch/x86_64/kernel-config
* busybox: >> Applying patches...
*           - 1.18.1-openvt.diff
*           - busybox-1.20.1-mdstart.patch
*           - busybox-1.20.2-bunzip2.patch
*           - busybox-1.20.2-glibc-sys-resource.patch
*           - busybox-1.20.2-modprobe.patch
*           - busybox-1.7.4-signal-hack.patch
* busybox: >> Configuring...
* busybox: >> Compiling...
* busybox: >> Copying to cache...
* initramfs: >> Initializing...
*         >> Appending base_layout cpio data...
*         >> Appending auxilary cpio data...
*         >> Copying keymaps
*         >> Appending busybox cpio data...
*         >> Appending lvm cpio data...
*           LVM: Adding support (compiling binaries)...
* lvm: >> Applying patches...
*           - lvm2-2.02.72-no-export-dynamic.patch
* lvm: >> Configuring...
* lvm: >> Compiling...
*       >> Copying to bincache...
*         >> Appending modules cpio data...
*         >> Appending blkid cpio data...
*         >> Appending modprobed cpio data...
*         >> Appending linker cpio data...
*         >> Finalizing cpio...
*         >> Compressing cpio data (.xz)...

* WARNING... WARNING... WARNING...
* Additional kernel cmdline arguments that *may* be required to boot properly...
* add "dolvm" for lvm support
* With support for several ext* filesystems available, it may be needed to
* add "rootfstype=ext3" or "rootfstype=ext4" to the list of boot parameters.

* Do NOT report kernel bugs as genkernel bugs unless your bug
* is about the default genkernel configuration...
*
* Make sure you have the latest ~arch genkernel before reporting bugs.
livecd linux # ls -1 /boot
System.map-3.16.5-gentoo
config-3.16.5-gentoo
initramfs-genkernel-x86_64-3.16.5-gentoo
lost+found
vmlinuz-3.16.5-gentoo
Now we can see the initramfs image under /boot directory.
Installing the bootloader
The gentoo intructions go over grub1 but now grub2 is the latest one. So I strayed away from the regular instructions a little bit. First install the grub package (and by default the grub2 package is used):
livecd linux # time emerge grub
real	3m0.380s
user	1m45.110s
sys	0m10.270s
It took about 5 minutes to build that guy. Here was the package it grabbed:
livecd linux # equery list grub
 * Searching for grub ...
[IP-] [  ] sys-boot/grub-2.02_beta2-r2:2
I needed to install the gentoolkit package to get the equery tool. Now to install grub on the disk:
livecd linux # grub2-install /dev/sda
Installing for i386-pc platform.
Installation finished. No error reported.
That will put the necessary files under /boot/grub and in the beginning of the disk:
livecd linux # ls -1 /boot/grub/
fonts
grubenv
i386-pc
locale
Now to configure grub we first need to enable lvm on the grub config:
livecd linux # grep ^GRUB_CMDLINE_LINUX /etc/default/grub
GRUB_CMDLINE_LINUX="dolvm"
and now to build the configuration:
livecd linux # grub2-mkconfig -o /boot/grub/grub.cfg
Generating grub configuration file ...
Found linux image: /boot/vmlinuz-3.16.5-gentoo
Found initrd image: /boot/initramfs-genkernel-x86_64-3.16.5-gentoo
done
Notice it discovered the correct files under /boot and that’s expected, from GRUB2 Quick Start:
In order for grub2-mkconfig to detect your Linux kernel(s), they must be named vmlinuz-version or kernel-version
Configuring the System
At this point we can probably reboot and it will should boot up. But before we do that let’s enable system logging and other necessary components.
Configure /etc/fstab
We need to tell our system where swap is and other partitions as well, here is how my /etc/fstab file looked like in the end:
livecd linux # grep /dev /etc/fstab
/dev/sda1			/boot		ext2		noatime		1 2
/dev/mapper/vg-root	/			ext3		noatime		0 1
/dev/mapper/vg-swap	none		swap		sw			0 0
Configure Networking
I was using DHCP so just the bare minimum worked out:
livecd linux # cd /etc/init.d/
livecd init.d # ln -s net.lo net.enp0s3
livecd init.d # echo 'hostname="gen"' > ../conf.d/hostname
livecd init.d # rc-update add net.enp0s3 default
 * service net.enp0s3 added to runlevel default
livecd init.d # rc-update add sshd default
 * service sshd added to runlevel default
Let’s set the password for root as well:
livecd ~ # passwd
New password:
Retype new password:
passwd: password updated successfully
Set the Clock
This is pretty easy, we just have to set the clock to local:
livecd ~ # grep ^clock /etc/conf.d/hwclock
clock="local"
clock_args=""
Install System Utils
Let’s install the lvm tools, since we are using that:
livecd ~ # time emerge lvm2
real	12m16.947s
user	9m38.100s
sys	1m12.650s
Since boost is a dependency of lvm, that’s why it took so long to compile. Now let’s enable that to run on boot:
livecd ~ # rc-update add lvm boot
 * service lvm added to runlevel boot
Now let’s install syslog and cron:
livecd ~ # time emerge syslog-ng vixie-cron
real	1m16.452s
user	0m41.960s
sys	0m6.960s
And let’s enable them as well to start on boot:
livecd ~ # rc-update add syslog-ng default
 * service syslog-ng added to runlevel default
livecd ~ # rc-update add vixie-cron default
 * service vixie-cron added to runlevel default
Since Virtualbox uses DHCP let’s install the DHCP client:
livecd ~ # time emerge dhcpcd
real	0m10.327s
user	0m6.820s
sys	0m0.910s
Leaving chroot and rebooting
So first let’s leave the chroot and then unmount everything:
livecd ~ # exit
exit
livecd gentoo # umount -l /mnt/gentoo/sys
livecd gentoo # umount -l /mnt/gentoo/dev
livecd gentoo # umount /mnt/gentoo/proc
livecd gentoo # umount /mnt/gentoo/boot
livecd gentoo # umount -l /mnt/gentoo
livecd gentoo # poweroff
livecd gentoo #
Broadcast message from root@gen (pts/0) (Wed Nov 12 23:53:14 2014):

The system is going down for system halt NOW!
I shut it off so I can remove the CD prior to booting the system back up:

Post Install Configuration:
Upon booting up I saw the grub2 menu:
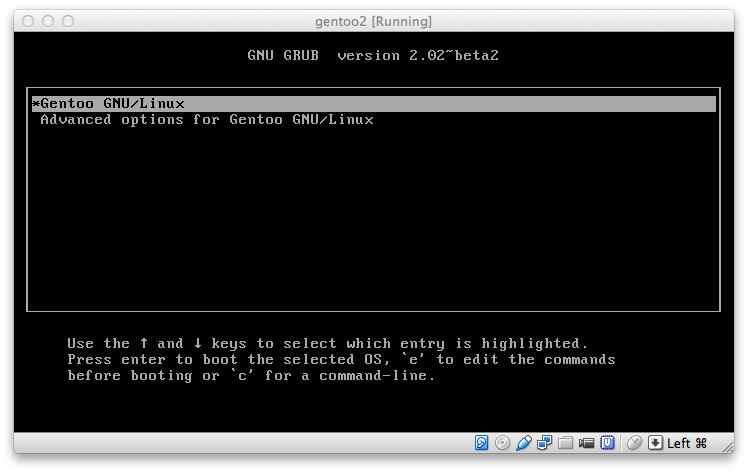
Upon selecting the default menu, I saw initramfs loaded and the machine kept booting:
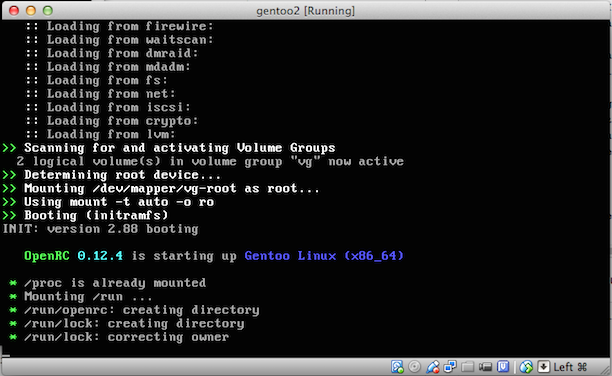
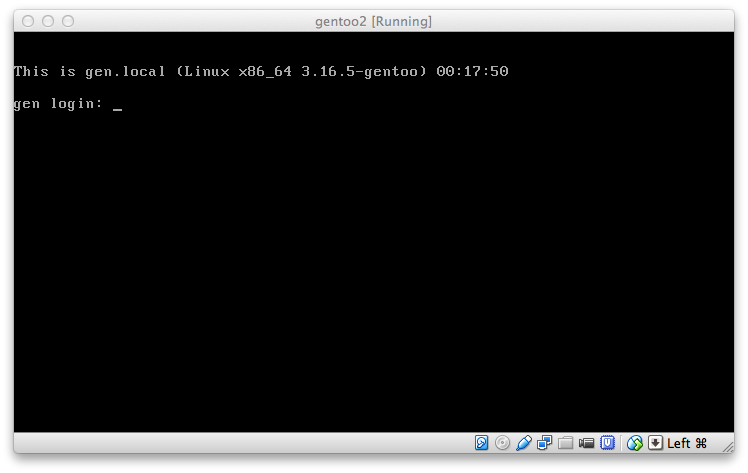
After it was done booting up, I saw the following:
If you try to SSH you will receive an “Identification” warning:
elatov@fed:~$ssh -p 2244 -l root localhost
@@@@@@@@@@@@@@@@@@@@@@@@@@@@@@@@@@@@@@@@@@@@@@@@@@@@@@@@@@@
@    WARNING: REMOTE HOST IDENTIFICATION HAS CHANGED!     @
@@@@@@@@@@@@@@@@@@@@@@@@@@@@@@@@@@@@@@@@@@@@@@@@@@@@@@@@@@@
IT IS POSSIBLE THAT SOMEONE IS DOING SOMETHING NASTY!
Someone could be eavesdropping on you right now (man-in-the-middle attack)!
It is also possible that a host key has just been changed.
The fingerprint for the ED25519 key sent by the remote host is
76:40:84:d2:1a:41:3c:16:5d:43:e9:e8:7f:71:78:7e.
Please contact your system administrator.
Add correct host key in /Users/elatov/.ssh/known_hosts to get rid of this message.
Offending ED25519 key in /Users/elatok/.ssh/known_hosts:77
ED25519 host key for [localhost]:2244 has changed and you have requested strict checking.
Host key verification failed.
And that’s because when we ssh‘ed last time we connected to the livecd and now we are ssh‘ing into the actually gentoo install. To fix the warning, just remove the old host line from the .ssh/known_hosts and re-ssh into the machine:
elatov@fed:~$ssh -p 2244 -l root localhost
The authenticity of host '[localhost]:2244 ([127.0.0.1]:2244)' can't be established.
ED25519 key fingerprint is 76:40:84:d2:1a:41:3c:16:5d:43:e9:e8:7f:71:78:7e.
Are you sure you want to continue connecting (yes/no)? yes
Warning: Permanently added '[localhost]:2244' (ED25519) to the list of known hosts.
Password:
gen ~ #
Build the locale
You can check the enabled locales like so:
livecd ~ # eselect locale list
Available targets for the LANG variable:
  [1]   C
  [2]   POSIX
  [ ]   (free form)
I went ahead and enabled the US locales:
gen ~ # grep -vE '^$|^#' /etc/locale.gen
en_US ISO-8859-1
en_US.UTF-8 UTF-8
and then generated them:
gen ~ # locale-gen
 * Generating 2 locales (this might take a while) with 1 jobs
 *  (1/2) Generating en_US.ISO-8859-1 ... [ ok ]
 *  (2/2) Generating en_US.UTF-8 ... [ ok ]
 * Generation complete
And now I can see them on the list:
gen ~ # eselect locale list
Available targets for the LANG variable:
  [1]   C
  [2]   POSIX
  [3]   en_US
  [4]   en_US.iso88591
  [5]   en_US.utf8
  [ ]   (free form)
You can then set it with:
gen ~ # eselect locale set 3
Modifying the make.conf file
Here we can enable concurrent compilation processes:
gen ~ # echo 'MAKEOPTS="-j2"' >> /etc/portage/make.conf
Then we can specify global options for building packages, this is done with the USE option. For example I don’t use ipv6 and I want to use Xorg, so I ended up with the following USE options:
gen ~ # grep ^USE /etc/portage/make.conf
USE="X -ipv6 bindist mmx sse sse2"
If you changed your USE flag, it’s a good idea to rebuild everything with the new options:
gen ~ # time emerge -vuD --newuse world
real	18m23.146s
user	12m42.519s
sys	3m3.482s
Installing Xorg
There are pretty good instructions in Xorg/Configuration. We already had all the kernel options set and we had the make.conf settings configured as well (we had added the following to the /etc/portage.make.conf file):
INPUT_DEVICES="evdev"
When I tried to install the package, I saw the following:
gen ~ # emerge xorg-server

 * IMPORTANT: 8 news items need reading for repository 'gentoo'.
 * Use eselect news to read news items.

..
..
The following USE changes are necessary to proceed:
 (see "package.use" in the portage(5) man page for more details)
# required by media-libs/mesa-10.0.4
# required by x11-base/xorg-server-1.15.0[-minimal]
# required by x11-drivers/xf86-video-virtualbox-4.2.24
# required by x11-base/xorg-drivers-1.15[video_cards_virtualbox]
=dev-libs/libxml2-2.9.1-r4 python

Use --autounmask-write to write changes to config files (honoring
CONFIG_PROTECT). Carefully examine the list of proposed changes,
paying special attention to mask or keyword changes that may expose
experimental or unstable packages.
It looks like we need to add the following line:
=dev-libs/libxml2-2.9.1-r4 python
into the /etc/portage/package.use or we can just run emerge with the suggested options:
gen ~ # emerge --autounmask-write xorg-server
..
..
The following USE changes are necessary to proceed:
 (see "package.use" in the portage(5) man page for more details)
# required by media-libs/mesa-10.0.4
# required by x11-base/xorg-server-1.15.0[-minimal]
# required by x11-drivers/xf86-input-evdev-2.8.2
# required by x11-base/xorg-drivers-1.15[input_devices_evdev]
=dev-libs/libxml2-2.9.1-r4 python

Autounmask changes successfully written.

 * IMPORTANT: config file '/etc/portage/package.use' needs updating.
 * See the CONFIGURATION FILES section of the emerge
 * man page to learn how to update config files.
Looks like some configs are requiring some changes, so let’s update the configs:
gen ~ # etc-update
Scanning Configuration files...
The following is the list of files which need updating, each
configuration file is followed by a list of possible replacement files.
1) /etc/portage/package.use (1)
Please select a file to edit by entering the corresponding number.
              (don't use -3, -5, -7 or -9 if you're unsure what to do)
              (-1 to exit) (-3 to auto merge all files)
                           (-5 to auto-merge AND not use 'mv -i')
                           (-7 to discard all updates)
                           (-9 to discard all updates AND not use 'rm -i'):


File: /etc/portage/._cfg0000_package.use
1) Replace original with update
2) Delete update, keeping original as is
3) Interactively merge original with update
4) Show differences again
5) Save update as example config
Please select from the menu above (-1 to ignore this update): 1
Replacing /etc/portage/package.use with /etc/portage/._cfg0000_package.use

Exiting: Nothing left to do; exiting. :)
Now that the changes are in place, let’s compile the package:
gen ~ # time emerge xorg-server
real	41m53.748s
user	33m49.628s
sys	4m25.978s
(this took the longest to build). Now let’s install xterm to test out if the Xorg Server can start up:
gen ~ # time emerge xterm
real	2m33.527s
user	1m28.180s
sys	0m28.255s
Then I just ran startx on the terminal and I saw the following:

Installing icewm
There are pretty good instructions on the setup at IceWM Gentoo Package. The install itself is pretty easy:
gen ~ # time emerge icewm
real	3m38.742s
user	2m29.740s
sys	0m38.760s
From here we have some options. If we don’t have a display manager we can just add the following
exec icewm-session
into ~/.xinitrc and then running startx will start the icewm. Or we can install a display manager and it will auto detect it. I have used lightdm in the past and I liked it.
Installing lightdm
There are good instructions at LightDM Gentoo Wiki. When I tried to install it it gave me a warning:
gen ~ # time emerge lightdm
The following USE changes are necessary to proceed:
 (see "package.use" in the portage(5) man page for more details)
# required by sys-auth/polkit-0.112-r2[-systemd]
# required by sys-apps/accountsservice-0.6.37
# required by x11-misc/lightdm-1.8.5
# required by x11-misc/lightdm-gtk-greeter-1.6.1
=sys-auth/consolekit-0.4.6 policykit

Use --autounmask-write to write changes to config files (honoring
CONFIG_PROTECT). Carefully examine the list of proposed changes,
paying special attention to mask or keyword changes that may expose
experimental or unstable packages.
So then I ran the following to configure the package.use file accordingly:
gen ~ # emerge --autounmask-write lightdm
The following USE changes are necessary to proceed:
 (see "package.use" in the portage(5) man page for more details)
# required by sys-auth/polkit-0.112-r2[-systemd]
# required by sys-apps/accountsservice-0.6.37
# required by x11-misc/lightdm-1.8.5
# required by x11-misc/lightdm-gtk-greeter-1.6.1
=sys-auth/consolekit-0.4.6 policykit

Autounmask changes successfully written.

 * IMPORTANT: config file '/etc/portage/package.use' needs updating.
 * See the CONFIGURATION FILES section of the emerge
 * man page to learn how to update config files.
gen ~ # etc-update
Scanning Configuration files...
The following is the list of files which need updating, each
configuration file is followed by a list of possible replacement files.
1) /etc/portage/package.use (1)
Please select a file to edit by entering the corresponding number.
              (don't use -3, -5, -7 or -9 if you're unsure what to do)
              (-1 to exit) (-3 to auto merge all files)
                           (-5 to auto-merge AND not use 'mv -i')
                           (-7 to discard all updates)
                           (-9 to discard all updates AND not use 'rm -i'): -5
Replacing /etc/portage/package.use with /etc/portage/._cfg0000_package.use
Exiting: Nothing left to do; exiting. :)
And then the install went through:
gen ~ # time emerge lightdm
real	32m1.662s
user	22m59.455s
sys	5m15.219s
It took a while to compile cause it grabbed a bunch of gnome dependencies. I then ran the following to enable lightdm to autoload on boot:
gen ~ # rc-update add dbus default
 * service dbus added to runlevel default
gen ~ # rc-update add xdm default
 * service xdm added to runlevel default
After it’s installed and enabled, we can set it as the default display manager by adding the following:
DISPLAYMANAGER="lightdm"
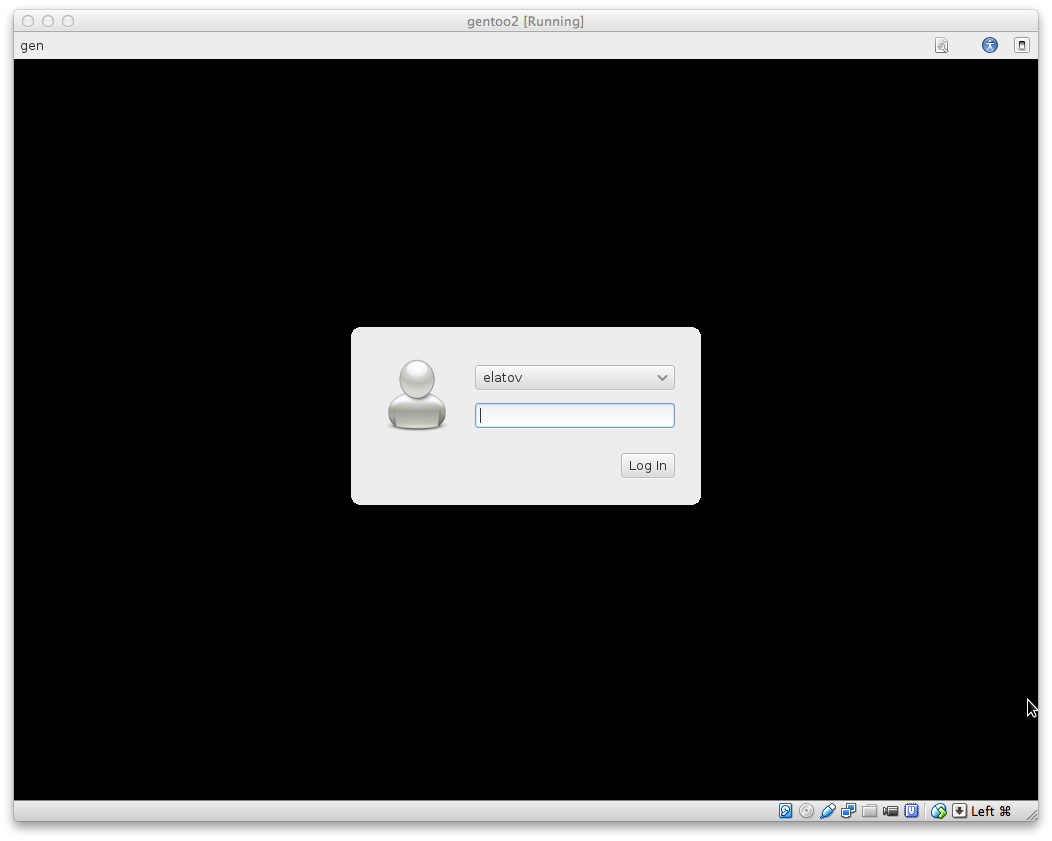
into the /etc/conf.d/xdm file. Then restarting the machine auto loaded the lightdm login page:
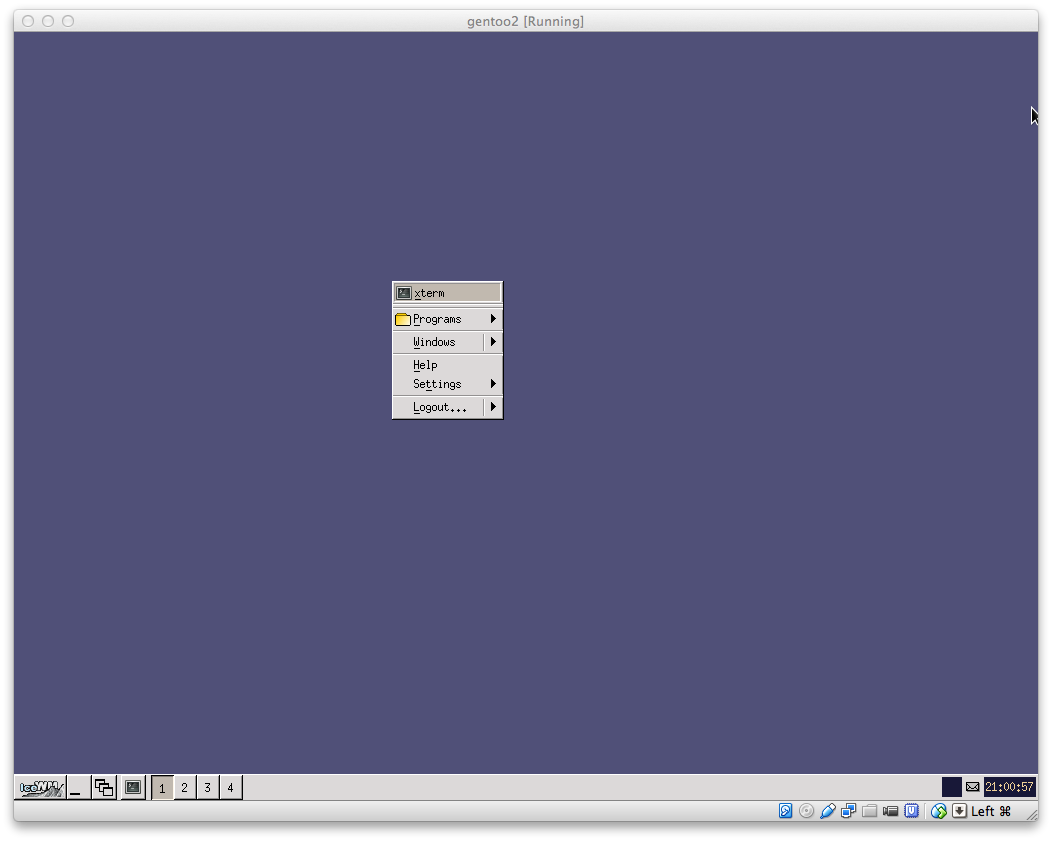
and then after logging in as a regular user I saw icewm loaded:
After that you can run the following to keep your system up-to-date
emerge --sync or emerge-webrsync
emerge -avuDN --with-bdeps y --keep-going world
emerge --depclean
dispatch-conf or etc-update