Snort on FreeBSD 10
I decided to try out installing snort on FreeBSD since the snort package was part of the pkgng repos (and part of ports as well). The install was pretty easy:
elatov@moxz:~$sudo pkg install snort
Password:
Updating FreeBSD repository catalogue...
FreeBSD repository is up-to-date.
All repositories are up-to-date.
The following 26 packages will be affected (of 0 checked):

New packages to be INSTALLED:
	snort: 2.9.7.0
	pulledpork: 0.7.0
	p5-libwww: 6.08_1
	p5-WWW-RobotRules: 6.02_1
	p5-URI: 1.65
	p5-LWP-MediaTypes: 6.02_1
	p5-HTTP-Negotiate: 6.01_1
	p5-HTTP-Message: 6.06_3
	p5-HTTP-Date: 6.02_1
	p5-HTML-Parser: 3.71_1
	p5-HTML-Tagset: 3.20_1
	p5-IO-HTML: 1.001_1
	p5-Encode-Locale: 1.03_1
	p5-HTTP-Daemon: 6.01_1
	p5-HTTP-Cookies: 6.01_1
	p5-File-Listing: 6.04_1
	p5-Authen-NTLM: 1.09_1
	p5-Digest-HMAC: 1.03_1
	p5-Net-HTTP: 6.07_1
	p5-LWP-Protocol-https: 6.06_1
	p5-Crypt-SSLeay: 0.72_1
	p5-Try-Tiny: 0.18_1
	p5-Path-Class: 0.34_1
	barnyard2: 1.13
	libnet: 1.1.6_2,1
	daq: 2.0.4_1

The process will require 11 MB more space.
4 MB to be downloaded.
There were some notes after the install:
Message for pulledpork-0.7.0:
 =====================================================================

In order to use pulled pork, adjust the config files located in
/usr/local/etc/pulledpork


Important Note:

Snort changed the way rules are published. Since June 2010 Snort
stop offering rules in the "snortrules-snapshot-CURRENT" format.

Instead, rules will be released for specific Snort versions.
You will be responsible for downloading the correct rules release
for your version of Snort.

The new versioning mechanism will require a four digit version in the
file name. To get the new download naming schema visit snort.org,
and look at 'My Account' -> 'Subscriptions and Oinkcodes'

=====================================================================
Message for barnyard2-1.13:
 Read the notes in the barnyard2.conf file for how to configure
/usr/local/etc/barnyard2.conf after installation.  For addtional information
see the Securixlive FAQ at http://www.securixlive.com/barnyard2/faq.php.

In order to enable barnyard2 to start on boot, you must edit /etc/rc.conf
with the appropriate flags, etc.  See the FreeBSD Handbook for syntax:
http://www.freebsd.org/doc/en_US.ISO8859-1/books/handbook/configtuning-rcng.html

For the various options available, type %25 barnyard2 -h after install or read
the options in the startup script - in /usr/local/etc/rc.d.

Barnyard2 can process unified2 files from snort or suricata.  It can also
interact with snortsam firewall rules as well as the sguil-sensor. Those
ports must be installed separately if you wish to use them.

************************************************************************
Message for snort-2.9.7.0:
 =========================================================================
Snort uses rcNG startup script and must be enabled via /etc/rc.conf
Please see /usr/local/etc/rc.d/snort
for list of available variables and their description.
Configuration files are located in /usr/local/etc/snort directory.

Please note that, by default, snort will truncate packets larger than the
default snaplen of 15158 bytes.  Additionally, LRO may cause issues with
Stream5 target-based reassembly.  It is recommended to disable LRO, if
your card supports it.

This can be done by appending '-lro' to your ifconfig_ line in rc.conf.
=========================================================================
After snort is installed let’s configure it. First let’s remove all the includes for the rules:
elatov@moxz:~$sudo sed -i '' '/^include \$RULE_PATH\/.*.rules$/d' /usr/local/etc/snort/snort.conf
Then edit the /usr/local/etc/snort/snort.conf file and make the following changes:
- ipvar HOME_NET [YOU_NEED_TO_SET_HOME_NET_IN_snort.conf]
- ipvar EXTERNAL_NET any
+ ipvar HOME_NET [192.168.0.0/16,10.0.0.0/8]
+ ipvar EXTERNAL_NET !$HOME_NET
- var WHITE_LIST_PATH ../rules
- var BLACK_LIST_PATH ../rules
+ var WHITE_LIST_PATH rules
+ var BLACK_LIST_PATH rules
- # output unified2: filename merged.log, limit 128, nostamp, mpls_event_types, vlan_event_types
+ output unified2: filename merged.log, limit 128, mpls_event_types, vlan_event_types
+ include $RULE_PATH/local.rules
+ include $RULE_PATH/snort.rules
That should be enough, now let’s get the definitions/rules using pulledpork.
Configure PulledPork
First let’s copy the template into place:
elatov@moxz:~$sudo cp /usr/local/etc/pulledpork/pulledpork.conf.sample /usr/local/etc/pulledpork/pulledpork.conf
Then let’s create the missing directories:
elatov@moxz:~$sudo mkdir /usr/local/etc/snort/so_rules
elatov@moxz:~$sudo mkdir /usr/local/etc/snort/rules/iplists
elatov@moxz:~$sudo touch /usr/local/etc/snort/rules/local.rules
elatov@moxz:~$sudo sudo cp /usr/local/etc/snort/preproc_rules/sensitive-data.rules-sample /usr/local/etc/snort/preproc_rules/sensitive-data.rules
elatov@moxz:~$sudo touch /usr/local/etc/snort/rules/white_list.rules
elatov@moxz:~$sudo touch /usr/local/etc/snort/rules/black_list.rules
Then go ahead and configure the pulledpork install like so:
elatov@moxz:~$grep -Ev '^$|^#' /usr/local/etc/pulledpork/pulledpork.conf
rule_url=https://www.snort.org/reg-rules/|snortrules-snapshot.tar.gz|XXXX
rule_url=https://s3.amazonaws.com/snort-org/www/rules/community/|community-rules.tar.gz|Community
rule_url=http://labs.snort.org/feeds/ip-filter.blf|IPBLACKLIST|open
rule_url=https://www.snort.org/reg-rules/|opensource.gz|XXXX
ignore=deleted.rules,experimental.rules,local.rules
temp_path=/tmp
rule_path=/usr/local/etc/snort/rules/snort.rules
local_rules=/usr/local/etc/snort/rules/local.rules
sid_msg=/usr/local/etc/snort/sid-msg.map
sid_msg_version=1
sid_changelog=/var/log/snort/sid_changes.log
sorule_path=/usr/local/etc/snort/so_rules/
snort_path=/usr/local/bin/snort
config_path=/usr/local/etc/snort/snort.conf
distro=FreeBSD-9-0
black_list=/usr/local/etc/snort/rules/iplists/default.blacklist
IPRVersion=/usr/local/etc/snort/rules/iplists
snort_control=/usr/local/bin/snort_control
version=0.7.0
Now let’s go ahead and grab all the rules:
elatov@moxz:~$sudo pulledpork.pl -c /usr/local/etc/pulledpork/pulledpork.conf -l

    http://code.google.com/p/pulledpork/
      _____ ____
     `----,\    )
      `--==\\  /    PulledPork v0.7.0 - Swine Flu!
       `--==\\/
     .-~~~~-.Y|\\_  Copyright (C) 2009-2013 JJ Cummings
  @_/        /  66\_  cummingsj@gmail.com
    |    \   \   _(")
     \   /-| ||'--'  Rules give me wings!
      \_\  \_\\
 ~~~~~~~~~~~~~~~~~~~~~~~~~~~~~~~~~~~~~~~~~~~~~~~~~~~~~~~~~~~~~~

Checking latest MD5 for snortrules-snapshot-2970.tar.gz....
Rules tarball download of snortrules-snapshot-2970.tar.gz....
	They Match
	Done!
Checking latest MD5 for community-rules.tar.gz....
Rules tarball download of community-rules.tar.gz....
	They Match
	Done!
IP Blacklist download of http://labs.snort.org/feeds/ip-filter.blf....
Reading IP List...
Checking latest MD5 for opensource.gz....
Rules tarball download of opensource.gz....
	They Match
	Done!
Prepping rules from community-rules.tar.gz for work....
	Done!
Prepping rules from opensource.gz for work....
	Done!
Prepping rules from snortrules-snapshot-2970.tar.gz for work....
	Done!
Reading rules...
Generating Stub Rules....
	Parsing Rules file "/usr/local/etc/snort/snort.conf"
Dumping dynamic rules...
  	Finished dumping dynamic rules.`
	Done
Reading rules...
Writing Blacklist File /usr/local/etc/snort/rules/iplists/default.blacklist....
Writing Blacklist Version 808923191 to /usr/local/etc/snort/rules/iplistsIPRVersion.dat....
Setting Flowbit State....
	Enabled 23 flowbits
	Done
Writing /usr/local/etc/snort/rules/snort.rules....
	Done
Generating sid-msg.map....
	Done
Writing v1 /usr/local/etc/snort/sid-msg.map....
	Done
Writing /var/log/snort/sid_changes.log....
	Done
Rule Stats...
	New:-------22761
	Deleted:---0
	Enabled Rules:----6247
	Dropped Rules:----0
	Disabled Rules:---16513
	Total Rules:------22760
IP Blacklist Stats...
	Total IPs:-----13281

Done
Please review /var/log/snort/sid_changes.log for additional details
Fly Piggy Fly!
Then go ahead and run snort to test it out:
elatov@moxz:~$sudo snort -A console -q  -c /usr/local/etc/snort/snort.conf -i em0
12/14-13:09:48.032632  [**] [119:31:1] (http_inspect) UNKNOWN METHOD [**] [Classification: Unknown Traffic] [Priority: 3] {TCP} 10.0.0.2:50051 -> 10.0.0.3:8000
At this point we can enable the services by adding the following to /etc/rc.conf:
snort_enable="YES"
snort_interface="em0"
and then starting the service:
elatov@moxz:~$sudo service snort start
Starting snort.
Spawning daemon child...
My daemon child 50740 lives...
Daemon parent exiting (0)
elatov@moxz:~$ps auwx | grep snort
root     50740  0.0 10.1 557360 210080  -  Ss    1:20PM     0:00.02 /usr/local/bin/snort -D -q -i em0 -c /usr/local/etc/snort/snort
And at this point you should see the merged.log under /var/log/snort:
elatov@moxz:~$ls -l /var/log/snort/merged.log
-rw-------  1 root  wheel  181 Dec 14 13:23 /var/log/snort/merged.log.1418767402
We can setup a cronjob to pull the rules on a nightly basis:
elatov@moxz:~$sudo crontab -l
# get snort rules
0 6 * * * /usr/local/bin/pulledpork.pl -c /usr/local/etc/pulledpork/pulledpork.conf -l > /dev/null
Setting up the MySQL DB
I already had mysql server installed:
elatov@moxz:~$pkg info | grep mysql
mysql56-client-5.6.22          Multithreaded SQL database (client)
mysql56-server-5.6.22          Multithreaded SQL database (server)
Make sure the service is enabled:
elatov@moxz:~$grep mysql /etc/rc.conf
mysql_enable="YES"
Then go ahead and start the service:
elatov@moxz:~$sudo service mysql-server start
Starting mysql.
If this is a brand new installation run sudo mysql_secure_installation to set the root password and secure the installation. Then login as root and create the snorby database:
elatov@moxz:~$mysql -u root -p
Enter password:
Welcome to the MySQL monitor.  Commands end with ; or \g.
Your MySQL connection id is 13
Server version: 5.6.22 Source distribution

Copyright (c) 2000, 2014, Oracle and/or its affiliates. All rights reserved.

Oracle is a registered trademark of Oracle Corporation and/or its
affiliates. Other names may be trademarks of their respective
owners.

Type 'help;' or '\h' for help. Type '\c' to clear the current input statement.

mysql> create database snorby;
Query OK, 1 row affected (0.00 sec)

mysql> grant ALL on snorby.* to snorby@localhost identified by 'snorby';
Query OK, 0 rows affected (0.00 sec)

mysql> flush privileges;
Query OK, 0 rows affected (0.00 sec)

mysql> exit
Bye
That should be it.
Configure Barnyard2
As I started to configure barnyard2 I realized the binary version (from pkgng) didn’t come built with mysql support:
elatov@moxz:~$pkg info barnyard2
barnyard2-1.13
Name           : barnyard2
Version        : 1.13
Installed on   : Sun Dec 14 10:49:31 MST 2014
Origin         : security/barnyard2
Architecture   : freebsd:10:x86:64
Prefix         : /usr/local
Categories     : security
Licenses       : GPLv2
Maintainer     : pauls@utdallas.edu
WWW            : http://www.securixlive.com/barnyard2/
Comment        : Interpreter for Snort unified2 binary output files
Options        :
	64BIT          : off
	ARUBA          : off
	BRO            : off
	DOCS           : on
	GRE            : off
	IPV6           : on
	MPLS           : off
	MYSQL          : off
	MYSQL_SSL      : off
	ODBC           : off
	PGSQL          : off
	PORT_PCAP      : off
Annotations    :
	repo_type      : binary
	repository     : FreeBSD
Flat size      : 411KiB
So I went back to ports. First I updated my ports sources:
elatov@moxz:~$sudo portsnap fetch update
Then I searched for the package in ports:
elatov@moxz:/usr/ports$cd
elatov@moxz:~$cd /usr/ports/
elatov@moxz:/usr/ports$make search name=barnyard2
Port:	barnyard2-1.13
Path:	/usr/ports/security/barnyard2
Info:	Interpreter for Snort unified2 binary output files
Maint:	pauls@utdallas.edu
B-deps:	autoconf-2.69 autoconf-wrapper-20131203 automake-1.14_1 automake-wrapper-20131203 indexinfo-0.2 libtool-2.4.2.418 m4-1.4.17_1,1 perl5-5.18.4_10
R-deps:
WWW:	http://www.securixlive.com/barnyard2/

Port:	barnyard2-sguil-1.13
Path:	/usr/ports/security/barnyard2-sguil
Info:	Interpreter for Snort unified2 binary output files
Maint:	pauls@utdallas.edu
B-deps:	autoconf-2.69 autoconf-wrapper-20131203 automake-1.14_1 automake-wrapper-20131203 indexinfo-0.2 libtool-2.4.2.418 m4-1.4.17_1,1 perl5-5.18.4_10 tcl86-8.6.3
R-deps:	tcl86-8.6.3
WWW:	http://www.securixlive.com/barnyard2/
After that I configured the package to enable MySQL support:
elatov@moxz:~$cd /usr/ports/security/barnyard2
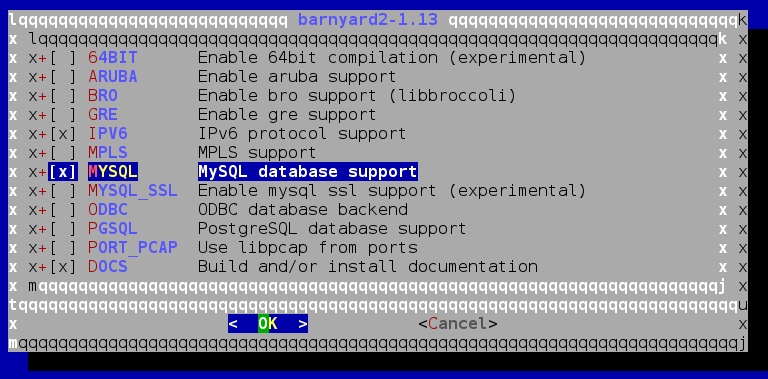
elatov@moxz:/usr/ports/security/barnyard2$sudo make config
Then remove the old version install with pkgng:
elatov@moxz:~$sudo pkg delete -f barnyard2
Checking integrity... done (0 conflicting)
Deinstallation has been requested for the following 1 packages (of 0 packages in the universe):

Installed packages to be REMOVED:
	barnyard2-1.13

The operation will free 411 KB.

Proceed with deinstalling packages? [y/N]: y
[1/1] Deinstalling barnyard2-1.13...
[1/1] Deleting files for barnyard2-1.13: 100%
Then install the new package
elatov@moxz:/usr/ports/security/barnyard2$sudo make install clean
Now checking the package information, I saw MySQL enabled:
elatov@moxz:~$pkg info barnyard2
barnyard2-1.13
Name           : barnyard2
Version        : 1.13
Installed on   : Sun Dec 14 12:04:53 MST 2014
Origin         : security/barnyard2
Architecture   : freebsd:10:x86:64
Prefix         : /usr/local
Categories     : security
Licenses       : GPLv2
Maintainer     : pauls@utdallas.edu
WWW            : http://www.securixlive.com/barnyard2/
Comment        : Interpreter for Snort unified2 binary output files
Options        :
	64BIT          : off
	ARUBA          : off
	BRO            : off
	DOCS           : on
	GRE            : off
	IPV6           : on
	MPLS           : off
	MYSQL          : on
	MYSQL_SSL      : off
	ODBC           : on
	PGSQL          : off
	PORT_PCAP      : off
Shared Libs required:
	libmysqlclient.so.18
Annotations    :
Flat size      : 423KiB
Lastly go ahead and make sure pkgng doesn’t update it later by locking the package:
elatov@moxz:~$sudo pkg lock barnyard2
barnyard2-1.13: lock this package? [y/N]: y
Locking barnyard2-1.13
Now let’s configure barnyard2 by editing the /usr/local/etc/barnyard2.conf file an making the following changes:
- # config hostname:   thor
- # config interface:  eth0
+ config hostname:   moxz
+ config interface:  em0
- #config daemon
+ config daemon

- #config waldo_file: /tmp/waldo
+ config waldo_file: /var/log/snort/barnyard2.waldo
+ output database: log, mysql, user=snorby password=snorby dbname=snorby host=localhost
Then enable the service to start on boot:
elatov@moxz:~$grep barn /etc/rc.conf
barnyard2_enable="YES"
barnyard2_flags="-f merged.log -d /var/log/snort -a /var/log/snort/archive -D"
Before starting the service create the missing files:
elatov@moxz:~$sudo mkdir /var/log/snort/archive
elatov@moxz:~$sudo touch /var/log/snort/barnyard2.waldo
Then start the service:
elatov@moxz:~$sudo service barnyard2 start
After sometime you should see the event table get populated in the snorby database:
mysql> select * from event;
+-----+-----+-----------+-------------------+-------------+---------+-------------+------+------------------+---------------------+----+
| sid | cid | signature | classification_id | users_count | user_id | notes_count | type | number_of_events | timestamp           | id |
+-----+-----+-----------+-------------------+-------------+---------+-------------+------+------------------+---------------------+----+
|   1 |   4 |       129 |              NULL |           0 |    NULL |           0 |    1 |                0 | 2014-12-16 15:14:04 |  1 |
|   1 |   5 |       129 |              NULL |           0 |    NULL |           0 |    1 |                0 | 2014-12-16 15:14:04 |  2 |
|   1 |   6 |       129 |              NULL |           0 |    NULL |           0 |    1 |                0 | 2014-12-16 15:14:04 |  3 |
|   1 |   7 |       129 |              NULL |           0 |    NULL |           0 |    1 |                0 | 2014-12-16 15:17:50 |  4 |
|   1 |   8 |       129 |              NULL |           0 |    NULL |           0 |    1 |                0 | 2014-12-16 15:17:50 |  5 |
|   1 |   9 |       129 |              NULL |           0 |    NULL |           0 |    1 |                0 | 2014-12-16 15:23:34 |  6 |
|   1 |  10 |       129 |              NULL |           0 |    NULL |           0 |    1 |                0 | 2014-12-16 15:23:34 |  7 |
|   1 |  11 |       129 |              NULL |           0 |    NULL |           0 |    1 |                0 | 2014-12-16 15:23:34 |  8 |
|   1 |  12 |       129 |              NULL |           0 |    NULL |           0 |    1 |                0 | 2014-12-16 15:27:51 |  9 |
|   1 |  13 |       152 |              NULL |           0 |    NULL |           0 |    1 |                0 | 2014-12-16 15:27:51 | 10 |
Lastly if you want to move the snort and barnyard2 logs to a specific file (so it doesn’t clutter the /var/log/messages file) we can add the following to the top of the /etc/syslog.conf file:
elatov@moxz:~$head /etc/syslog.conf
# $FreeBSD: release/10.0.0/etc/syslog.conf 252481 2013-07-01 21:20:17Z asomers $
#
#	Spaces ARE valid field separators in this file. However,
#	other *nix-like systems still insist on using tabs as field
#	separators. If you are sharing this file between systems, you
#	may want to use only tabs as field separators here.
#	Consult the syslog.conf(5) manpage.
!snort,barnyard2
*.*						/var/log/snort/snort.log
!-snort,barnyard2
And then restart the syslogd service:
elatov@moxz:~$sudo service syslogd restart
Then add the following to automatically rotate the logs:
elatov@moxz:~$grep snort /etc/newsyslog.conf
/var/log/snort/snort.log  644 3 100 * JC
Also we can add the following cron job to clean up old archived merge.log files under /var/log/snort/archive (these are created by barnyard2), just to make sure it doesn’t keep adding up:
elatov@moxz:~$sudo crontab -l
# clean up snort files
0 5 * * * /usr/bin/find /var/log/snort/archive -mtime +7 -type f -delete
Installing Snorby
I wanted to see how the passenger plugin for apache would work out. So let’s install that. Snorby only works with ruby1.9 so let’s install that version of ruby:
elatov@moxz:~$sudo pkg install ruby19
Now let’s get the root-ssl-CA certs so that the gem install command can use ssl to download the necessary packages:
elatov@moxz:~$ sudo pkg install ca_root_nss
elatov@moxz:~$ sudo ln -s /usr/local/share/certs/ca-root-nss.crt /etc/ssl/cert.pem
Now let’s install then bundler gem:
elatov@moxz:~$sudo gem19 install rdoc bundler
Now let’s get the passenger gem:
elatov@moxz:~$sudo gem19 install passenger
Now before we install the apache module let’s install apache first:
elatov@moxz:~$sudo pkg install apache24
After we can install the apache module:
elatov@moxz:~$sudo /usr/local/bin/passenger-install-apache2-module -a
For a quick test let’s then create the following configuration file to load the passenger plugin:
elatov@moxz:~$cat /usr/local/etc/apache24/Includes/passenger.conf
LoadModule passenger_module /usr/local/lib/ruby/gems/1.9/gems/passenger-4.0.55/buildout/apache2/mod_passenger.so
<IfModule mod_passenger.c>
  PassengerRoot /usr/local/lib/ruby/gems/1.9/gems/passenger-4.0.55
  PassengerDefaultRuby /usr/local/bin/ruby19
</IfModule>
Then make sure apache is enabled:
elatov@moxz:~$grep apache /etc/rc.conf
apache24_enable="YES"
And now let’s make sure the configuration for apache is okay:
elatov@moxz:~$sudo apachectl -t
Syntax OK
Now let’s get the source:
elatov@moxz:~$sudo pkg install git
elatov@moxz:~$git clone http://github.com/Snorby/snorby.git
Cloning into 'snorby'...
remote: Counting objects: 10589, done.
remote: Total 10589 (delta 0), reused 0 (delta 0)
Receiving objects: 100% (10589/10589), 10.08 MiB | 432.00 KiB/s, done.
Resolving deltas: 100% (4847/4847), done.
Checking connectivity... done.
Now let’s get the prereqs as well:
elatov@moxz:~$sudo pkg install wkhtmltopdf
Let’s configure the MySQL connection settings:
elatov@moxz:~$cp snorby/config/database.yml.example snorby/config/database.yml
Now edit the snorby/config/database.yml file and modify it to look like this:
snorby: &snorby
  adapter: mysql
  username: snorby
  password: "snorby"
  host: localhost
Now let’s configure the production configuration of snorby:
elatov@moxz:~$cp snorby/config/snorby_config.yml.example snorby/config/snorby_config.yml
Then modify the snorby/config/snorby_config.yml file to have the following:
production:
  # in case you want to run snorby under a suburi/suburl under eg. passenger:
  baseuri: '/snorby'
  # baseuri: '/snorby'
  domain: 'demo.snorby.org'
  wkhtmltopdf: /usr/local/bin/wkhtmltopdf
  ssl: false
  mailer_sender: 'snorby@snorby.org'
  geoip_uri: "http://geolite.maxmind.com/download/geoip/database/GeoLiteCountry/GeoIP.dat.gz"
  rules:
    - ""
  authentication_mode: database
  # If timezone_search is undefined or false, searching based on time will
  # use UTC times (historical behavior). If timezone_search is true
  # searching will use local time.
  timezone_search: true
  time_zone: 'America/Denver'
Now let’s setup the snorby install
elatov@moxz:~$ cd snorby
elatov@moxz:snorby$ bundle pack
elatov@moxz:snorby$ bundle install --path vendor/cache
Then config the snorby rails app:
elatov@moxz:/usr/local/snorby$bundle exec rake snorby:setup
Jammit Warning: Asset compression disabled -- Java unavailable.
[~] Adding `index_timestamp_cid_sid` index to the event table
[~] Adding `index_caches_ran_at` index to the caches table
[~] Adding `id` to the event table
[~] Building `aggregated_events` database view
[~] Building `events_with_join` database view
* Removing old jobs
* Starting the Snorby worker process.
* Adding jobs to the queue
If you get the following error:
/usr/local/lib/ruby/gems/1.9/gems/bundler-1.7.9/lib/bundler/spec_set.rb:92:in `block in materialize': Could not find rake-0.9.2 in any of the sources (Bundler::GemNotFound)
It could be because you have two versions of ruby (in my case I also had ruby 2.0 installed). To fix that error, just set the default one to be 1.9 and you will be okay:
elatov@moxz:~$sudo mv /usr/local/bin/ruby /usr/local/bin/ruby.orig
elatov@moxz:~$sudo ln -s /usr/local/bin/ruby19 /usr/local/bin/ruby
Now if you try to launch the app you will see the following:
elatov@moxz:/usr/local/snorby$bundle exec rails server -e production -b 0.0.0.0
Jammit Warning: Asset compression disabled -- Java unavailable.
=> Booting WEBrick
=> Rails 3.1.12 application starting in production on http://0.0.0.0:3000
=> Call with -d to detach
=> Ctrl-C to shutdown server
[2014-12-14 19:48:28] INFO  WEBrick 1.3.1
[2014-12-14 19:48:28] INFO  ruby 1.9.3 (2014-11-13) [amd64-freebsd10]
[2014-12-14 19:48:28] INFO  WEBrick::HTTPServer#start: pid=97354 port=3000
At this point if you visit http://IP:3000 you should see the snorby login page and you can login with:
snorby@snorby.org/snorby
To go through the passenger plugin, I ended up creating the following config file:
elatov@moxz:~$cat /usr/local/etc/apache24/Includes/passenger.conf
LoadModule passenger_module /usr/local/lib/ruby/gems/1.9/gems/passenger-4.0.55/buildout/apache2/mod_passenger.so
PassengerRoot /usr/local/lib/ruby/gems/1.9/gems/passenger-4.0.55
PassengerDefaultRuby /usr/local/bin/ruby19

Alias /snorby /usr/local/snorby/public
<Location /snorby>
    PassengerBaseURI /snorby
    PassengerAppRoot /usr/local/snorby
</Location>

<Directory /usr/local/snorby/public>
  #Options Indexes FollowSymLinks MultiViews
  Options -MultiViews
  AllowOverride all
  Require all granted
  #Order allow,deny
  #allow from all
</Directory>

ErrorLog /var/log/snort/snorby_error.log
CustomLog /var/log/snort/snorby_access.log combined
This way I could use the snorby setup as a sub URL. If you want you can just make it the default page for apache on a specific port. The config will look like this if you want to take the latter approach:
elatov@moxz:~$cat /usr/local/etc/apache24/Includes/passenger.conf
LoadModule passenger_module /usr/local/lib/ruby/gems/1.9/gems/passenger-4.0.55/buildout/apache2/mod_passenger.so
PassengerRoot /usr/local/lib/ruby/gems/1.9/gems/passenger-4.0.55
PassengerDefaultRuby /usr/local/bin/ruby19

Listen 3000
<VirtualHost *:3000>

DocumentRoot "/usr/local/snorby/public"

<Directory />
  Options FollowSymLinks
  AllowOverride None
</Directory>

<Directory /usr/local/snorby/public>
  #Options Indexes FollowSymLinks MultiViews
  Options -MultiViews
  AllowOverride all
  Require all granted
  #Order allow,deny
  #allow from all
</Directory>

ErrorLog /var/log/snort/snorby_error.log
CustomLog /var/log/snort/snorby_access.log combined

</VirtualHost>
Both examples are covered in the following pages:
With snorby ran into the issue described here. Looks like I had modify the ps line to look like this:
Snorby::Process.new(`ps awux | fgrep 'delayed_job'`.chomp.strip)
After that the dashboard looked good and it didn’t show me that the worker is not running:

Lastly I ran into a pretty cool script which automates the above install, it’s located here. It’s written for FreeBSD 9, but with minor tweaks I am sure it will work for FreeBSD 10.