Aanval Setup on CentOS 7
I wanted to try out a SIEM (Security Information and Event Management) product and I read good things about Aanval, so I decided to set it up and see how it works out.
Aanval
From their FAQ:
Aanval SAS (Situational Awareness System) is the combination of our most advanced SIEM features with our newly released Network Host Scanner, Rogue Host Detection, and Offensive Reconnaissance modules. Aanval SAS™ provides real-time security intelligence to shore up defenses and help defenders take the offensive on thwarting cyber attacks. As the industry’s most comprehensive Security Information and Event Management (SIEM) console on the market today, Aanval supports Snort and Suricata as well as virtually any syslog-sourced data, and is designed specifically to scale from small single-sensor installations to global enterprise deployments
I already had snort running so I decided to integrate that with Aanval. From their site here is a comparison of the free vs not-free features:
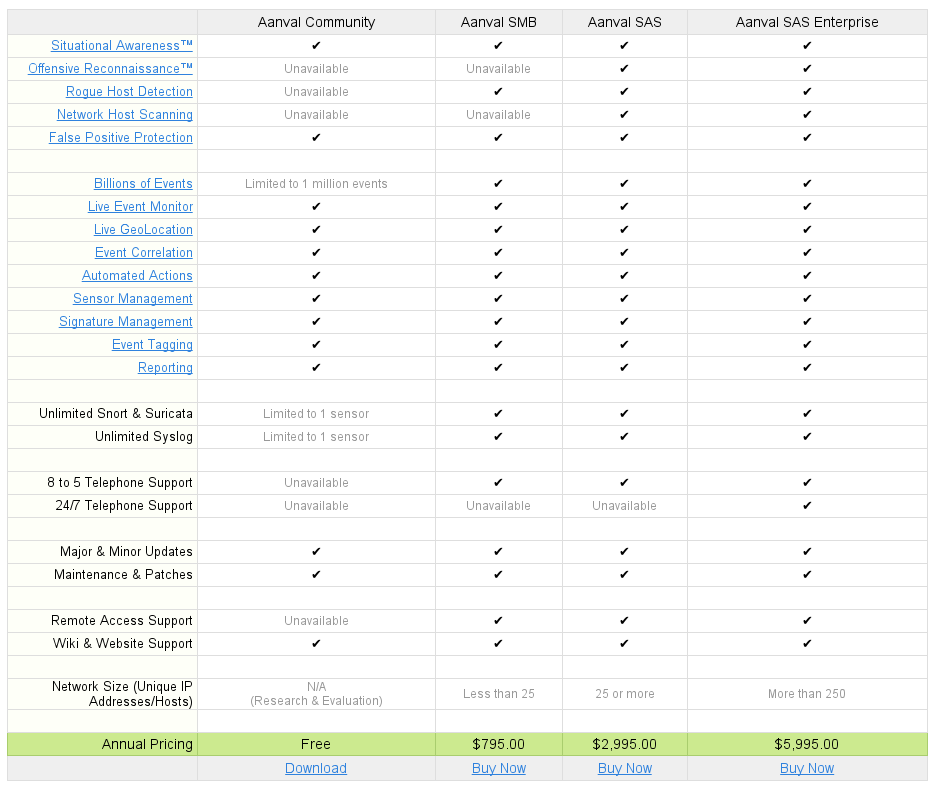
I will just test out the community version.
Aanval Install
The install is pretty straight forward, you just have to sign up and download the software. After it’s downloaded you will have the following file:
elatov@kerch:~$ls -l download/
total 8080
-rw-r----- 1 elatov elatov 8270303 Dec 27 14:31 aanval-7-latest-stable.tar.gz
There are also pretty good instructions laid out here. So let’s extract the tar archive:
elatov@kerch:~/download$tar xzf aanval-7-latest-stable.tar.gz
Now let’s put the software under the doc_root of the apache install:
elatov@kerch:~/download$sudo cp -R aanval /var/www/html/.
Now let’s install Apache with PHP:
elatov@kerch:~$sudo yum install httpd php php-mysql
After that we can restart the apache service:
elatov@kerch:~$sudo systemctl restart httpd.service
and then we can confirm that PHP is loaded in Apache:
elatov@kerch:~$sudo httpd -M | grep -i php
 php5_module (shared)
Lastly let’s change the ownership of the aanval install over to the apache user:
elatov@kerch:~$sudo chown -R apache:apache /var/www/html/aanval
Aanval DB Setup
Now let’s prepare the DB. I already had a MySQL DB Server running so I just added the DB and access to it remotely. On the MySQL server I ran the following:
elatov@kerch:~$mysql -u root -p
Enter password:
mysql> create database aanvaldb;
Query OK, 1 row affected (0.01 sec)

mysql> GRANT ALL PRIVILEGES ON aanvaldb.* TO 'aanval_user'@'localhost' IDENTIFIED BY 'aanval' with grant option;
Query OK, 0 rows affected (0.00 sec)

mysql> GRANT ALL PRIVILEGES ON aanvaldb.* TO 'aanval_user'@'10.0.0.6' IDENTIFIED BY 'aanval' with grant option;
Query OK, 0 rows affected (0.00 sec)
mysql> flush privileges;
Then from the CentOS machine we can confirm that we can connect to the database:
elatov@kerch:~$ sudo yum install mariadb
elatov@kerch:~$ mysql -u aanval_user -p -h 10.0.0.2
Enter password:
Welcome to the MariaDB monitor.  Commands end with ; or \g.
Your MySQL connection id is 1440335

MySQL [(none)]> show databases;
+--------------------+
| Database           |
+--------------------+
| information_schema |
| aanvaldb           |
+--------------------+
2 rows in set (0.00 sec)

MySQL [(none)]> use aanvaldb;
Reading table information for completion of table and column names
You can turn off this feature to get a quicker startup with -A

Database changed
MySQL [aanvaldb]>
Aanval Initial Configuration
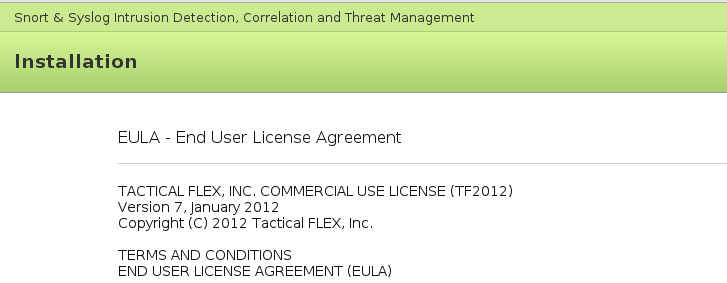
At this point you can browse to http://IP/aanval and you will see the EULA:
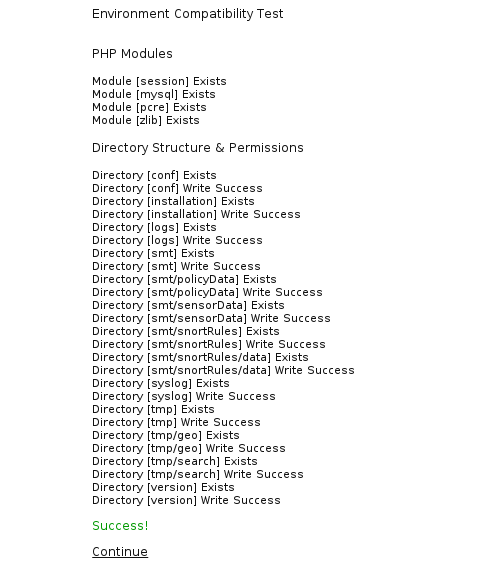
After accepting the License we can then check to make sure the install is ready for use. If all is well you will see the following (if anything is missing, install the necessary modules):
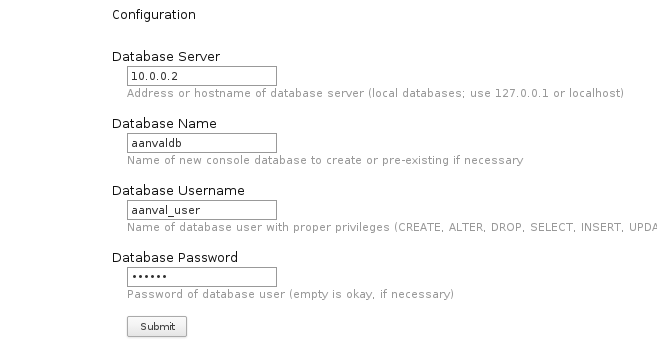
You can then fill out the Database information:
If all is well upon hitting Submit you will see the following:
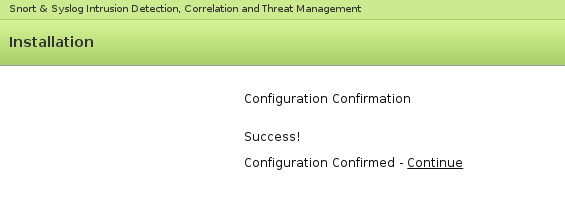
Then you can click “Continue” and you will see the next steps:

I went back and started the BPUs:
elatov@kerch:/var/www/html/aan/apps$sudo -u apache perl ./idsBackground.pl -srt

---------------------------------------------------
Aanval by Tactical FLEX, Inc.
Copyright 2003-2014

http://www.tacticalflex.com/

Background Processing Unit (BPU) Initializer
Version: 8.0.800
---------------------------------------------------

Aanval BPU (core) launched in daemon mode [PID: 2175].
Aanval BPU (process) launched in daemon mode [PID: 2181].
Aanval BPU (report) launched in daemon mode [PID: 2192].
Aanval BPU (search) launched in daemon mode [PID: 2207].
To make sure the Daemons are running check the ouput of ps:
elatov@kerch:~$ps -eaf | grep -i aan
apache    2175     1  0 15:12 ?        00:00:00 Aanval BPU (core)
apache    2181     1  0 15:12 ?        00:00:00 Aanval BPU (process)
apache    2192     1  0 15:12 ?        00:00:00 Aanval BPU (report)
apache    2207     1  0 15:12 ?        00:00:00 Aanval BPU (search)
Aanval Snort Module Configuration
There is a actually a pretty good produre here. After you login with the following credentials:
root/specter
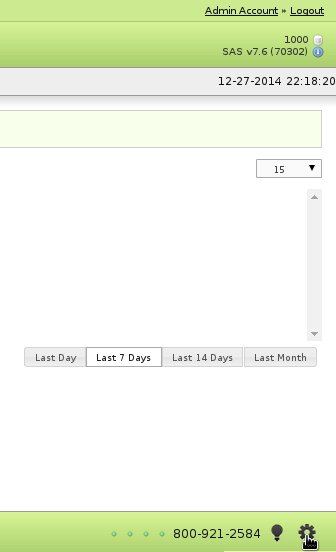
You can then click on the gear at the bottom right:
You will then see all the available sensors:

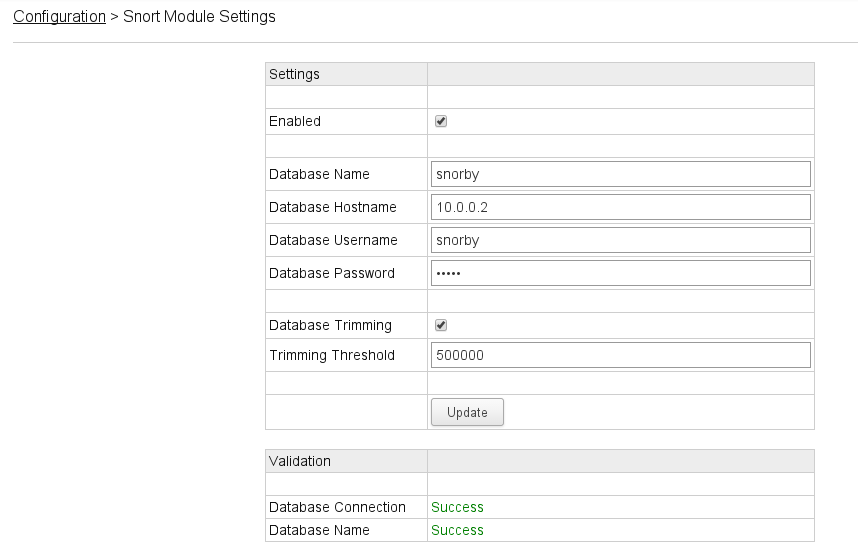
Click on Settings under the “Snort Module” section and fill everything out (I already had a snorby DB that barnyard2 was writing to):
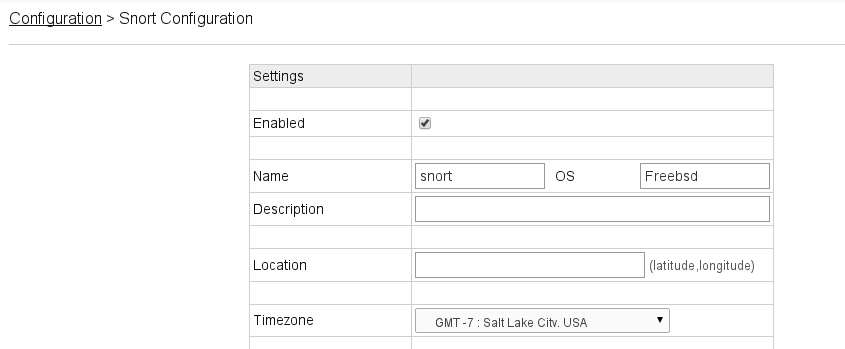
Lastly go to the “Sensor Configuration” link for the Snort Module and make sure it’s enabled:
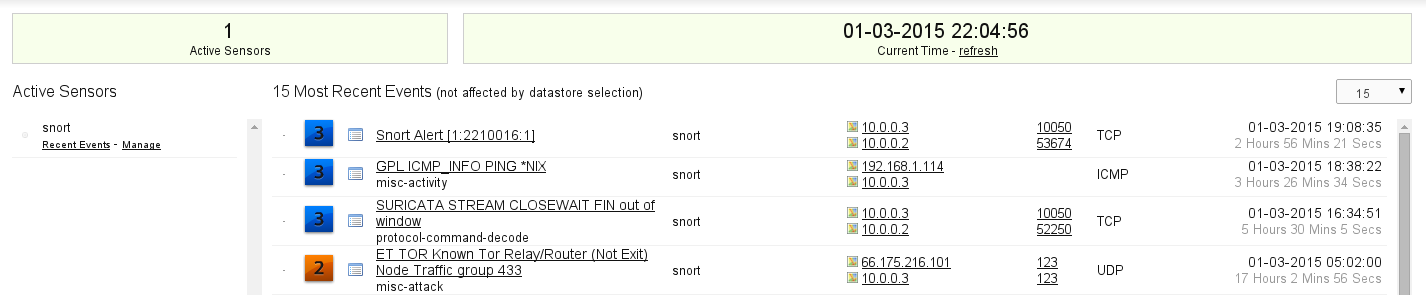
After that if you go to the dashboard you will see the events that snort had captured:
The cool thing is if you have syslog server then you can add that as a sensor and it will correlate any events snort with syslog logs.