openSUSE on MacBook Pro 6,2
openSUSE Leap 42.2
I had an old mac book pro laying around and I wanted to install linux on it. I have been reading good things about SUSE/openSUSE so I decided to give it a try. When I went to the download page the first download link was for the beta version, so I decided to try the Leap 42.2 Beta version. I downloaded the ISO and burned it to a DVD. After that I inserted the DVD into the drive and rebooted. Right after the boot chime, I held the “C” key and it booted from the DVD. If you look at the SDB:Installation on a Mac page, they recommend leaving some of the Mac OS X partitions intact, but I decided to completely wipe everything and just use rEFIt (or rEFInd) to sync the GPT partition.
openSUSE Install
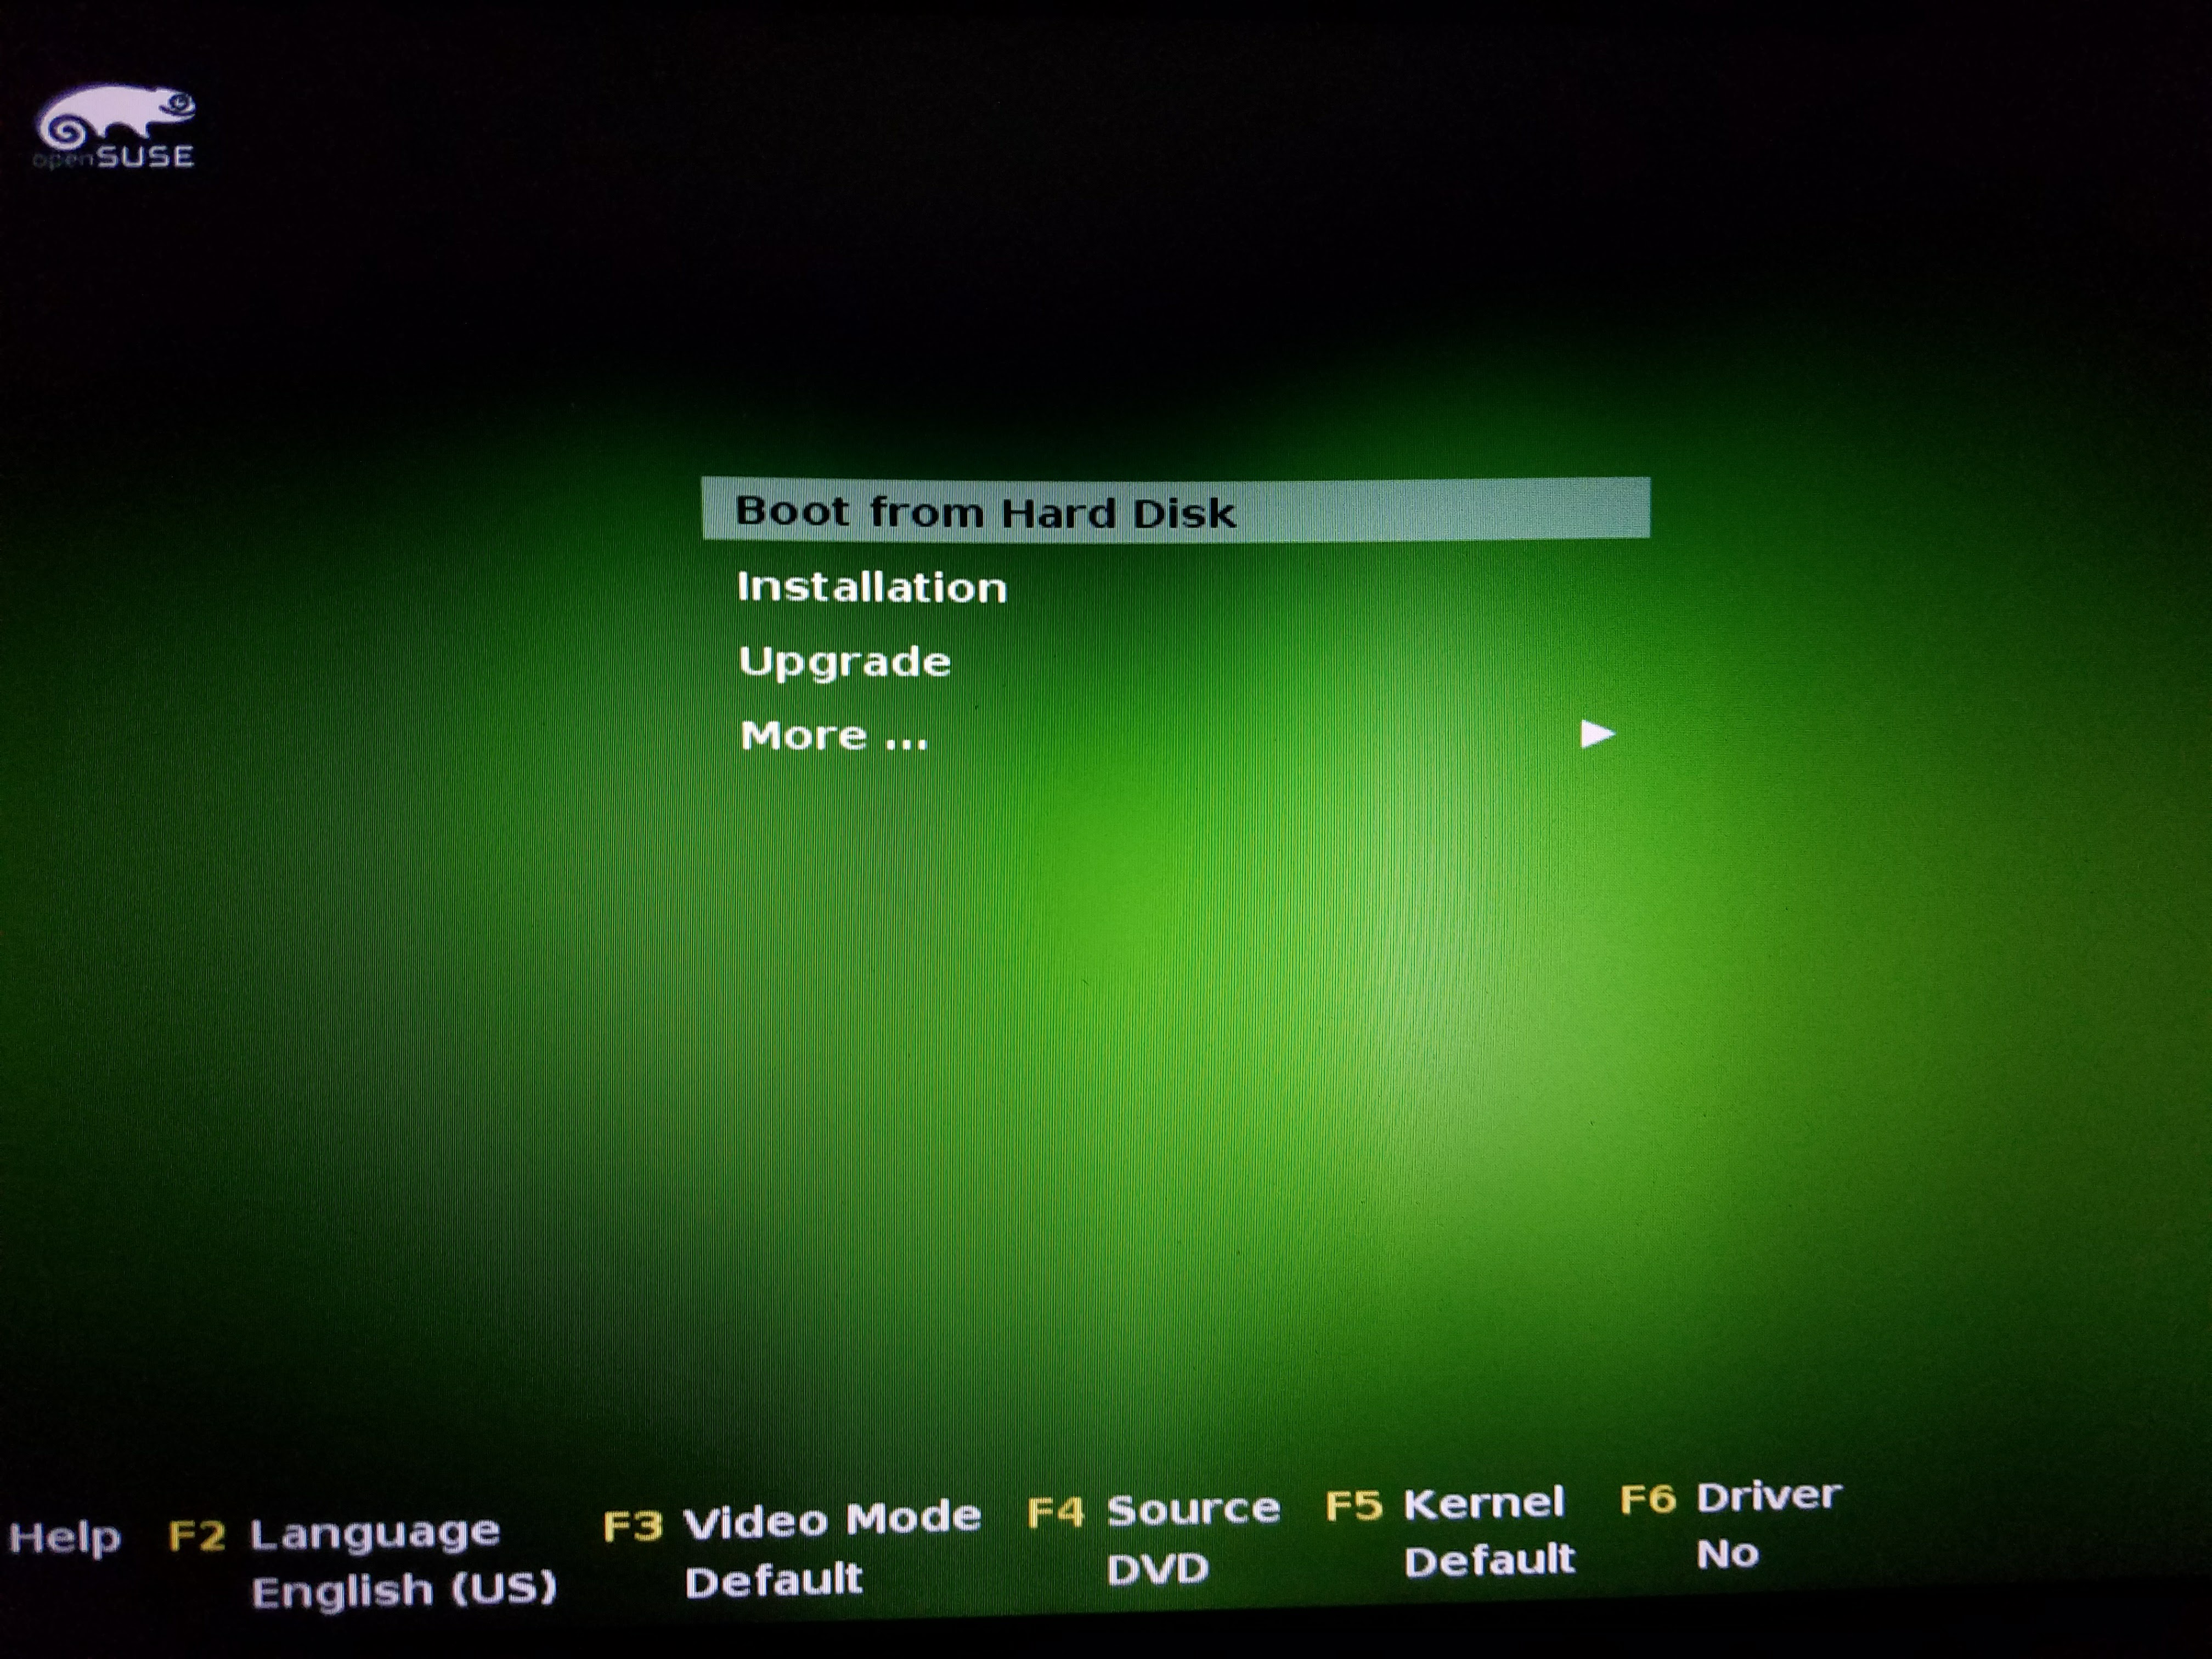
After the DVD boots you will see the GRUB menu for it:
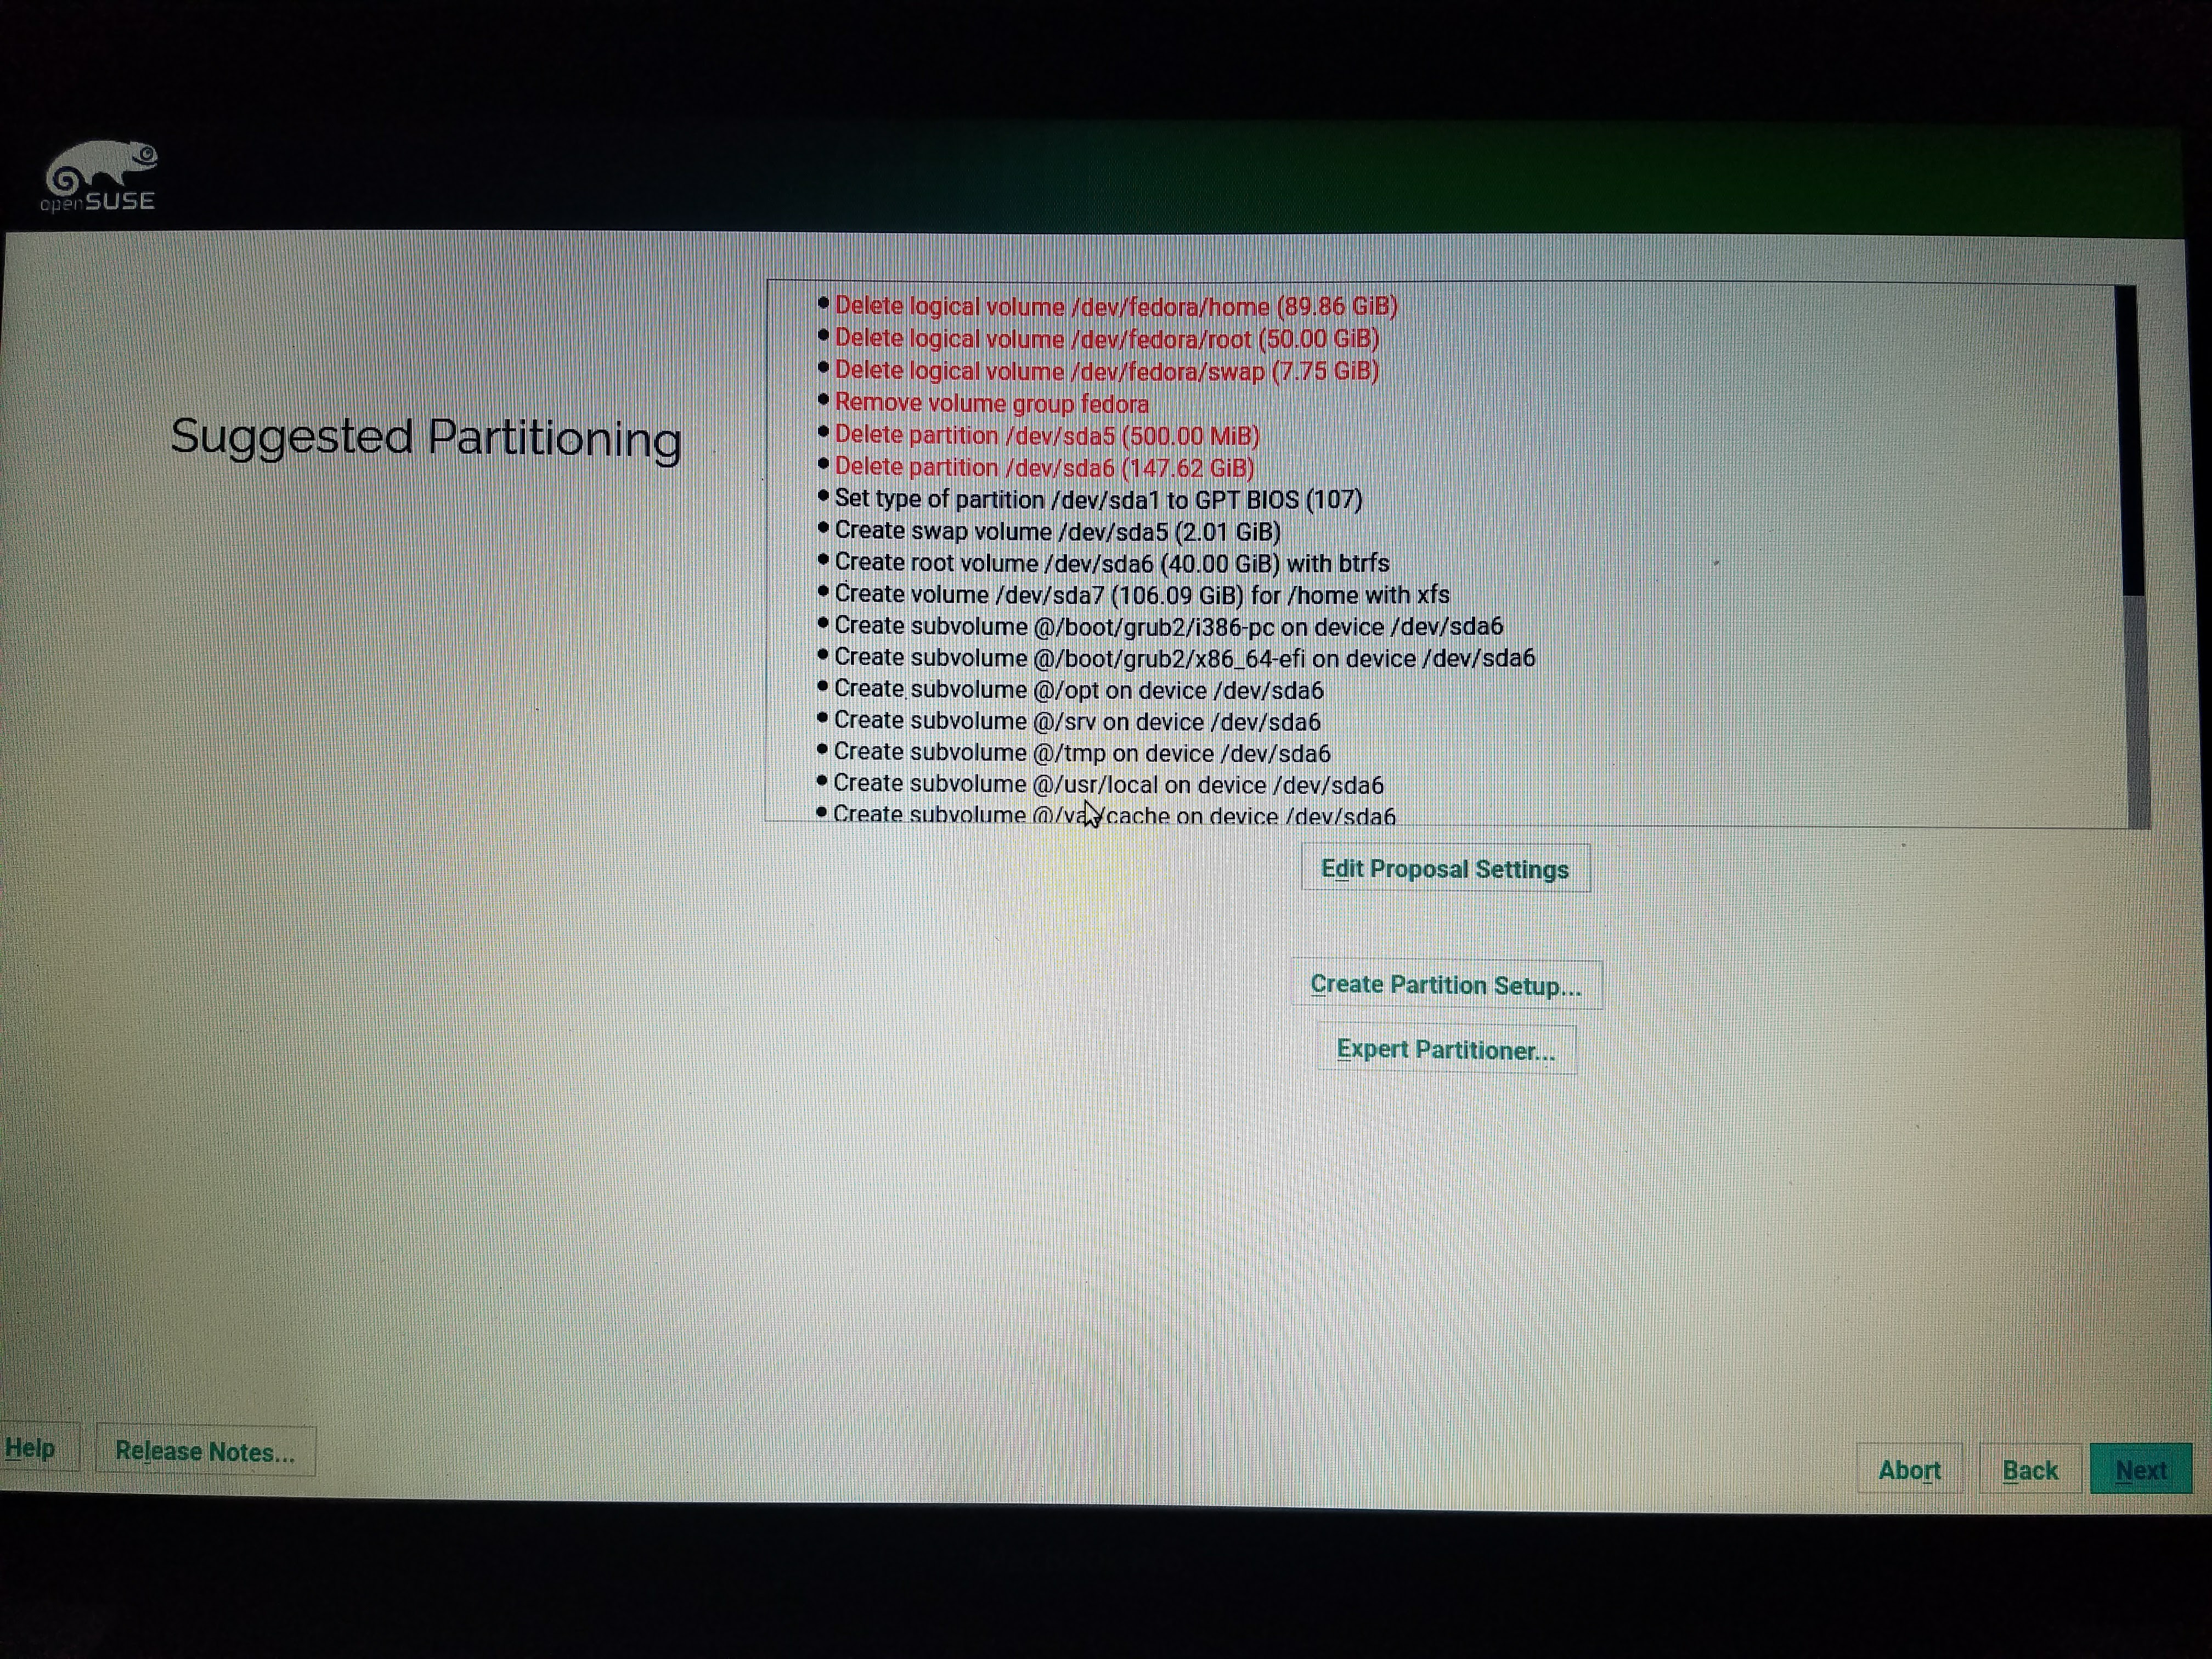
You can boot into the installer and by default it will suggest a partition schema for you:
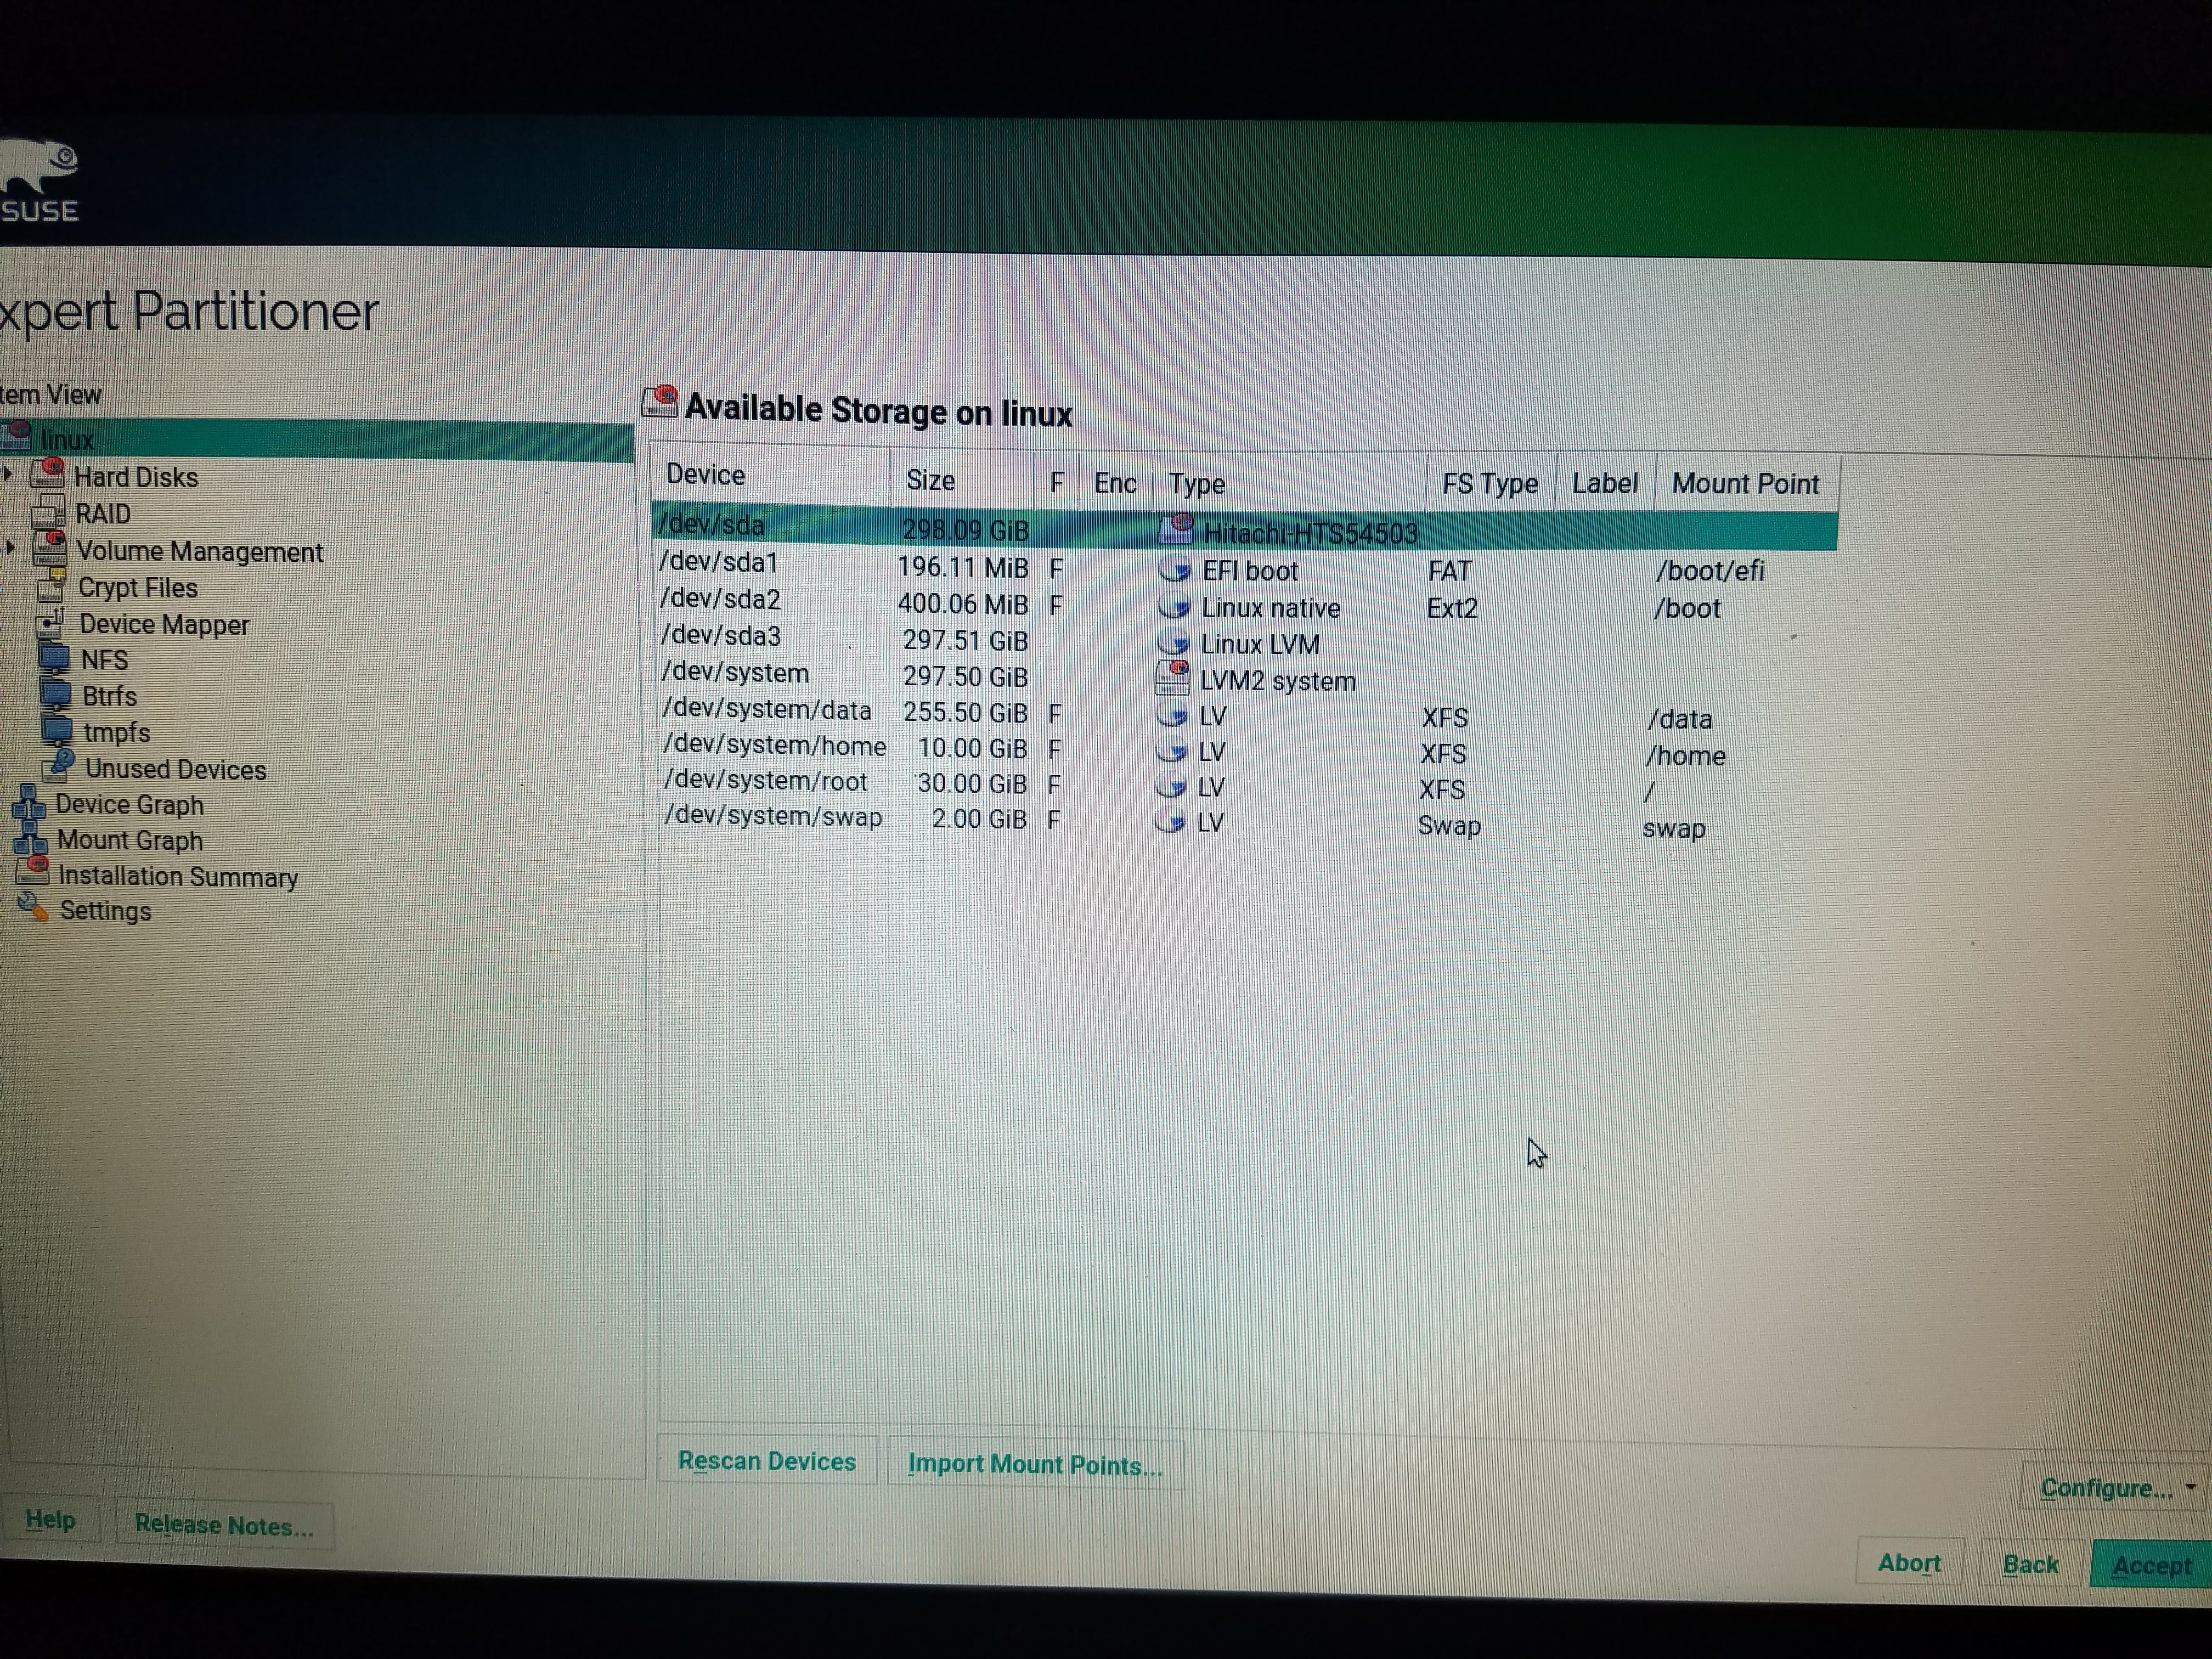
I ended up clicking on the Expert Partitioner and creating the following partition layout:
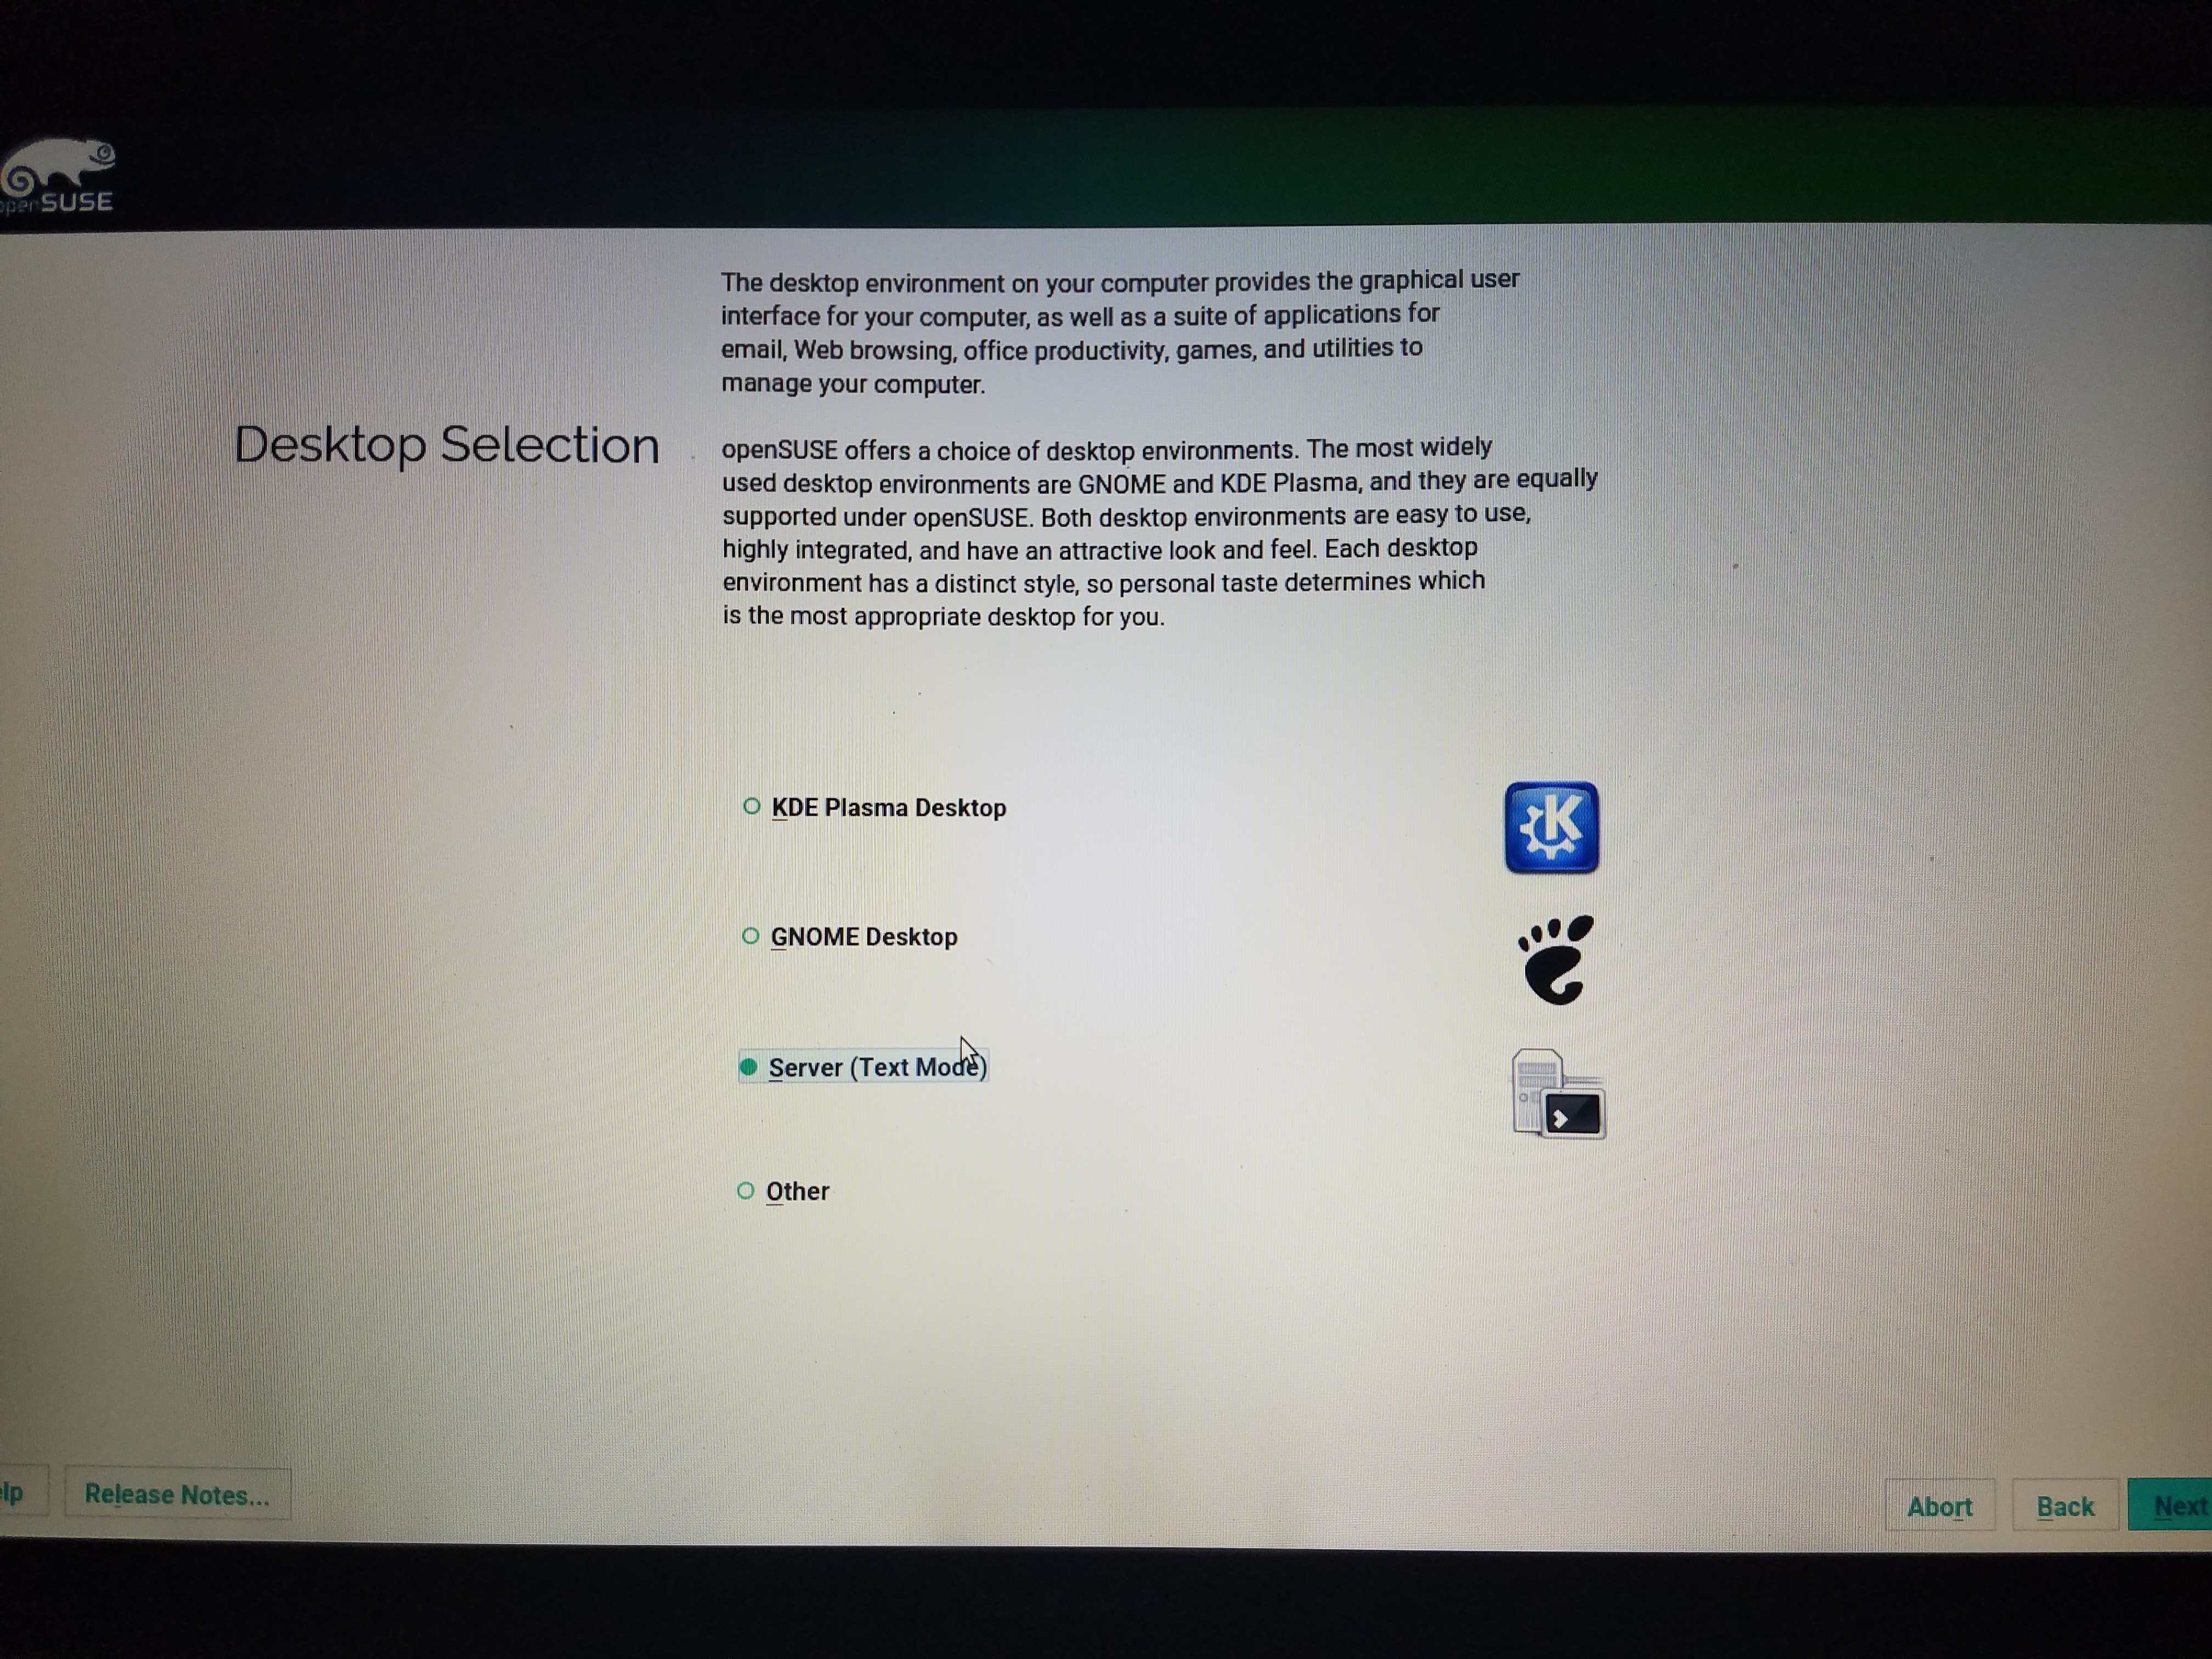
And for the Desktop Setup, I decided to leave it blank for now:
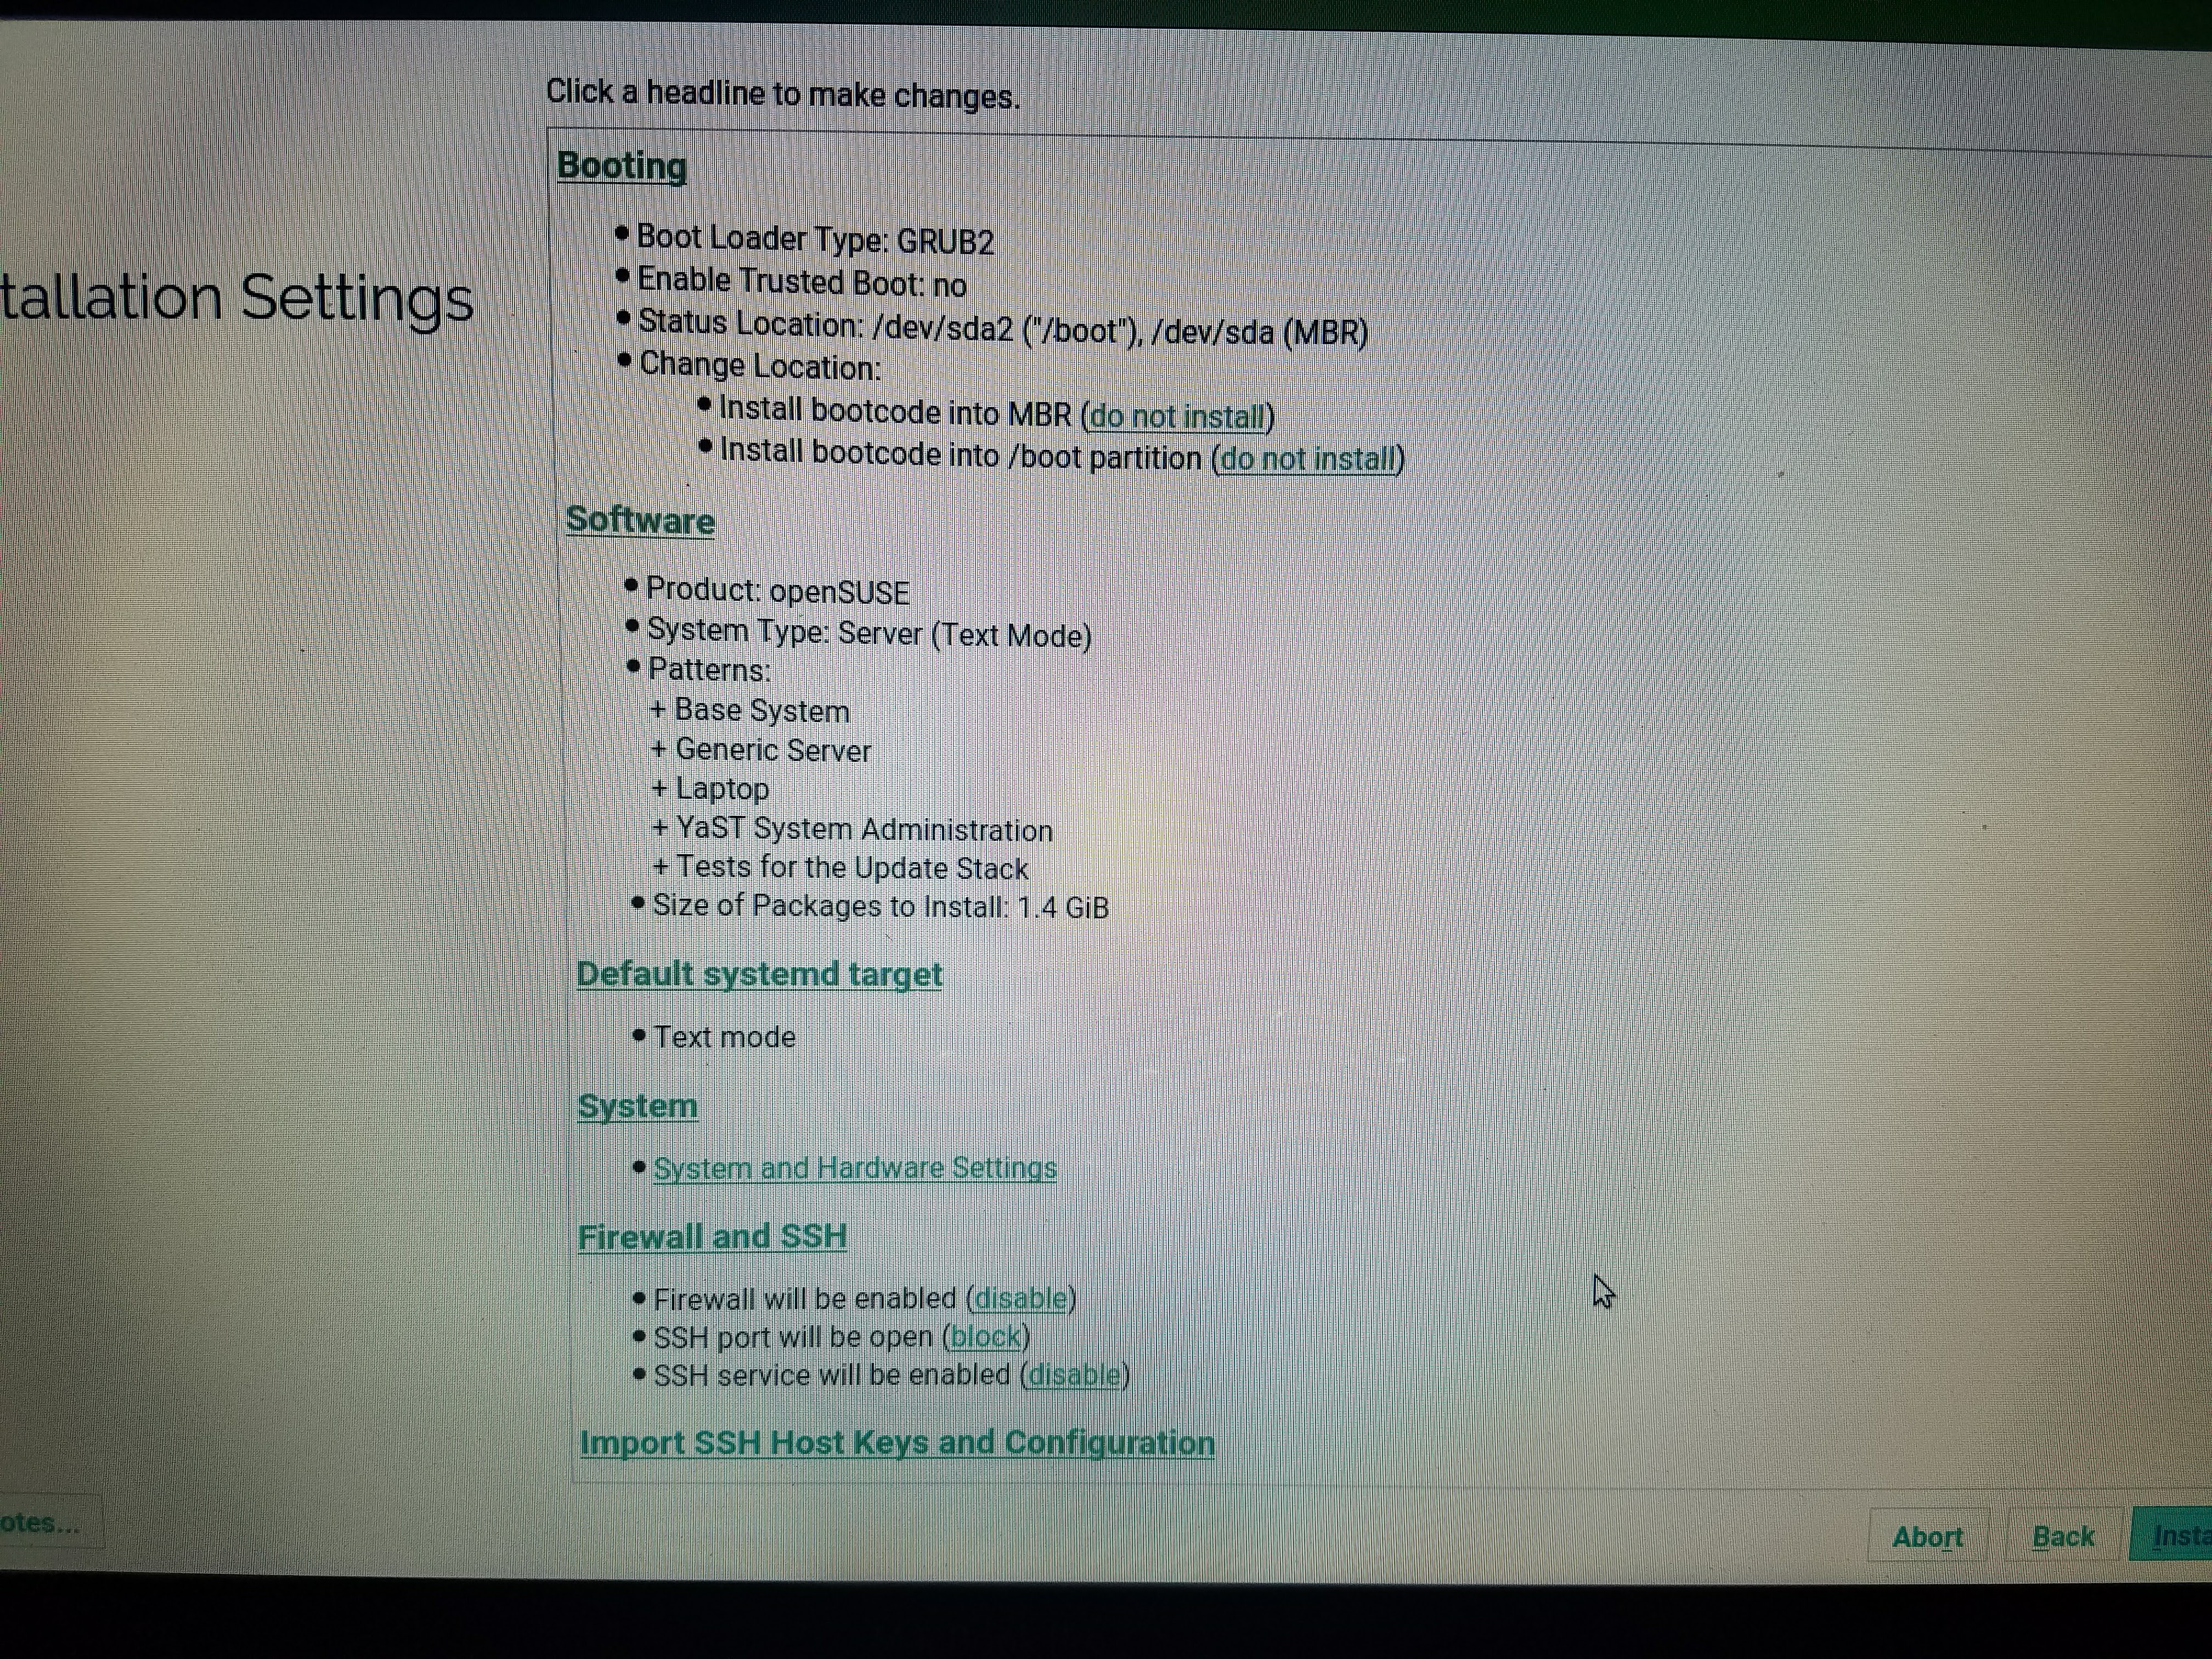
And in the end here was the summary it provided before starting the install:
After the install finished it rebooted and I booted from the CD one more time so I could install GRUB appropriately.
Installing GRUB EFI
I booted from the CD and chose the Rescue Linux option and it booted into a shell. After that I followed instructions laid out in this arch linux page on how to install GRUB for EFI. Here are the commands I ran:
## load the lvm volumes
$ lvm vgscan -v
$ lvm vgchange -a y
$ lvm lvs –all

## mount all the partions
$ mount /dev/mapper/system-root /a
$ mount --bind /dev /a/dev
$ mount --bind /proc /a/proc
$ mount --bind /sys /a/sys
$ mount /dev/sda2 /a/boot
$ mount /dev/sda1 /a/boot/efi

## chroot into the install
$ chroot /a

## Install grub
$ grub-install --target=x86_64-efi --efi-directory=/boot/efi --bootloader-id=opensuse --recheck --debug
$ grub-mkconfig -o /boot/efi/EFI/opensuse/grub.cfg
$ cp /boot/efi/EFI/opensuse/grub.cfg /boot/grub/grub.cfg
$ cp /boot/efi/EFI/opensuse/grubx64.efi /boot/efi/EFI/boot/bootx64.efi

## delete the Mac OS X option
$ efibootmgr -b 0000 -B
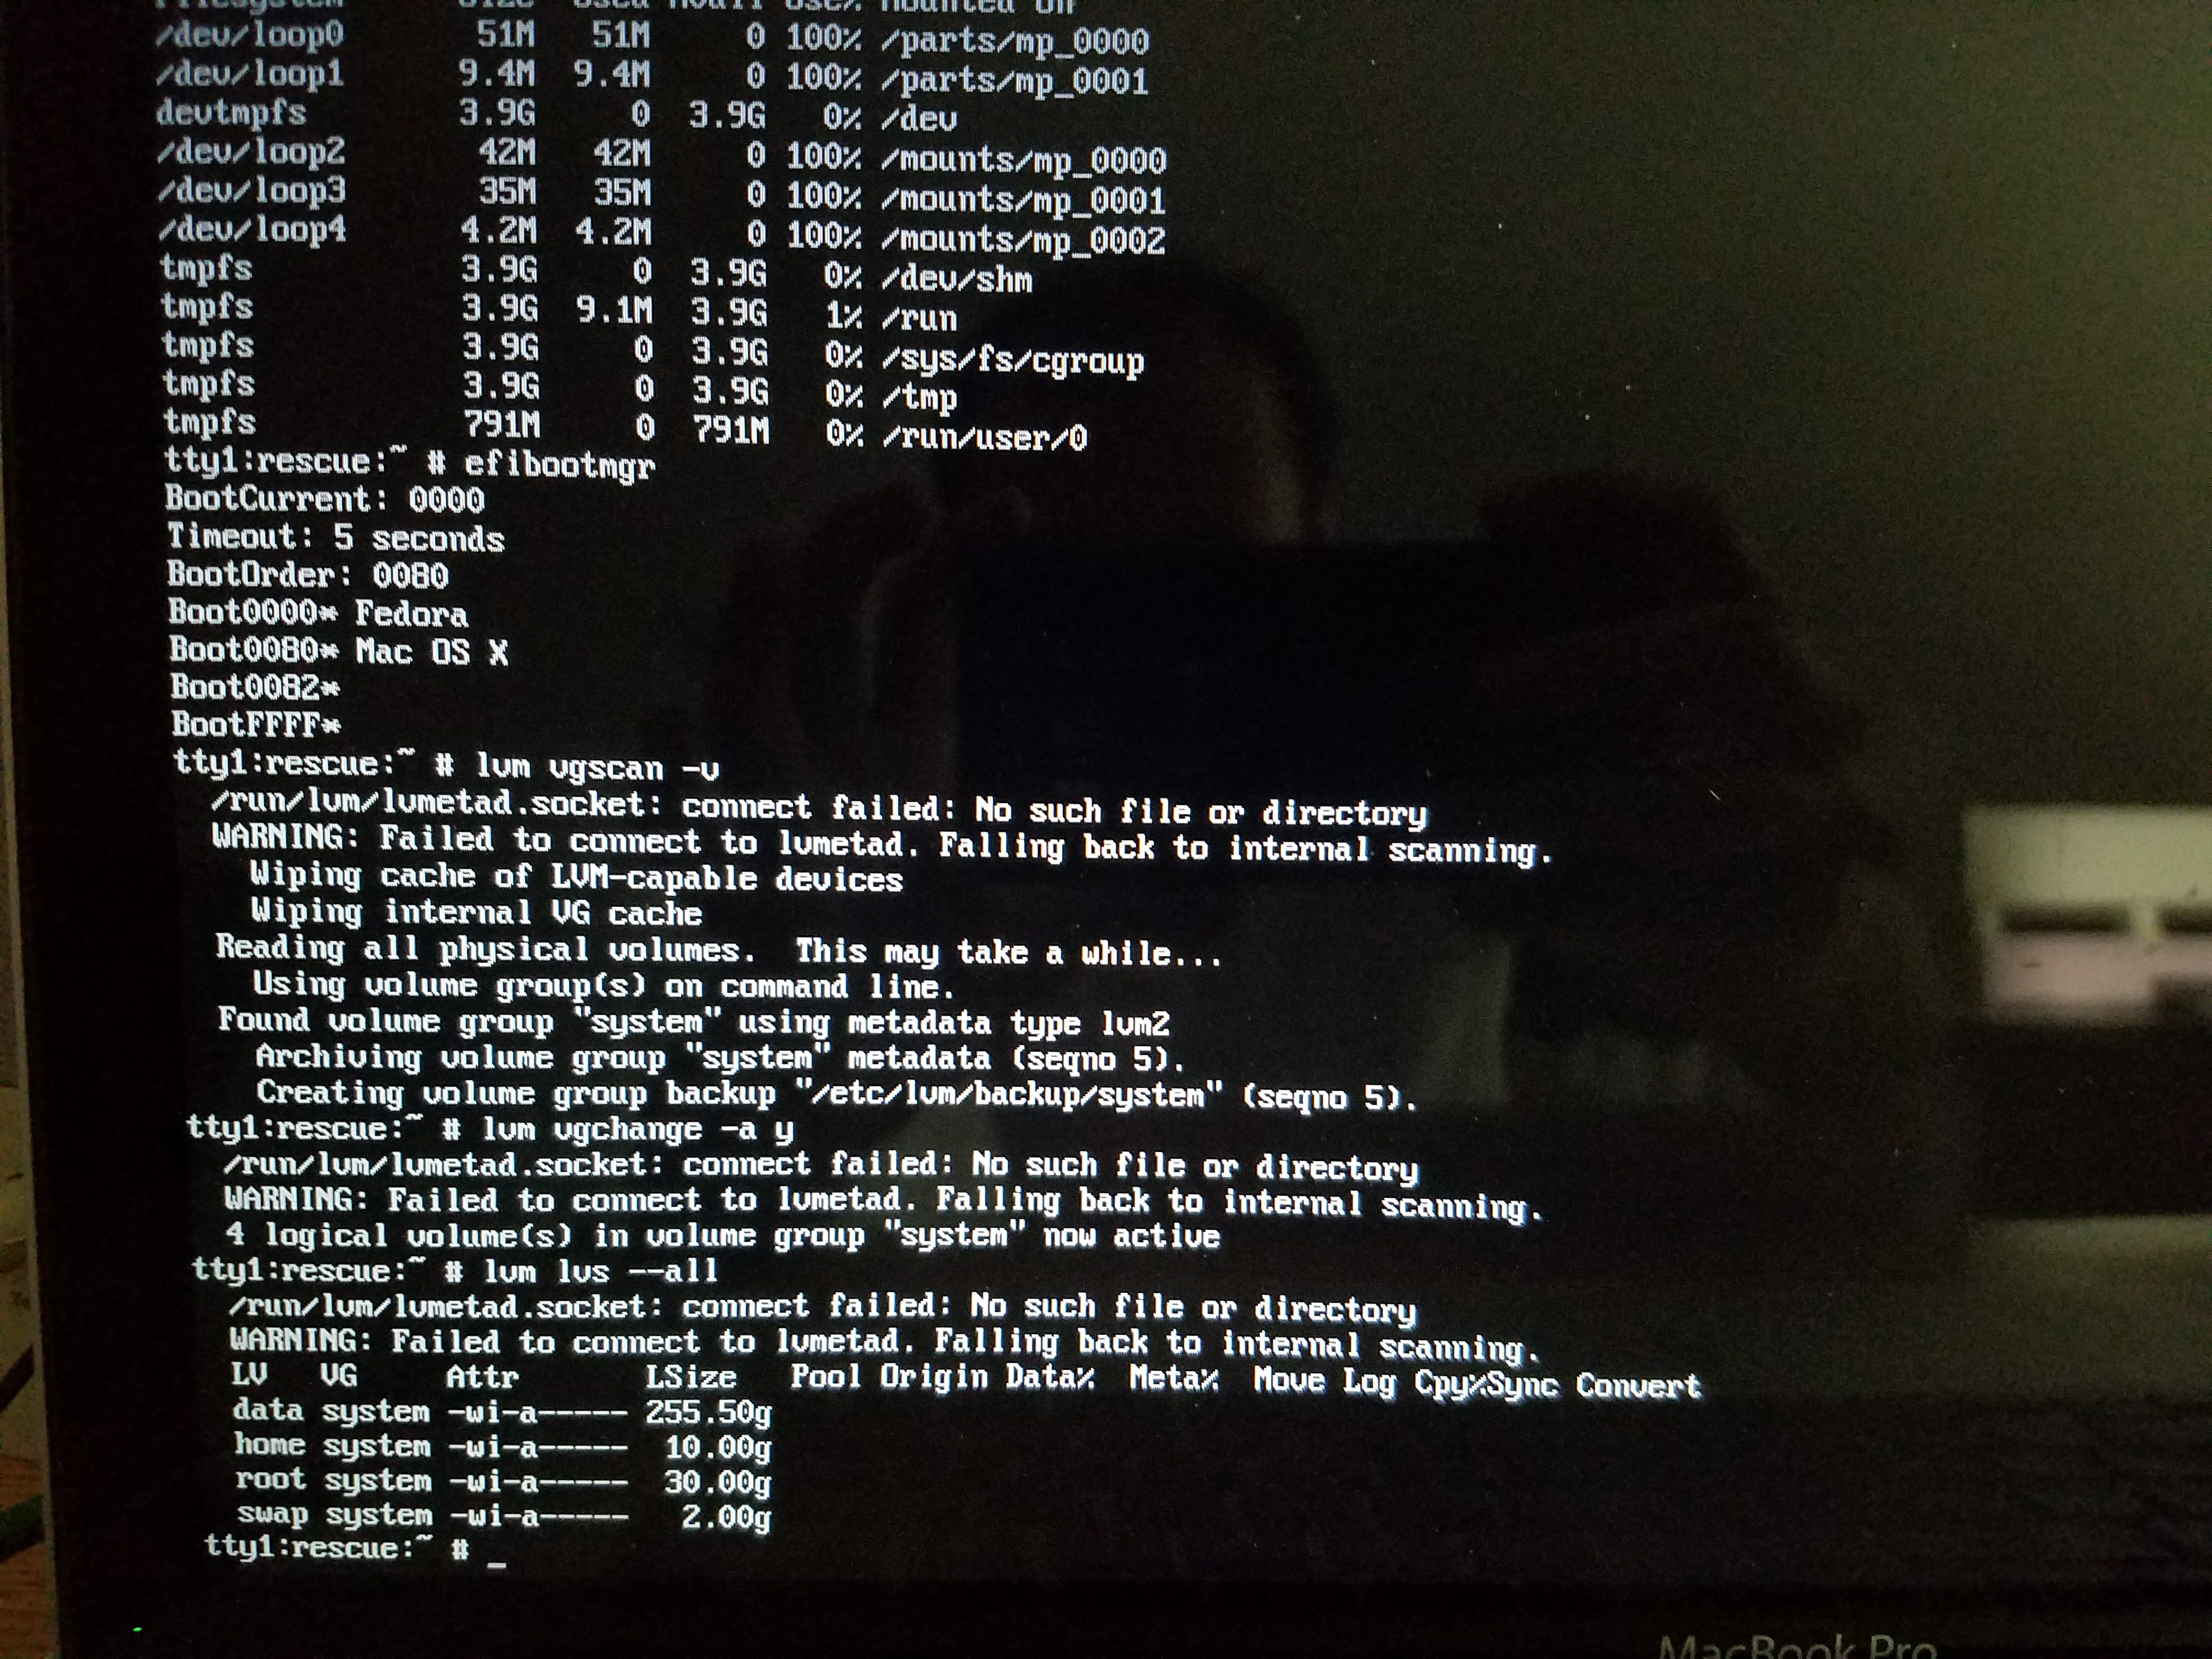
Here is screenshot of the shell when I was just starting out the mount:
After the above commands are done, you can do the following to reboot:
## leave the chroot
$ exit

## unmount the install
$ umount -R /a

## and reboot
$ reboot
rEFIt GPT sync
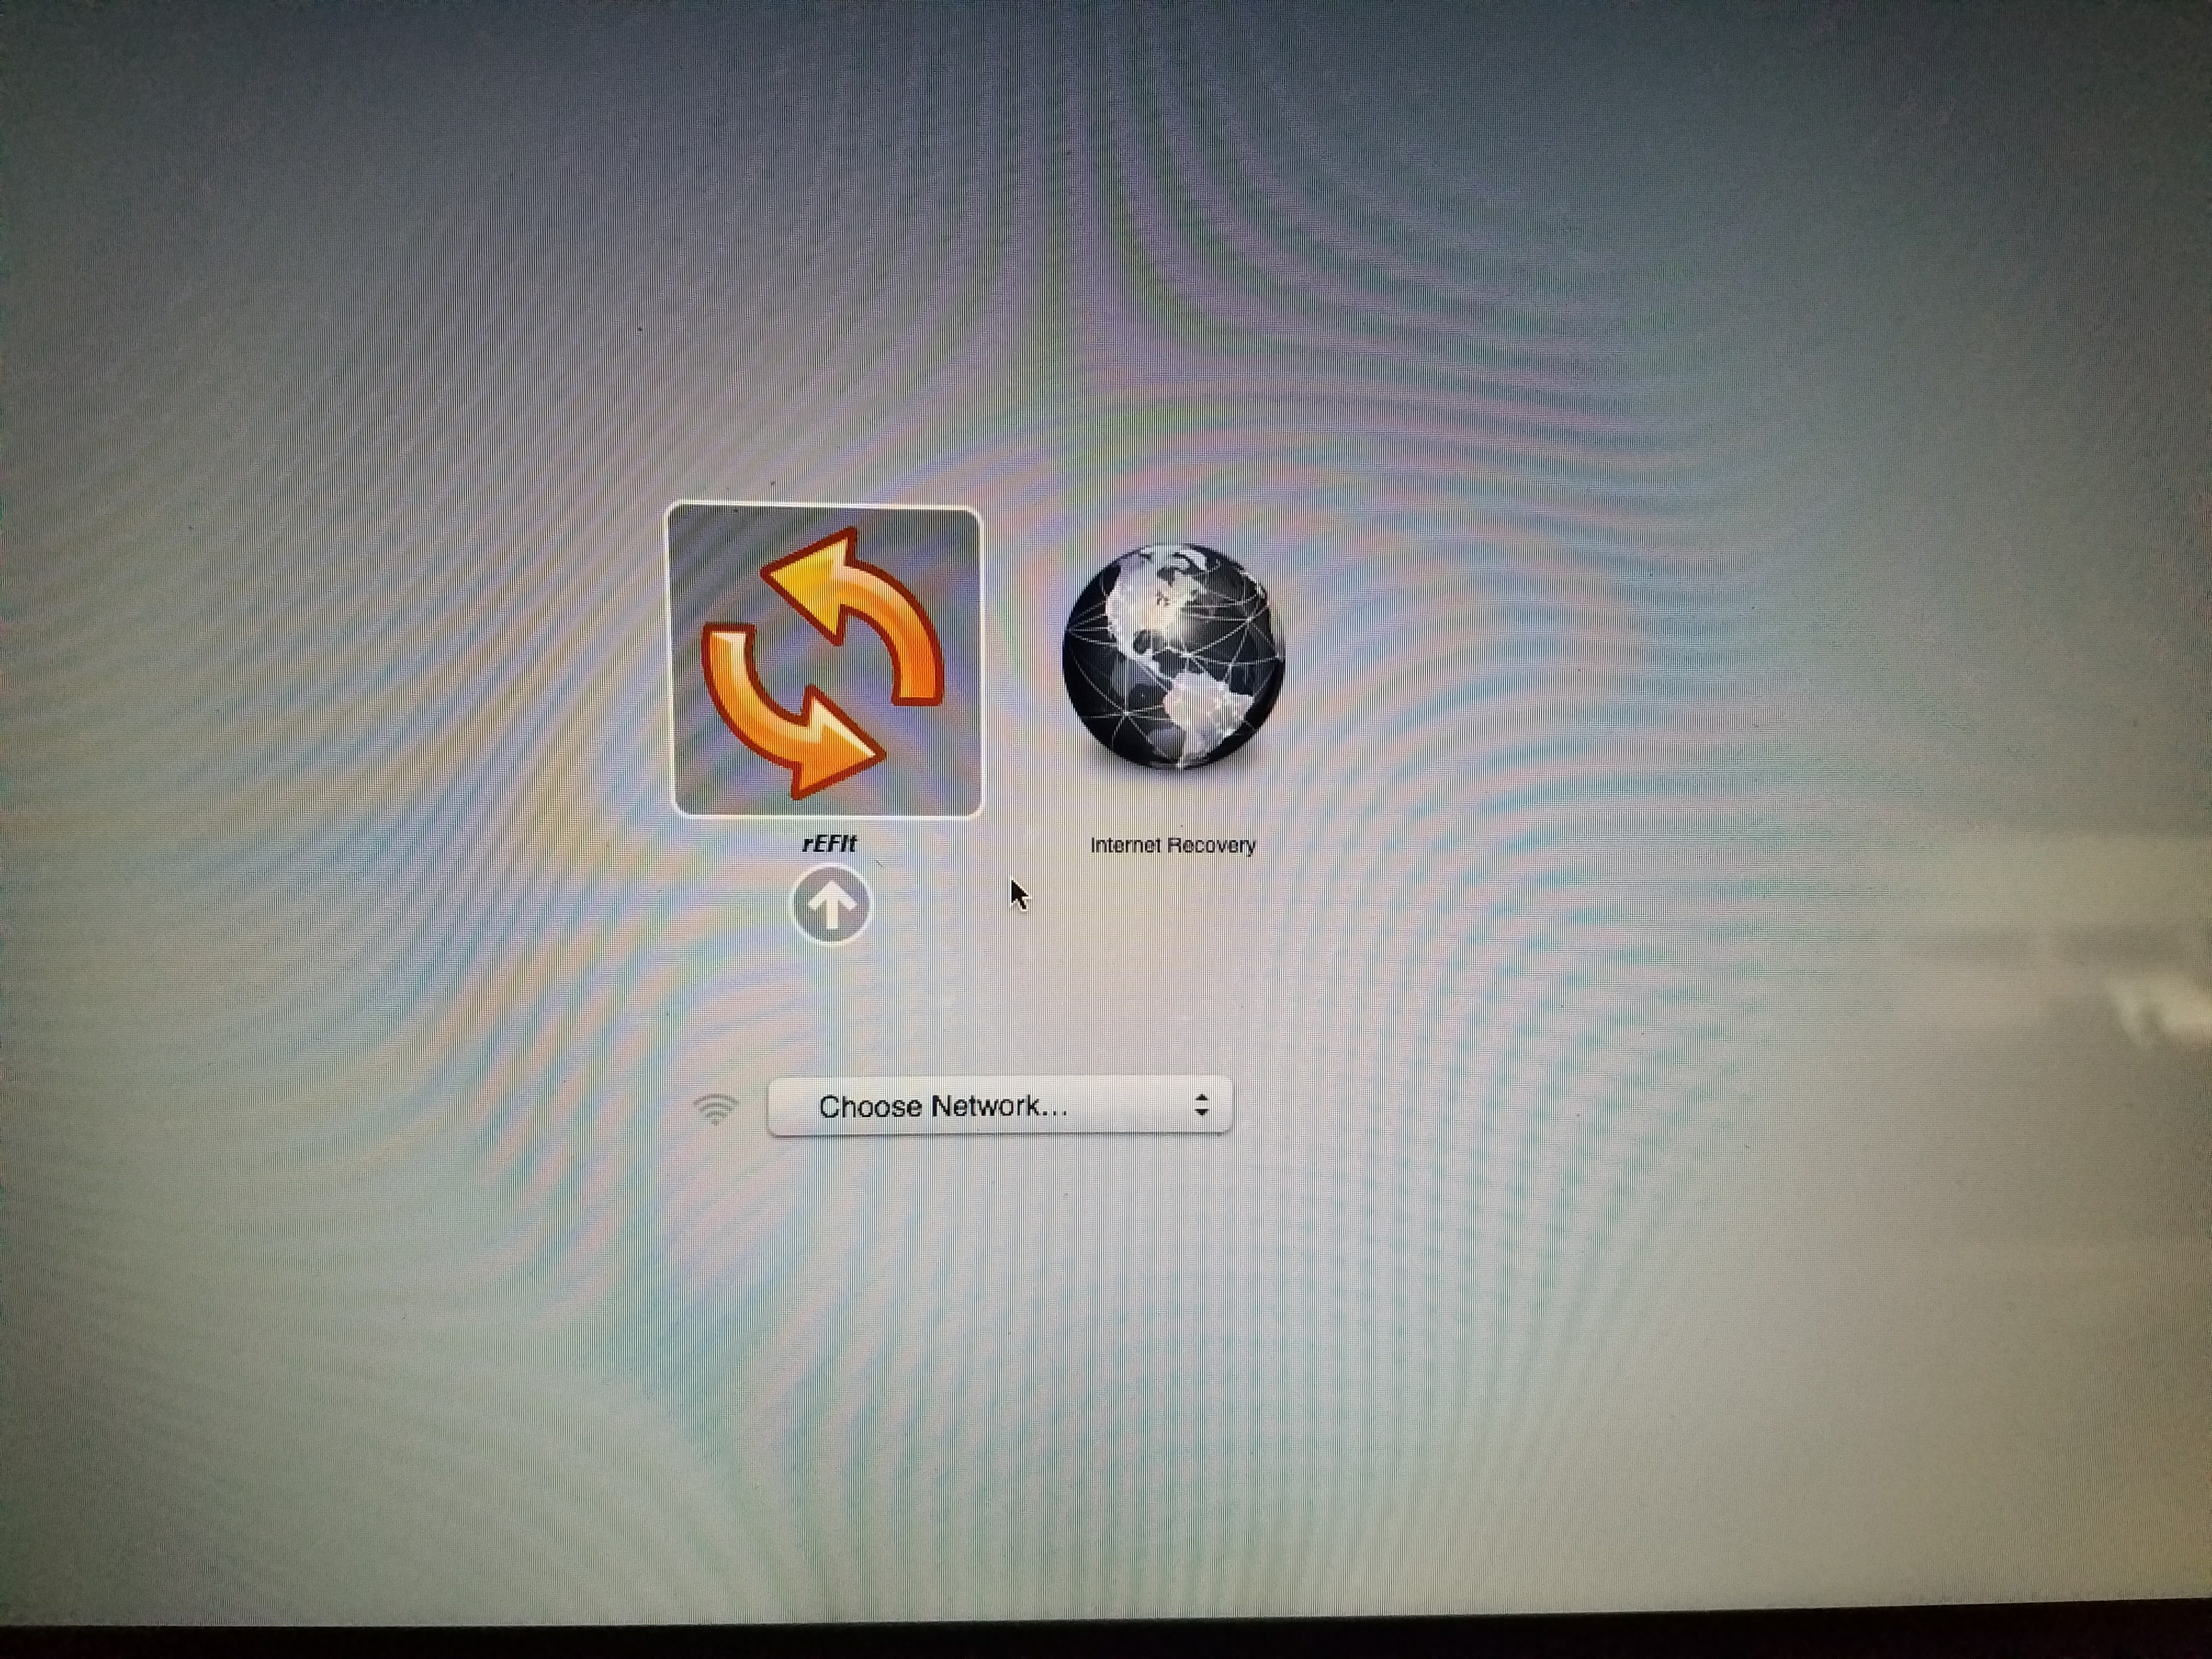
After that I put in the rEFIt CD and held the Alt/Option Key see the available boot options (you will notice the Linux Install is not available yet):
Then I booted from the CD and opened up a shell and ran gptsync.efi:
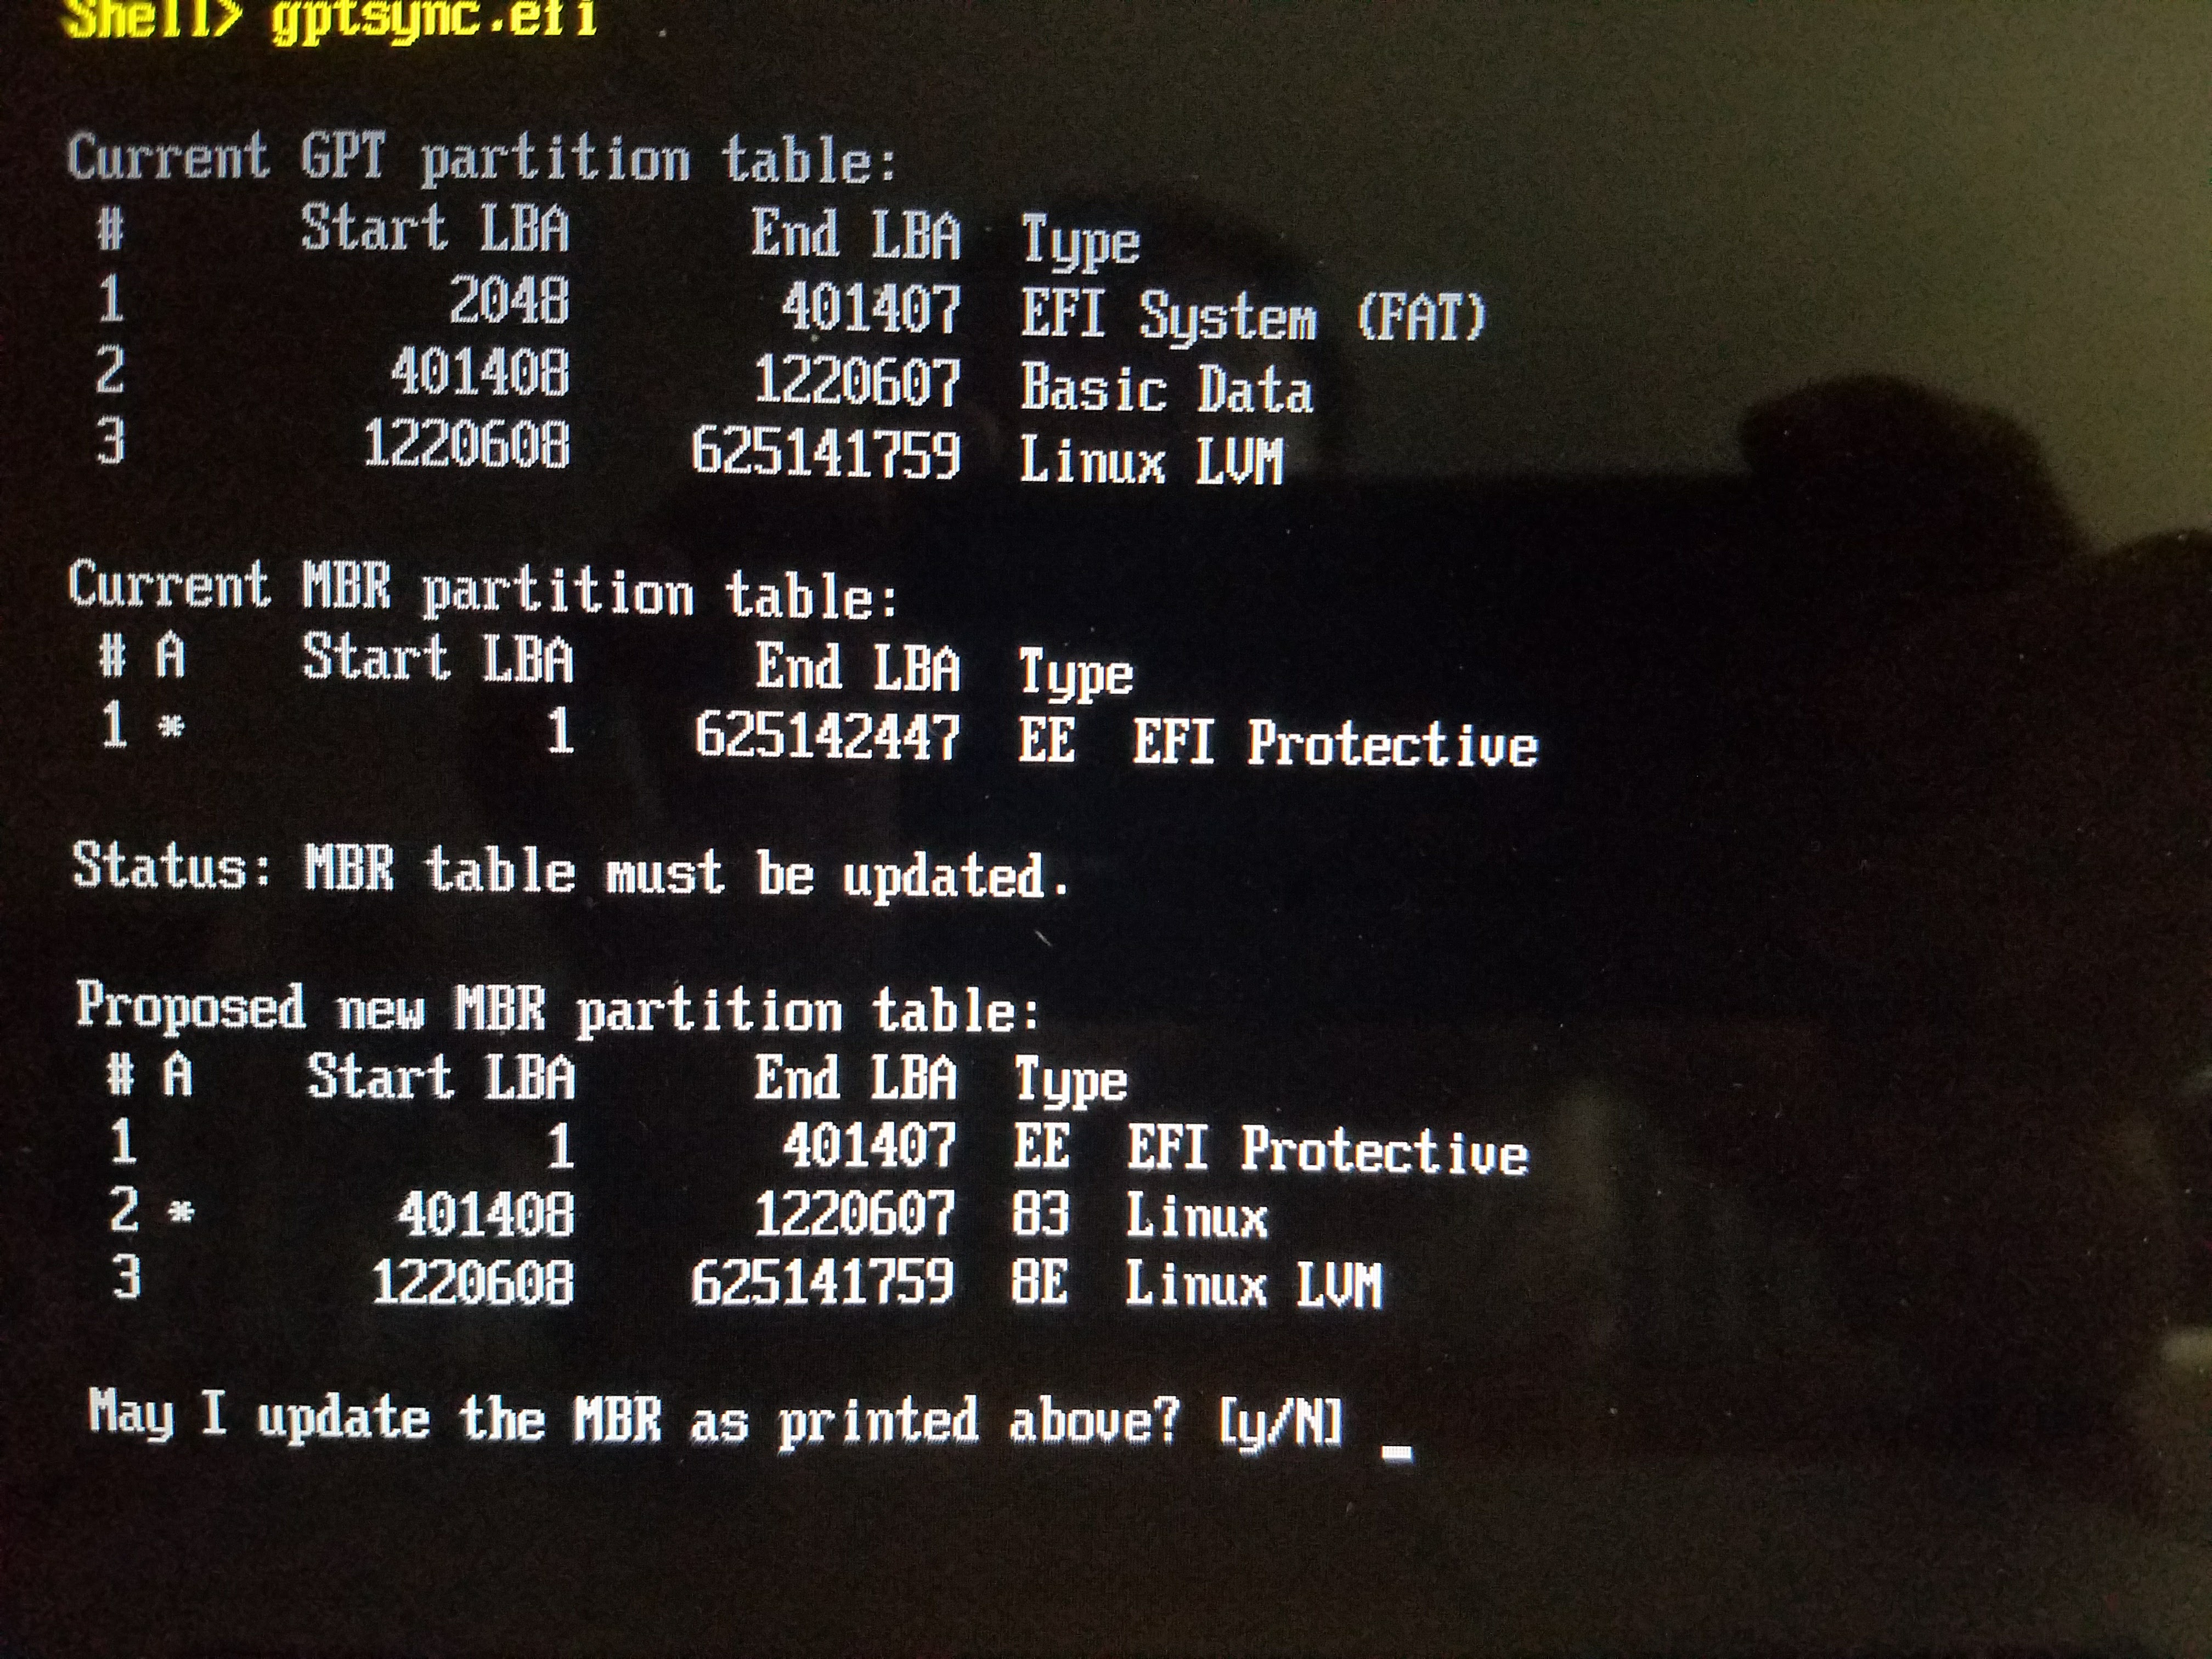
Then rebooting one more time, I was able to boot into the openSUSE install.
Setting Up Xorg
First I installed all the necessary packages:
$ sudo zypper in xorg-x11-server xinit lightdm icewm
Then I enabled the graphical target for systemd:
$ sudo systemctl set-default graphical.target
That would actually not show X, it would just boot up and then the screen would go completely blank. It’s a known issue when you have multiple Video Cards, and this old laptop did. You can follow the instructions laid out at:
- Proprietary NVidia drivers with EFI on Mac, to prevent overheating
- Installing Ubuntu Mate On A MacBook Pro With UEFI
In summary I created the following file:
<> cat /etc/grub.d/02_mbp
echo "setpci -s "00:01.0" 3e.b=8"
echo "setpci -s "01:00.0" 04.b=7"
And made it executable:
$ sudo chmod +x /etc/grub.d/02_mbp
Then rebuilt the grub menu:
$ sudo grub2-mkconfig -o /boot/grub2/grub.cfg
While I was at it I decided to install the Nvidia Driver before I rebooted. I followed the instructions at Graphics Drivers. First enable the repo:
$ sudo zypper addrepo -f http://download.nvidia.com/opensuse/leap/42.2 nvidia
Then we can run the following for it to install the correct driver:
~> sudo zypper install-new-recommends
Loading repository data...
Warning: Repository 'openSUSE-Leap-42.2-Update-Non-Oss' appears to be outdated. Consider using a different mirror or server.
Reading installed packages...
Resolving package dependencies...

The following 5 NEW packages are going to be installed:
  nvidia-computeG03 nvidia-gfxG03-kmp-default nvidia-glG03
  nvidia-uvm-gfxG03-kmp-default x11-video-nvidiaG03

5 new packages to install.
Overall download size: 70.1 MiB. Already cached: 0 B. After the operation,
additional 341.0 MiB will be used.
Continue? [y/n/? shows all options] (y):
After that X would finally start (it wouldn’t be just a blank screen), but lightdm still failed to load. I checked out the logs under /var/log/Xorg.0.log and I saw the following:
[    34.450] (EE) NVIDIA(0): Failed to initialize the GLX module; please check in your X
[    34.450] (EE) NVIDIA(0):     log file that the GLX module has been loaded in your X
[    34.450] (EE) NVIDIA(0):     server, and that the module is the NVIDIA GLX module.  If
[    34.450] (EE) NVIDIA(0):     you continue to encounter problems, Please try
[    34.450] (EE) NVIDIA(0):     reinstalling the NVIDIA driver.
For whatever reason it was using the wrong glx module, luckily that file was managed with alternatives so I just updated the link. Here is the before:
~> sudo update-alternatives --display libglx.so
libglx.so - manual mode
  link best version is /usr/lib64/xorg/modules/extensions/nvidia/nvidia-libglx.so
  link currently points to /usr/lib64/xorg/modules/extensions/xorg/xorg-libglx.so
  link libglx.so is /usr/lib64/xorg/modules/extensions/libglx.so
/usr/lib64/xorg/modules/extensions/nvidia/nvidia-libglx.so - priority 100
/usr/lib64/xorg/modules/extensions/xorg/xorg-libglx.so - priority 50
Here is to update to the nVidia one:
~> sudo update-alternatives --set libglx.so /usr/lib64/xorg/modules/extensions/nvidia/nvidia-libglx.so
And here is the after:
~> sudo update-alternatives --display libglx.so
libglx.so - manual mode
  link best version is /usr/lib64/xorg/modules/extensions/nvidia/nvidia-libglx.so
  link currently points to /usr/lib64/xorg/modules/extensions/nvidia/nvidia-libglx.so
  link libglx.so is /usr/lib64/xorg/modules/extensions/libglx.so
/usr/lib64/xorg/modules/extensions/nvidia/nvidia-libglx.so - priority 100
/usr/lib64/xorg/modules/extensions/xorg/xorg-libglx.so - priority 50
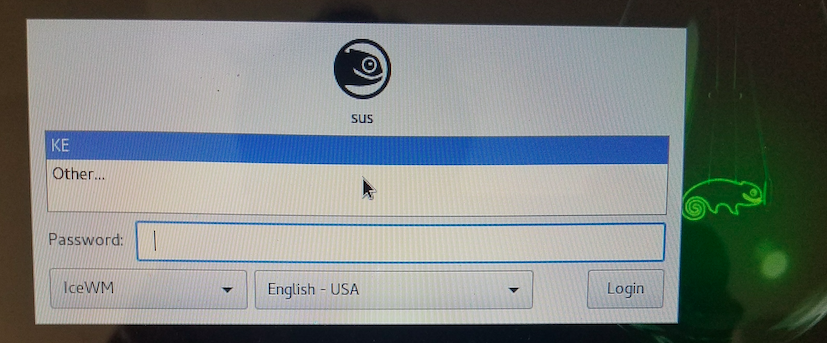
Then after one more reboot I finally saw lightdm:
Media Codecs
Initially I installed mpv and tried playing a video but it complained about not having the necessary codecs. There is nice page that talks about adding the right repos: Multimedia Codecs, but I couldn’t find the repo for Leap 42.2, I tried 42.1:
sudo zypper addrepo -f http://packman.inode.at/suse/openSUSE_Leap_42.1/ packman
sudo zypper addrepo -f http://opensuse-guide.org/repo/openSUSE_Leap_42.1/ dvd
sudo zypper install k3b-codecs ffmpeg lame packman-gstreamer-meta-package libdvdcss2
I even tried the vlc repo which was available for Leap 42.2:
sudo zypper ar -f http://download.videolan.org/pub/videolan/vlc/SuSE/Leap_42.2/ vlc
sudo zypper in vlc
But that caused all sorts of dependency problems (and vlc still complained about the missing codecs)… that’s what I get for trying a beta version :) At this point I decided to try out openSUSE Tumbleweed.
openSUSE Tumbleweed
There is a nice page that talks about the difference betwee two Distro Versions: Side-by-side: openSuSE Tumbleweed and Leap. From that page:
The openSUSE project offers two distributions: Tumbleweed, which is a rolling distribution that gets continuous updates, and Leap, which is a point distribution that gets periodic updates.
I think in summary Tumbleweed is supposed to be close to bleeding edge where Leap is little bit more stable. Hind sight I should’ve probably just gone with Leap 42.1.
openSUSE Tumbleweed Install
I just booted into the new DVD and actually ended up wiping my root parition and formatting it btrfs (just to try it out), but the left the rest of the setup the same as in Leap 42.2. After installing X, lightdm started up without any issues:
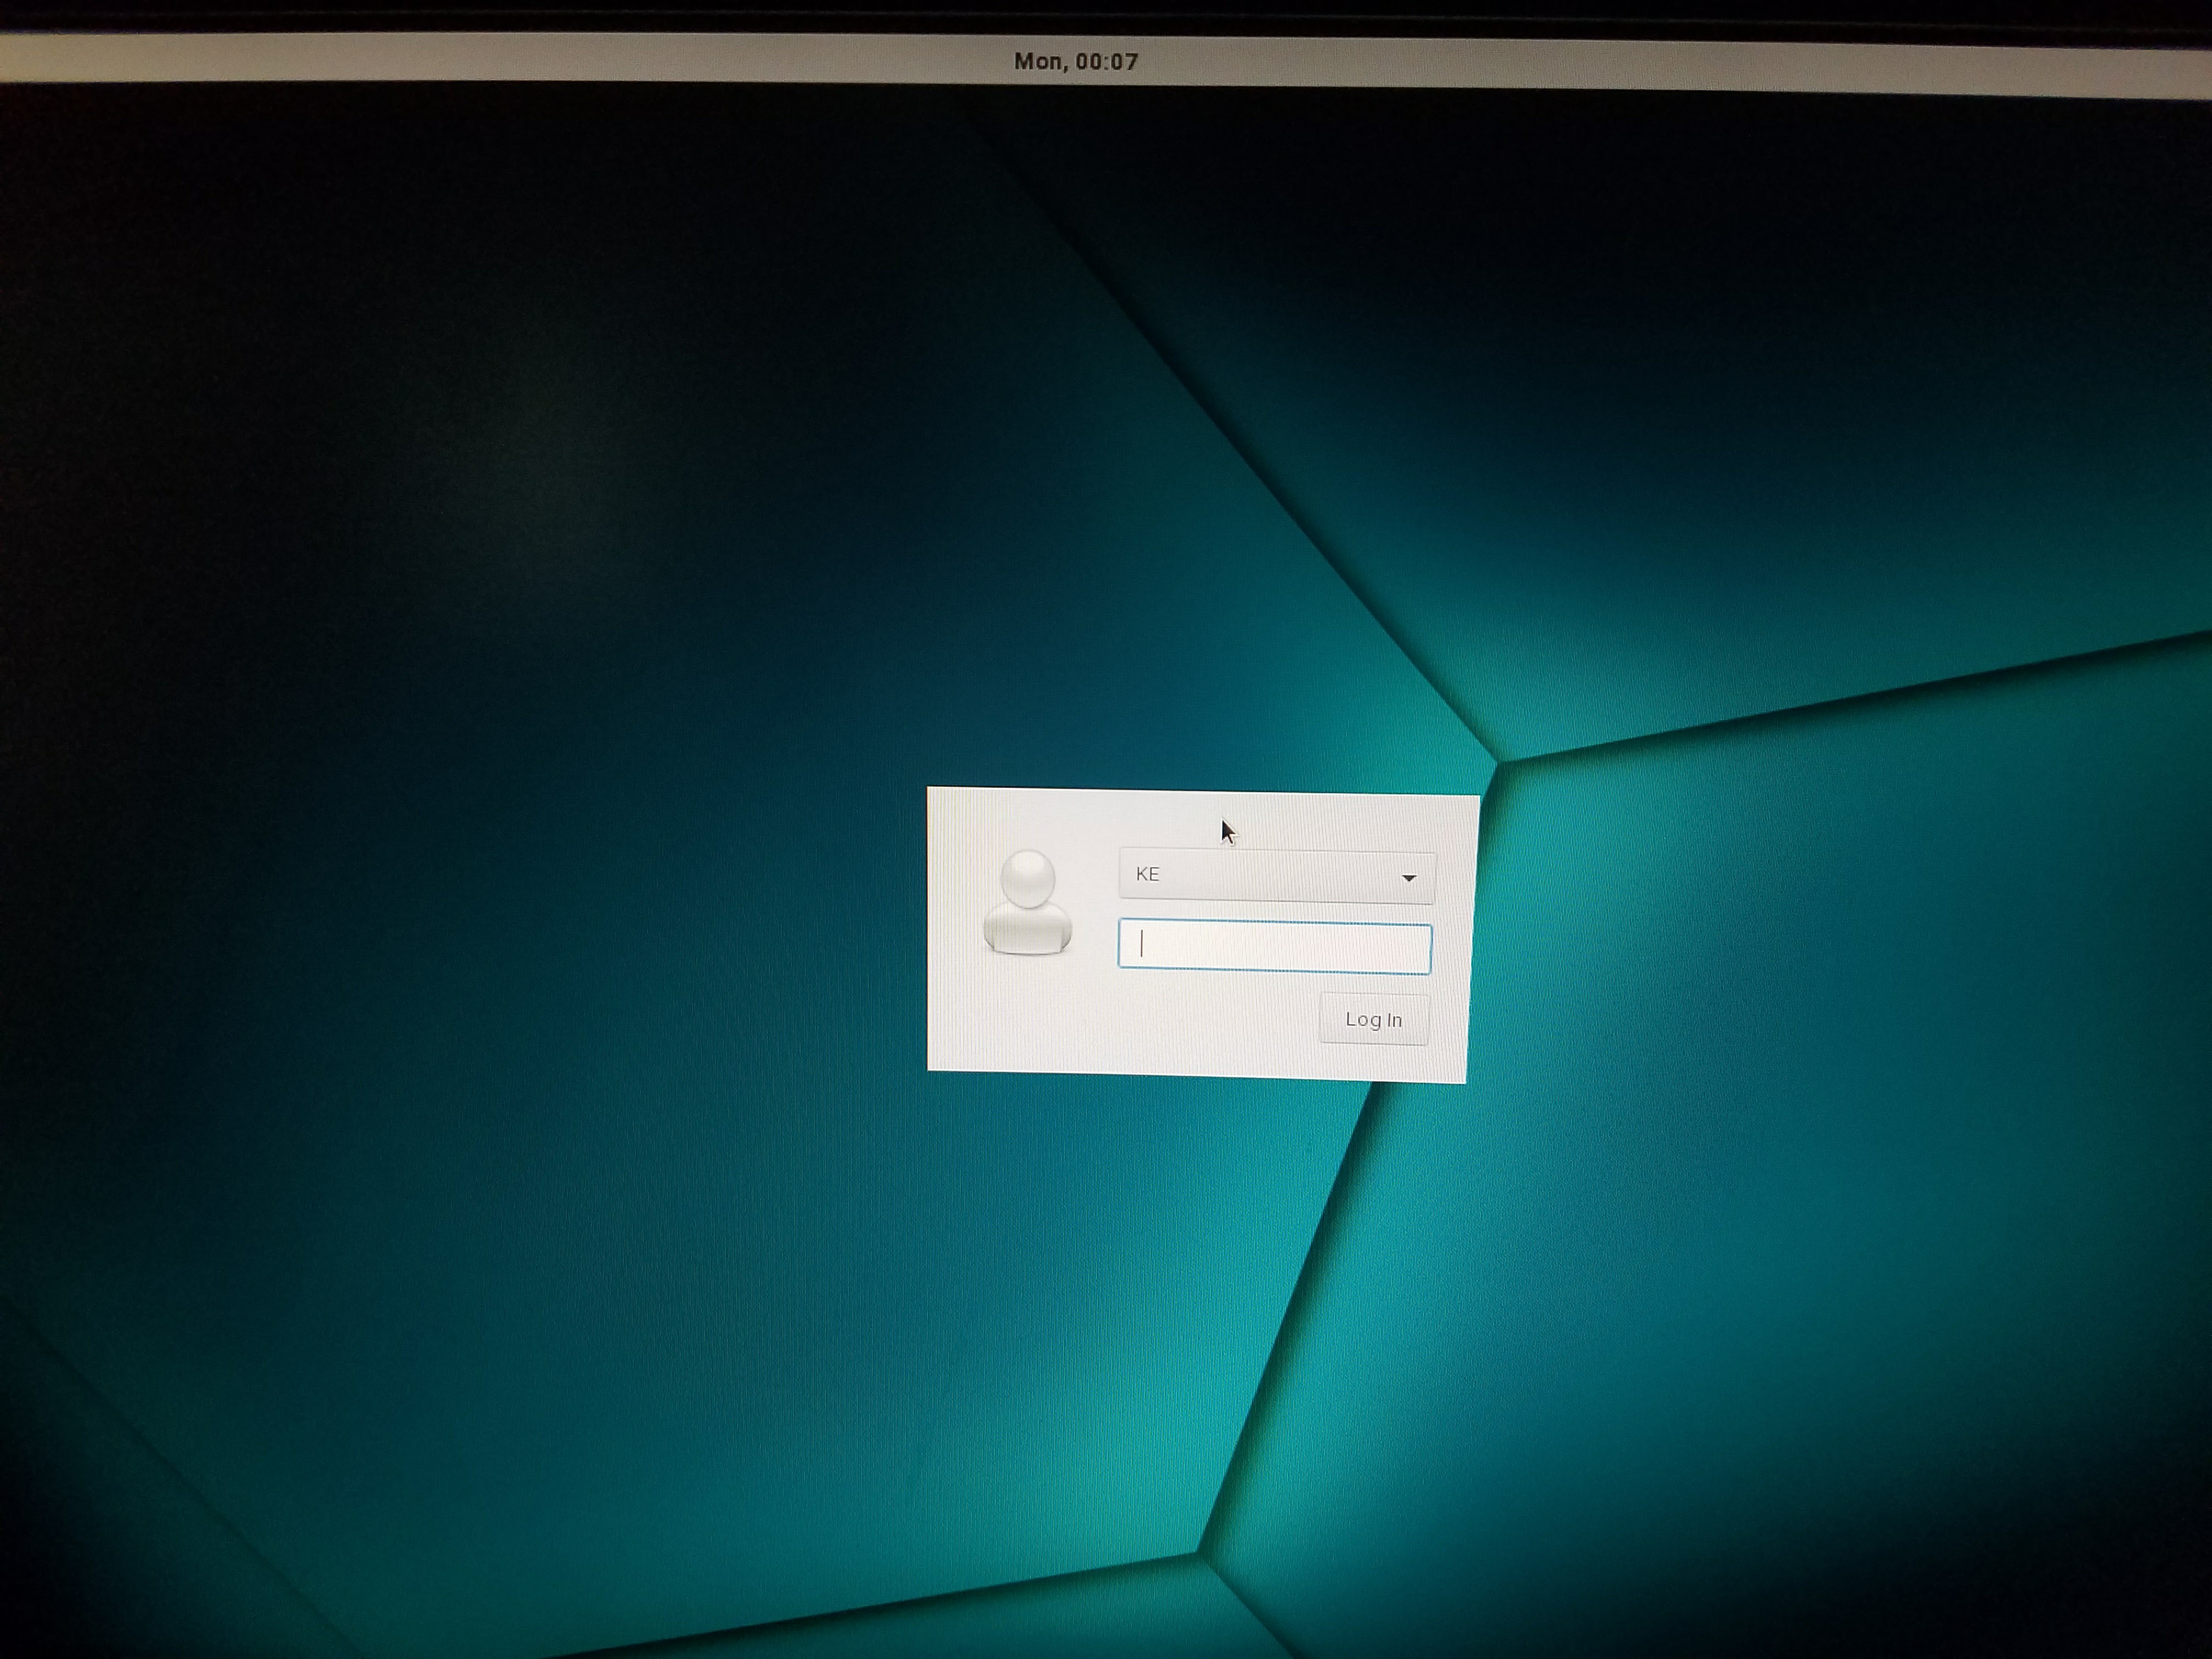
This was using the Nouveau drivers (and didn’t have to make any GRUB changes).
Media Codecs
Tumbleweed has a dedicated packman repo, so I just ran the following to install what I needed:
$ sudo zypper ar -f http://opensuse-guide.org/repo/openSUSE_Tumbleweed dvd
$ sudo zypper ar -f http://ftp.gwdg.de/pub/linux/misc/packman/suse/openSUSE_Tumbleweed/ packman
$ sudo zypper ref
$ sudo zypper in mpv
And it worked out, I was able to play my videos without issues.
Installing nVidia
I am still contemplating whether I want to use this setup. I went ahead and disabled the Nouveau driver. First by putting on the module blacklist:
<> cat /etc/modprobe.d/nvidia-installer-disable-nouveau.conf
# generated by nvidia-installer
blacklist nouveau
options nouveau modeset=0
And then adding the option nouveau.blacklist=1 in the GRUB line as well:
<> grep nouveau /etc/default/grub
GRUB_CMDLINE_LINUX_DEFAULT="resume=/dev/system/swap splash=verbose nouveau.blacklist=1 audit=0 ipv6.disable=1 showopts"
Then I rebuilt initrd and the GRUB menu:
$ sudo mkinitrd
$ sudo grub2-mkconfig -o /boot/grub2/grub.cfg
Then after a reboot the installer worked:
$ sudo ./NVIDIA-Linux-x86_64-340.98.run
I noticed that I ran into the same blank screen issues after I installed the nvidia module, so I did same thing as I did in Leap:
<> cat /etc/grub.d/02_mbp
echo "setpci -s "00:01.0" 3e.b=8"
echo "setpci -s "01:00.0" 04.b=7"
And made it executable:
$ sudo chmod +x /etc/grub.d/02_mbp
Then rebuilt the GRUB menu:
$ sudo grub2-mkconfig -o /boot/grub2/grub.cfg
After that Xorg started with the nVidia driver.
I ran into a weird issue, where the GPU would just die at times and I would see the following in the logs (dmesg):
Oct 08 10:37:23 sus kernel: NVRM: GPU at 0000:01:00.0 has fallen off the bus.
Oct 08 10:37:23 sus kernel: NVRM: GPU at 0000:01:00.0 has fallen off the bus.
I ran into this forum and I tried setting the PowerMizer Option as described:
$ tail -6 /etc/X11/xorg.conf.d/50-device.conf
Section "Device"
    Identifier     "Device0"
    Driver         "nvidia"
    VendorName     "NVIDIA Corporation"
    Option "RegistryDwords" "PowerMizerEnable=0x1; PerfLevelSrc=0x3333; PowerMizerDefault=0x2; PowerMizerDefaultAC=0x2"
EndSection
And after a reboot it seems to be okay. If I run into more issues, I might revert back to nouveau since I don’t really do anything Video intensive.
Bluetooth Config
I have a Bluetooth keyboard that I use and since this laptop has bluetooth I decided to set it up. First confirm that the bluetooth device is available:
<> lsusb | grep -i blue
Bus 001 Device 008: ID 05ac:8218 Apple, Inc. Bluetooth Host Controller
Bus 001 Device 003: ID 0a5c:4500 Broadcom Corp. BCM2046B1 USB 2.0 Hub (part of BCM2046 Bluetooth)
<> rfkill list
0: hci0: Bluetooth
    Soft blocked: no
    Hard blocked: no
Then install the necessary package and start up the service:
$ sudo zypper in bluez
$ sudo systemctl enable bluetooth
$ sudo systemctl start bluetooth.service
By default the device is down, bring it up
<> sudo hciconfig hci0 up
<> hciconfig
hci0:   Type: Primary  Bus: USB
    BD Address: 60:33:4B:12:A1:57  ACL MTU: 1021:8  SCO MTU: 64:1
    UP RUNNING PSCAN
    RX bytes:192931 acl:10554 sco:0 events:170 errors:0
    TX bytes:3467 acl:40 sco:0 commands:78 errors:0
Now we can use bluetoothctl to pair the keyboard (put the keyboard into pairing mode) and then start the pairing process:
<> bluetoothctl
[NEW] Controller 00:10:20:30:40:50 pi [default]
[bluetooth]# agent KeyboardOnly
Agent registered
[bluetooth]# default-agent
Default agent request successful
[bluetooth]# scan on
Discovery started
Discovery started
[CHG] Controller 00:10:20:30:40:50 Discovering: yes
[NEW] Device 7C:ED:8D:68:E1:7D Microsoft Bluetooth Mobile Keyboard 6000
[bluetooth]# pair 7C:ED:8D:68:E1:7D
Attempting to pair with 7C:ED:8D:68:E1:7D
[CHG] Device 7C:ED:8D:68:E1:7D Connected: yes
[CHG] Device 7C:ED:8D:68:E1:7D Connected: no
[CHG] Device 7C:ED:8D:68:E1:7D Connected: yes
Request PIN code
[agent] Enter PIN code: 562763
[CHG] Device 7C:ED:8D:68:E1:7D Paired: yes
Pairing successful
After the pair is complete you can confirm the device is there and also trust the device:
[bluetooth]# devices
Device 7C:ED:8D:68:E1:7D Microsoft Bluetooth Mobile Keyboard 6000
Device BC:30:7D:14:13:D8 Panasonic Viera
[bluetooth]# info 7C:ED:8D:68:E1:7D
Device 7C:ED:8D:68:E1:7D
    Name: Microsoft Bluetooth Mobile Keyboard 6000
    Alias: Microsoft Bluetooth Mobile Keyboard 6000
    Class: 0x002540
    Icon: input-keyboard
    Paired: yes
    Trusted: no
    Blocked: no
    Connected: yes
    LegacyPairing: yes
    UUID: Service Discovery Serve.. (00001000-0000-1000-8000-00805f9b34fb)
    UUID: Human Interface Device... (00001124-0000-1000-8000-00805f9b34fb)
    UUID: PnP Information           (00001200-0000-1000-8000-00805f9b34fb)
    Modalias: usb:v045Ep0762d0013
[bluetooth]# trust 7C:ED:8D:68:E1:7D
[CHG] Device 7C:ED:8D:68:E1:7D Trusted: yes
Changing 7C:ED:8D:68:E1:7D trust succeeded
[CHG] Device 7C:ED:8D:68:E1:7D Connected: yes
If you want the device to connect on boot we have to set the laptop’s bluetooth device to be up as soon as the device is available. We can use udev for that, I ended up creating this rule to bring it up on boot:
<> cat /etc/udev/rules.d/90-bluetooth.rules
ACTION=="add", KERNEL=="hci0", TEST=="/usr/bin/hciconfig", RUN+="/usr/bin/hciconfig hci0 up"
Then I rebooted the laptop and at the lightdm screen I typed a couple of keys and after about two times the keyboard started to work.
Lm_sensors Config
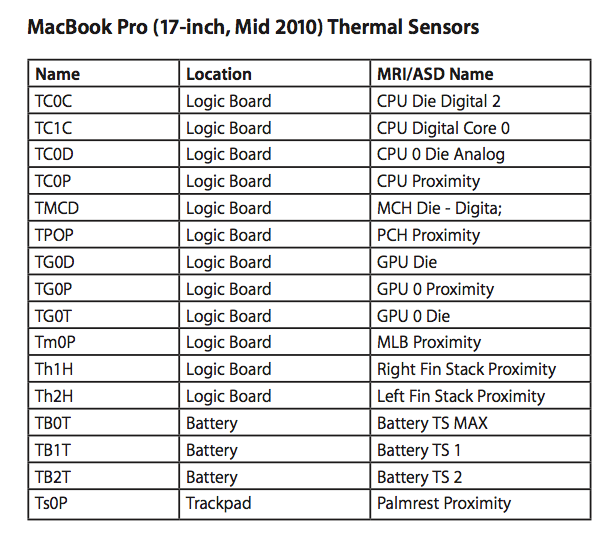
Macs usually have a pretty complicated temperature sensor configurations (which can be good and bad). Check out my previous post on that. For this laptop I ran into the Apple Technician Guide: MacBook Pro (17-inch, Mid 2010) and that had a nice description of all the sensors:
and also a nice diagram of where they are located:
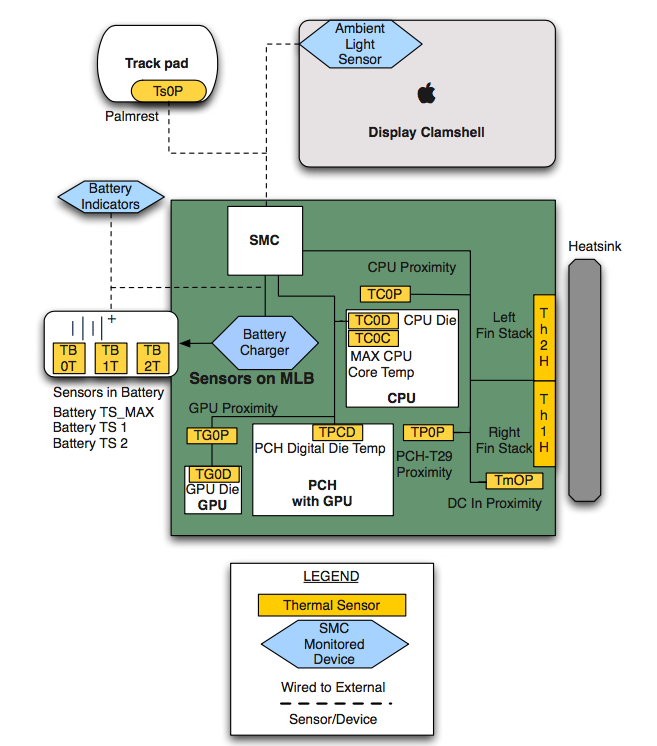
After looking through the guide, I ended up creating the following sensors config:
<> cat /etc/sensors.d/mbp.conf
chip "applesmc-*"
	label temp1 "Bottom_Enclosure Temp"
	label temp2 "Battery_Point_1 Temp"
	label temp3 "Battery_Point_2 Temp"
	label temp4 "CPU_CORE_0 Temp"
	label temp5 "CPU_Package-Diode Temp"
	label temp6 "CPU_Proximity Temp"
	label temp7 "CPU_CORE_1 Temp"
	label temp8 "GPU_Die Temp"
	label temp9 "GPU_Proximity Temp"
	label temp10 "GPU_Discrete_Thermal_Diode Temp"
	label temp11 "Memory_Control_Hub Temp"
	label temp12 "PCH_Proximity Temp"
	label temp13 "PCH_Die Temp"
	label temp14 "Right_Fin_Stack_Proximity Temp"
	label temp15 "Left_Fin_Stack_Proximity Temp"
	label temp16 "Mainboard_Proximity Temp"
	label temp17 "Palmrest_Proximity Temp"
	label temp18 "Memory_Proximity Temp"

chip "coretemp-*"
	label temp2 "CPU_Core0 Temp"
	label temp4 "CPU_Core1 Temp"

chip "BAT0-virtual-*"
	label temp1 "Battery Temp"
And that produced the following output:
<> sensors
BAT0-virtual-0
Adapter: Virtual device
Battery Temp:  +38.3°C

applesmc-isa-0300
Adapter: ISA adapter
Left side  :                     2306 RPM  (min = 2000 RPM, max = 6000 RPM)
Right side :                     2306 RPM  (min = 2000 RPM, max = 6000 RPM)
Bottom_Enclosure Temp:            +38.0°C
Battery_Point_1 Temp:             +38.0°C
Battery_Point_2 Temp:             +35.0°C
CPU_CORE_0 Temp:                  +58.5°C
CPU_Package-Diode Temp:           +62.5°C
CPU_Proximity Temp:               +60.2°C
CPU_CORE_1 Temp:                  +61.0°C
GPU_Die Temp:                     +61.5°C
GPU_Proximity Temp:               +57.8°C
GPU_Discrete_Thermal_Diode Temp:  +62.0°C
Memory_Control_Hub Temp:          +61.0°C
PCH_Proximity Temp:               +64.8°C
PCH_Die Temp:                     +76.0°C
Right_Fin_Stack_Proximity Temp:   +53.0°C
Left_Fin_Stack_Proximity Temp:    +52.2°C
Mainboard_Proximity Temp:         +57.2°C
Palmrest_Proximity Temp:          +35.0°C
Memory_Proximity Temp:            +47.0°C

coretemp-isa-0000
Adapter: ISA adapter
CPU_Core0 Temp:  +63.0°C  (high = +95.0°C, crit = +105.0°C)
CPU_Core1 Temp:  +60.0°C  (high = +95.0°C, crit = +105.0°C)
Not to shabby.
Using the Laptop with the Lid Closed
I ended up wanting to close the lid and just use a single monitor with the laptop. I actually ran into some issues so I decided to jot them down. First disable the suspend on closing of the lid at the Window Manager Level. For example in xfce4, you can do the following
### query the setting
$ xfconf-query -c xfce4-power-manager -p /xfce4-power-manager/lid-action-on-ac
### then set it 0 to do nothing
$ xfconf-query -c xfce4-power-manager -p /xfce4-power-manager/lid-action-on-ac -t int -s 0
The options are as follows:
0=nothing
1=suspend
2=hibernate
3=lock screen
Then let’s configure systemd-logind to ignore the closed lid as well, set the following option:
<> grep Lid /etc/systemd/logind.conf
HandleLidSwitch=ignore
And restart the service:
$ sudo systemctl restart systemd-logind
I ran into an issue with a reboot, and the issue is descibed here and the fix is there as well. Xorg would fail to start and in the /var/log/Xorg.0.log file I saw the following:
[   159.042] (EE) NVIDIA(0): Failed to initialize the NVIDIA GPU at PCI:1:0:0.  Please
[   159.042] (EE) NVIDIA(0):     check your system's kernel log for additional error
and dmesg showed the following:
[  158.976521] NVRM: RmInitAdapter failed! (0x25:0x28:1148)
[  158.976530] NVRM: rm_init_adapter(0) failed
I added the following kernel option to fix it:
<> grep rcu /etc/default/grub
GRUB_CMDLINE_LINUX_DEFAULT="resume=/dev/system/swap splash=verbose ipv6.disable=1 showopts rcutree.rcu_idle_gp_delay=1"
To apply that setting, I re-generated a new GRUB menu:
$ sudo grub2-mkconfig -o /boot/grub2/grub.cfg
Then a reboot worked.
Random kworker and Power Consumption issue
I installed zabbix on the laptop, since it runs at home all the time and I kept getting a lot of “Too many processes running” and “High Load Avg” alerts from the laptop.
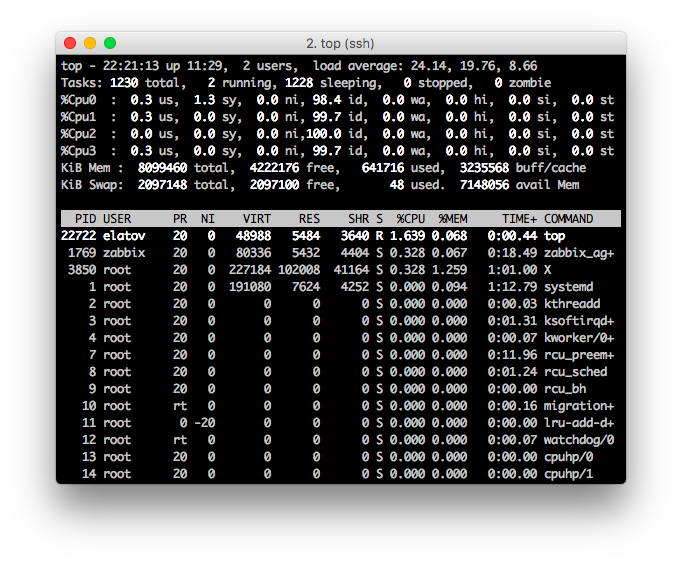
I realized I had a lot of kworker threads:
<> ps -ef | grep kwork | wc -l
1053
I ran into this page High CPU usage due to kworker, and I did see one of the gpes be high:
<> grep . -r /sys/firmware/acpi/interrupts
/sys/firmware/acpi/interrupts/sci:     614
/sys/firmware/acpi/interrupts/error:       0
/sys/firmware/acpi/interrupts/gpe00:       0   invalid
/sys/firmware/acpi/interrupts/gpe01:       0   invalid
..
/sys/firmware/acpi/interrupts/gpe16:       1   enabled
/sys/firmware/acpi/interrupts/gpe0A:       0   invalid
/sys/firmware/acpi/interrupts/gpe17:     612   disabled
..
/sys/firmware/acpi/interrupts/gpe_all:     614
/sys/firmware/acpi/interrupts/ff_gbl_lock:       0   enabled
/sys/firmware/acpi/interrupts/ff_pwr_btn:       0   enabled
/sys/firmware/acpi/interrupts/ff_slp_btn:       0   invalid
After trying the workaround, it didn’t help:
$ sudo crontab -l
@reboot echo "disable" > /sys/firmware/acpi/interrupts/gpe17
$ reboot
Then I went on a rampage and tried a bunch of grub/kernel options:
-
Arch Macbook Stability Problems
libata.force=1:noncq
- MacBookPro6-2/Precise
-
Confirmed the Controller using AHCI Mode and not IDE Mode
lspci | grep -i ahci00:1f.2 SATA controller: Intel Corporation 5 Series/3400 Series Chipset 4 port SATA AHCI Controller (rev 06)
-
-
High load averages and interrupts with 2.6.36/2.6.37
nohz=off highres=off
-
AC to battery causes extreme load, many kworker threads in D state - 2008 Macbook
acpi=off
There were a couple more (I didn’t keep track), but none of those helped. Then by dumb luck I was running powertop and I saw it action:

After that I found this kernel bug: SLAB: extreme load averages and over 2000 kworker threads. Since tumbleweed was running the latest kernel at the time:
<> uname -r
4.7.5-1-default
I ran into an issue with SLAB, I did confirm that I did have slab enabled:
<> zgrep -iE 'slab|slub' /proc/config.gz
CONFIG_SLAB=y
# CONFIG_SLUB is not set
CONFIG_SLAB_FREELIST_RANDOM=y
CONFIG_SLABINFO=y
# CONFIG_DEBUG_SLAB is not set
And that’s what I get for using Tumbleweed :) I will keep an eye on it and confirm whether kernel 4.8 or later fixes the issue.
Snapper
Since I was using openSUSE and btrfs I could take advantage of snapper. zypper integrates nicely with snapper and it basically takes a filesystem level snapshot before and after a zypper install/update and then you can check out the difference between the snapshots and of course revert to an older snapshot if you desire. Here are the snapshots that I saw after doing a couple of zypper installs and updates:
<> sudo snapper list
Type   | #   | Pre # | Date                            | User | Cleanup | Description           | Userdata
-------+-----+-------+---------------------------------+------+---------+-----------------------+--------------
single | 0   |       |                                 | root |         | current               |
single | 1   |       | Sun 02 Oct 2016 05:33:04 PM MDT | root |         | first root filesystem |
...
pre    | 121 |       | Sat 08 Oct 2016 10:27:47 AM MDT | root | number  | zypp(zypper)          | important=no
post   | 122 | 121   | Sat 08 Oct 2016 10:27:49 AM MDT | root | number  |                       | important=no
pre    | 123 |       | Sat 08 Oct 2016 12:00:25 PM MDT | root | number  | zypp(zypper)          | important=no
post   | 124 | 123   | Sat 08 Oct 2016 12:00:27 PM MDT | root | number  |                       | important=no
Now if I want to I checkout the difference between two snapshots in the following way:
<> sudo snapper status 122..123
c..... /etc/X11/xorg.conf.d/50-device.conf
c..... /root/.viminfo
c..... /var/lib/alsa/asound.state
c.ug.. /var/lib/mlocate/mlocate.db
c..... /var/lib/NetworkManager/dhclient-fd08a5d2-d8fc-38f6-b83e-8617201b98bf-enp2s0.lease
c..... /var/lib/NetworkManager/timestamps
c..... /var/lib/plymouth/boot-duration
c..... /var/lib/smartmontools/attrlog.Hitachi_HTS545032B9SA02-100619PBT30016HTU9YY.ata.csv
c..... /var/lib/smartmontools/smartd.Hitachi_HTS545032B9SA02-100619PBT30016HTU9YY.ata.state
c..... /var/lib/smartmontools/smartd.Hitachi_HTS545032B9SA02-100619PBT30016HTU9YY.ata.state~
c..... /var/lib/sudo/ts/elatov
c..... /var/lib/systemd/random-seed
You notice that there were a bunch of files created and that’s when I was messing with the nVidia config. So now let’s check out the difference between the top file:
<> sudo snapper diff 122..123 /etc/X11/xorg.conf.d/50-device.conf
--- /.snapshots/122/snapshot/etc/X11/xorg.conf.d/50-device.conf	2011-07-01 04:49:43.000000000 -0600
+++ /.snapshots/123/snapshot/etc/X11/xorg.conf.d/50-device.conf	2016-10-08 10:55:20.915244302 -0600
@@ -13,3 +13,10 @@
 #  #Option "monitor-DVI-0" "Default Monitor"
 #
 #EndSection
+
+Section "Device"
+    Identifier     "Device0"
+    Driver         "nvidia"
+    VendorName     "NVIDIA Corporation"
+    Option "RegistryDwords" "PowerMizerEnable=0x1; PerfLevelSrc=0x3333; PowerMizerDefault=0x2; PowerMizerDefaultAC=0x2"
+EndSection
It’s pretty cool. You can then undo changes if you want. The Using Snapper to Undo Changes has a good description of the process and it mentions that it’s important to know the difference between rollback and undoing changes. From the page:
IMPORTANT: Undoing Changes vs. Rollback
When working with snapshots to restore data, it is important to know that there are two fundamentally different scenarios Snapper can handle:
Undoing Changes
When undoing changes as described in the following, two snapshots are being compared and the changes between these two snapshots are made undone. Using this method also allows to explicitly select the files that should be restored.
Rollback
When doing rollbacks as described in Section 3.3, System Rollback by Booting from Snapshots, the system is reset to the state at which the snapshot was taken.
When undoing changes, it is also possible to compare a snapshot against the current system. When restoring all files from such a comparison, this will have the same result as doing a rollback.
So if I wanted to revert my file change I could just run the following:
<> sudo snapper -v undochange 122..123 /etc/X11/xorg.conf.d/50-device.conf
create:0 modify:1 delete:0
modifying /etc/X11/xorg.conf.d/50-device.conf
Zypper
SUSE is an RPM based distro but it uses it’s own package manager called zypper. There are a couple of things I like about zypper. I like how after an update you can run zypper ps and it will tell you what running programs are using the old files:
<> sudo zypper up
The following 2 packages are going to be upgraded:
  moc mpv

2 packages to upgrade.
Overall download size: 1.4 MiB. Already cached: 0 B. After the operation,
additional 48.0 B will be used.
Continue? [y/n/? shows all options] (y): y
Retrieving package moc-2.5.0-5.57.x86_64   (1/2), 249.1 KiB (672.4 KiB unpacked)
Retrieving: moc-2.5.0-5.57.x86_64.rpm ......................[done (100.0 KiB/s)]
Retrieving package mpv-0.20.0-61.21.x86_64 (2/2),   1.1 MiB (  2.4 MiB unpacked)
Retrieving: mpv-0.20.0-61.21.x86_64.rpm ....................[done (270.8 KiB/s)]
Checking for file conflicts: .............................................[done]
(1/2) Installing: moc-2.5.0-5.57.x86_64 ..................................[done]
(2/2) Installing: mpv-0.20.0-61.21.x86_64 ................................[done]
There are some running programs that might use files deleted by recent upgrade. You may wish to check and restart some of them. Run 'zypper ps -s' to list these programs.
<> sudo zypper ps
The following running processes use deleted files:

PID   | PPID  | UID  | User   | Command        | Service | Files
------+-------+------+--------+----------------+---------+----------------------
24123 | 23020 | 1000 | elatov | mocp (deleted) |         | /usr/lib64/moc/deco->
      |       |      |        |                |         | /usr/lib64/moc/deco->
      |       |      |        |                |         | /usr/bin/mocp (dele->
      |       |      |        |                |         | /usr/lib64/moc/deco->
I don’t like that the inconsistent search option documentation. For example with yum you can run something like this: yum provides "*/bin/binary_name" and that will show you which package that you don’t have installed will provide that file. It seems that you should be able to use the what-provides option for that (wp):
<> sudo zypper wp "*/bin/convert"
Command 'what-provides' is replaced by 'search --provides --match-exact'.
See 'help search' for all available options.
Loading repository data...
Reading installed packages...
No matching items found.
Eventually I found that within the search (se) option there is a –file-list (-f) flag which can help out
<> sudo zypper se -f "*/bin/convert"
Loading repository data...
Reading installed packages...

S | Name        | Summary                         | Type
--+-------------+---------------------------------+--------
  | ImageMagick | Viewer and Converter for Images | package
With openSUSE you can also use the cnf (command not found) utility but it doesn’t work for libraries:
<> cnf convert

The program 'convert' can be found in the following package:
  * ImageMagick [ path: /usr/bin/convert, repository: zypp (repo-oss) ]

Try installing with:
    sudo zypper install ImageMagick
Another way of searching for files used to be webpin, but it looks like that has become deprecated. Here is how it looked like.

Or you can use the cli, get the RPM from here. Then after installing, you can use it:
<> webpin wavpack.pc
... performing request on http://webpinstant.com/ws/searchservice/Search/Simple/   20 results (15 packages) found for "wavpack.pc" in openSUSE_Leap_422
* wavpack: Free Hybrid Lossless Audio Compression Format
   - 4.60.99.6.2 [suse-oss]
* wavpack-devel: Free Hybrid Lossless Audio Compression Format
   - 4.60.99.6.2 [suse-oss]
The zypper dup (distribution update) vs zypper up (update) usage
I ran into this forum Differnce between zypper up and zypper dup and there doesn’t seem to be clear instructions on which one to use with Tumbleweed. I noticed that the dup option re-installs any packages that the distro is supposed to have for example if I remove the yast* packages, a zypper dup will update, downgrade, and reinstall any packages that it needs (it basically matches a list of packages that that distro version needs to have). A zypper up just updates the packages that you have installed. From a reddit page here is the best advice I saw:
The “best” update method is currently unknown. Every developer/maillist/forum has been saying “zypper dup” is the supported way. The official documentation for TW does not mention how to go about updating from snapshot to snapshot.
In another thread here, /u/rbrownsuse (chairman of openSUSE) said that it’s better to do “zypper up” most of the time with only “zypper dup” occassionally.
Listing packages (pa) from specific repos seems a little strange (it would always list the @System repo), so the best way I figured out how to list packages that are installed from a specific repo was like this:
<> sudo zypper pa -ir packman | grep -v '@System'
Loading repository data...
Reading installed packages...
S  | Repository | Name                                  | Version                          | Arch
---+------------+---------------------------------------+----------------------------------+-------
i  | packman    | dkms                                  | 2.2.0.3-16.4                     | noarch
i  | packman    | exfat-utils                           | 1.2.4-1.4                        | x86_64
v  | packman    | exfat-utils                           | 1.2.4-1.4                        | i586
i  | packman    | fdupes                                | 1.51-3.18                        | x86_64
v  | packman    | fdupes                                | 1.51-3.18                        | i586
i  | packman    | fuse-exfat                            | 1.2.4-1.4                        | x86_64
v  | packman    | fuse-exfat                            | 1.2.4-1.4                        | i586
i  | packman    | gstreamer-plugins-bad                 | 1.8.3-5.3                        | x86_64
v  | packman    | gstreamer-plugins-bad                 | 1.8.3-5.3                        | i586
Or you can use the search option but then I am not sure what the difference is between search (se) and package (pa):
<> sudo zypper se -ir packman
Loading repository data...
Reading installed packages...

S | Name                         | Summary                                                                   | Type
--+------------------------------+---------------------------------------------------------------------------+--------
i | dkms                         | Dynamic Kernel Module Support Framework                                   | package
i | exfat-utils                  | Utilities for exFAT file system                                           | package
i | fdupes                       | Identifying and deleting, linking or modifying duplicate files            | package
i | fuse-exfat                   | Free exFAT file system implementation                                     | package
i | gstreamer-plugins-bad        | GStreamer Streaming-Media Framework Plug-Ins                              | package
i | k3b                          | A Universal CD and DVD Burning Application                                | package
i | k3b-codecs                   | Full Multimedia Codec Support for k3b                                     | package